How to Manage Voicemail
This guide has two parts. First you set up the greeting your callers hear. Then you learn where to find, play and follow up on the voicemails they leave. Your voicemails will look different from the sample data in the screenshots.
6 min read · 7 steps
How voicemail works
- Voicemail is a step in your call flow. When a call reaches it, the caller hears your greeting and can leave a message after the beep.
- Each voicemail is saved as a recording and listed on the Voicemails page.
- A voicemail counts as a call whose outcome is “Voicemail”, so it also shows in your Calls list with the status Voicemail.
- Voicemail can only be the last step of a flow. Nothing can be added after it.
-
Step 1: Part 1: Add or open the Voicemail step in your flow
In the left menu, click Flows and open your flow (Manage Flow). In the flow builder, add the Voicemail widget from the Widget Library (“Record voice message”), or click the Voicemail step that is already in your flow.
- The Voicemail step sits at the end of the flow, followed by End of flow.
- The Widget Settings panel opens on the right (“Configure your Voicemail widget”).
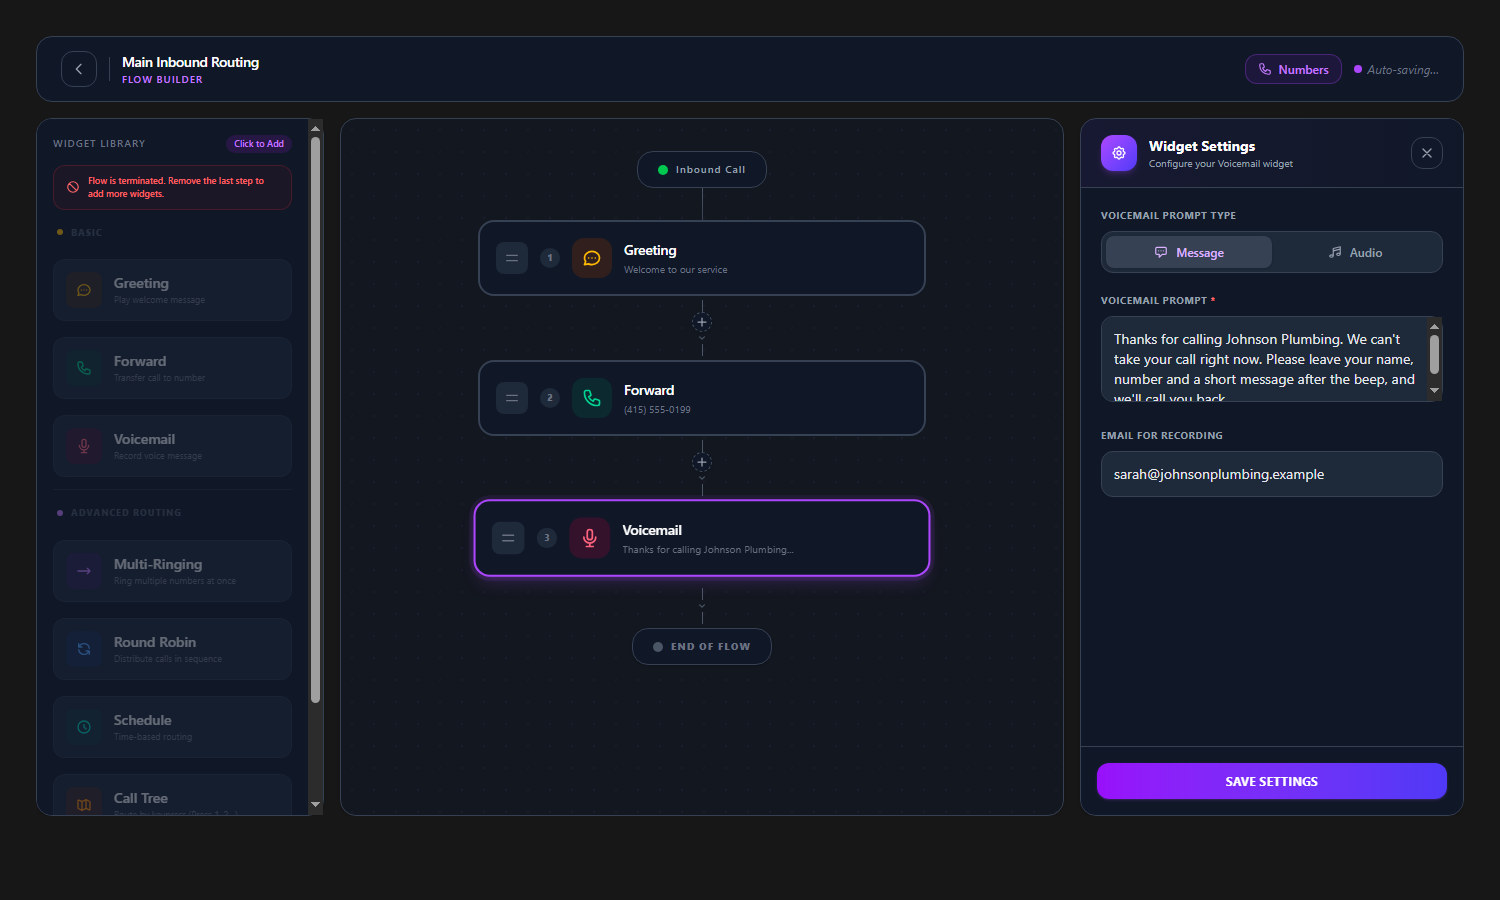
The Voicemail step and its Widget Settings, with the Message option selected -
Step 2: Choose how the greeting is played
Voicemail Prompt Type has two options: Message and Audio. To have the system read a message to your callers, choose Message.
- Type the text in Voicemail Prompt (required). The system reads it to callers.
- For example: “Thanks for calling Johnson Plumbing. We can’t take your call right now. Please leave your name, number and a short message after the beep, and we’ll call you back.”
- If you leave it empty, callers hear the default: “Please leave your message after the tone.”
- You can also type an email address under Email for Recording (optional).
- Click Save Settings.
-
Step 3: Or use your own recorded greeting
Click Audio instead of Message. Then click Click to upload audio and choose an MP3, WAV or OGG file (up to 10 MB).
- Voicemail Greeting Audio is required in Audio mode.
- Once it is uploaded, you can play it back in the panel, or remove it with the bin icon and upload another.
- Click Save Settings.
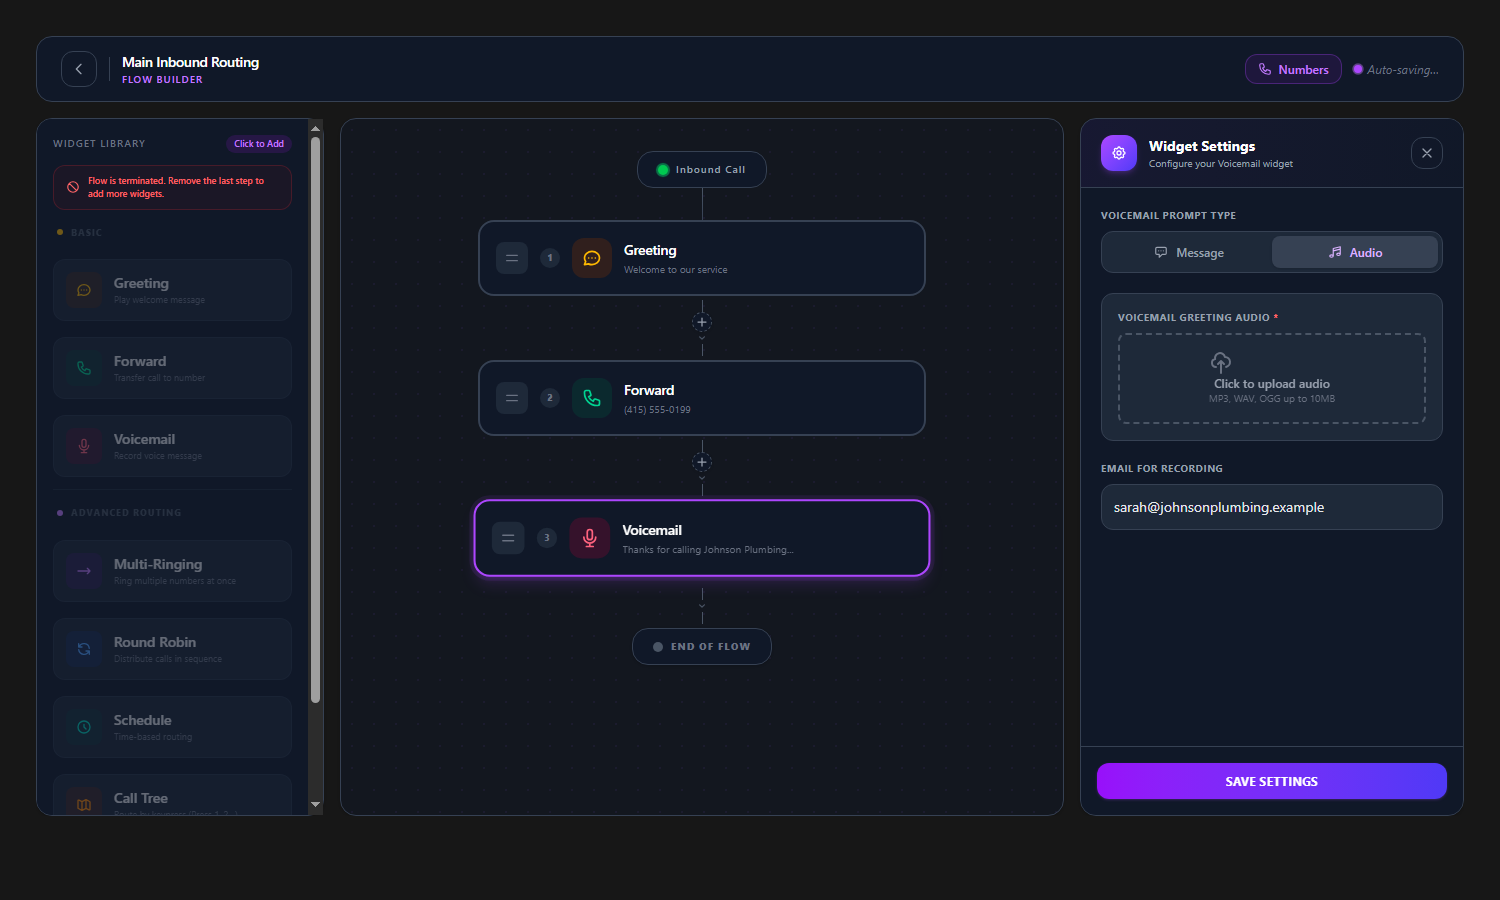
Audio mode: upload your own greeting (MP3, WAV or OGG, up to 10 MB) Tip: Make sure the flow is attached to your phone number. See How to Create a Call Flow and Connect a Number. -
Step 4: Part 2: Open the Voicemails page
In the left menu, under Communications, click Voicemails. The top row has four cards:
- Total Voicemails: all voicemails on your numbers.
- Recent Voicemails: voicemails in the last 7 days (the last 168 hours, not calendar days).
- With Recording: the share of voicemails that have a saved recording.
- Avg Duration: the average length of voicemails that have a recorded duration.
- Below the cards, the table lists every voicemail, newest first. The columns are listed next.
- Number: your CallRing number that was called, with its label.
- From: the caller’s number. If the caller is saved in your Contacts, their name shows under the number.
- Duration: how long the message is.
- Recording: click the green Play button to listen. A dash means no recording was saved.
- Date: the day and time, in your account time zone.
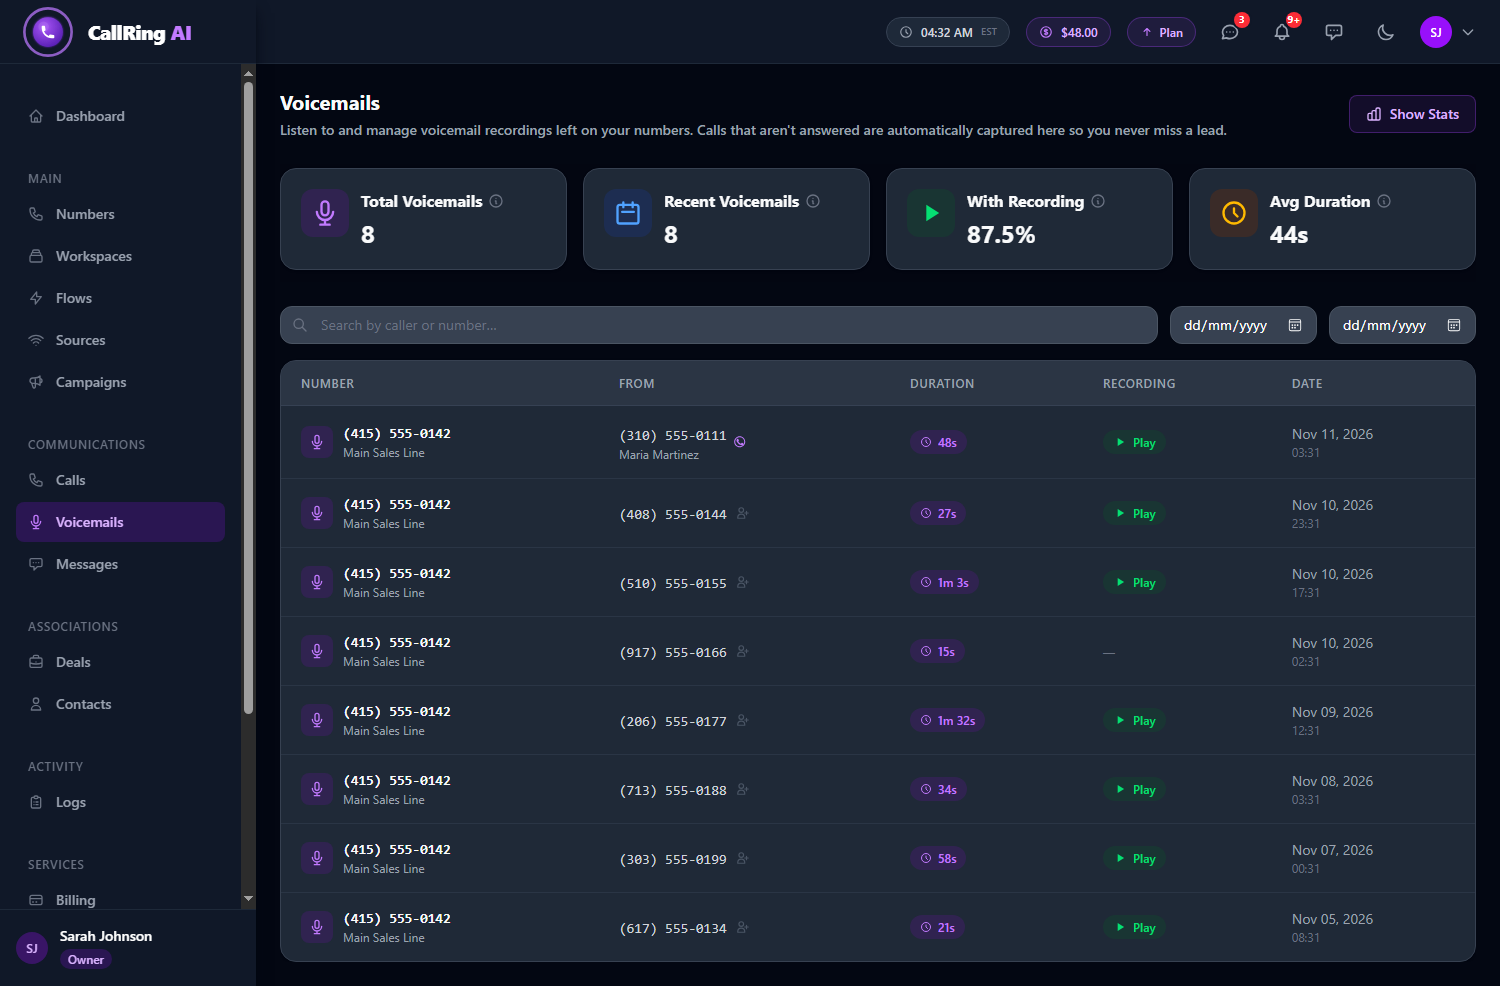
The Voicemails page: four summary cards and your voicemail list Tip: Hover over the small i icon on each card to see how it is calculated. Search and date filters do not change these cards. -
Step 5: Search and filter
Type part of a caller number, a number or a label in the search box (“Search by caller or number…”). The list updates as you type. For example, typing “408” finds the voicemail from (408) 555-0144.
- Use the two date boxes (From and To) to show only a date range.
- A red Clear button appears. Click it to reset the dates.
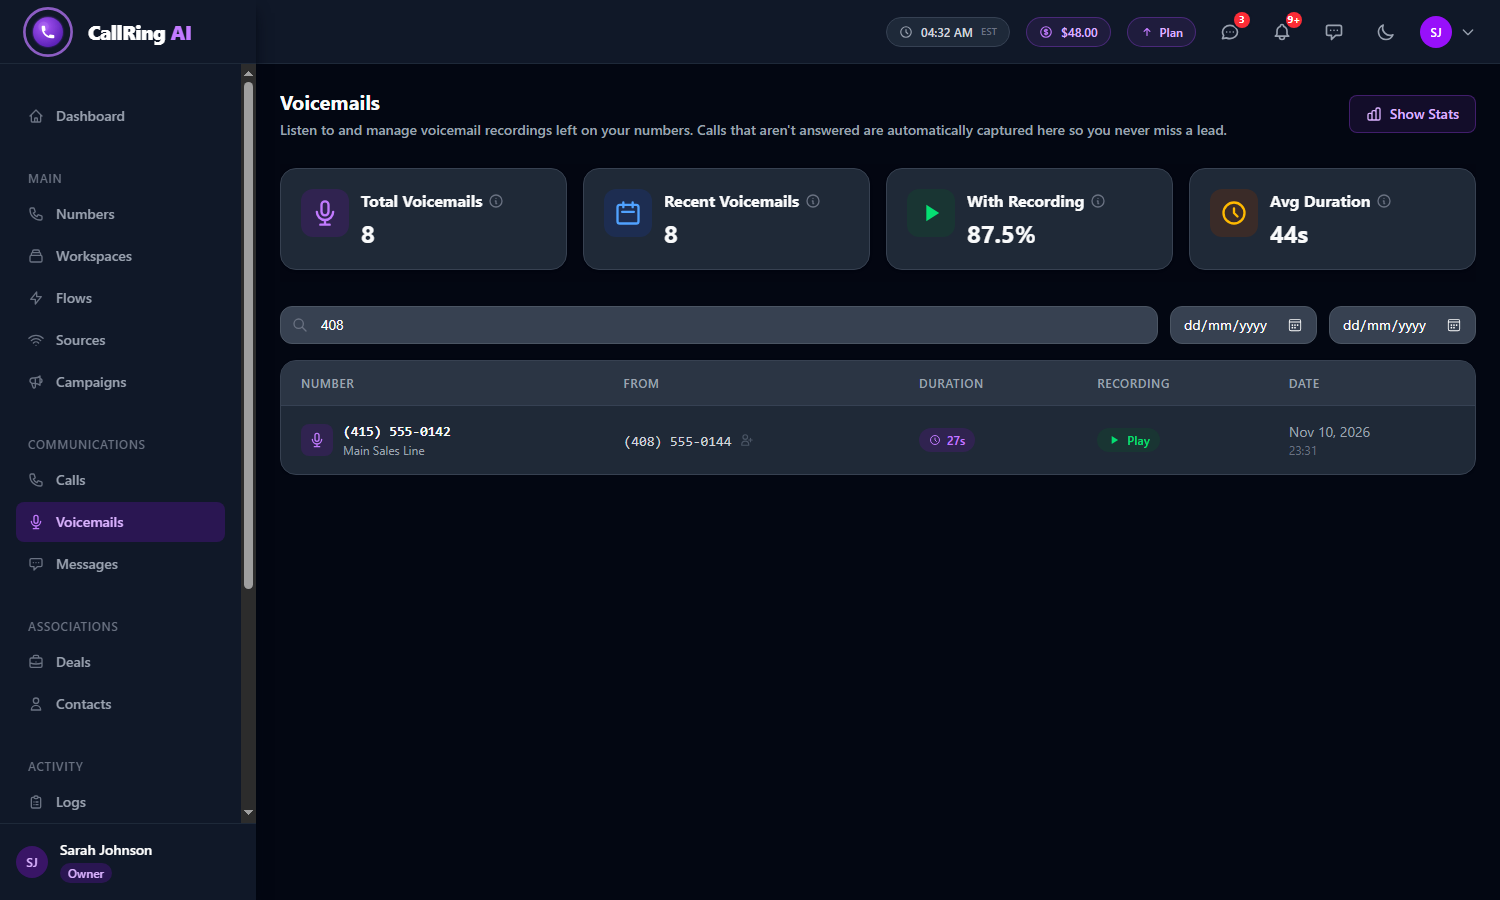
Type part of a number to find a voicemail -
Step 6: Save a caller to your contacts
Click the small “add person” icon next to a caller you do not know yet. The Save to Contacts window opens with the phone number filled in.
- Fill in Name (required) and, if you like, Email, Company and Notes.
- Click Save Contact.
- The caller’s name now shows next to their number on Voicemails and Calls.
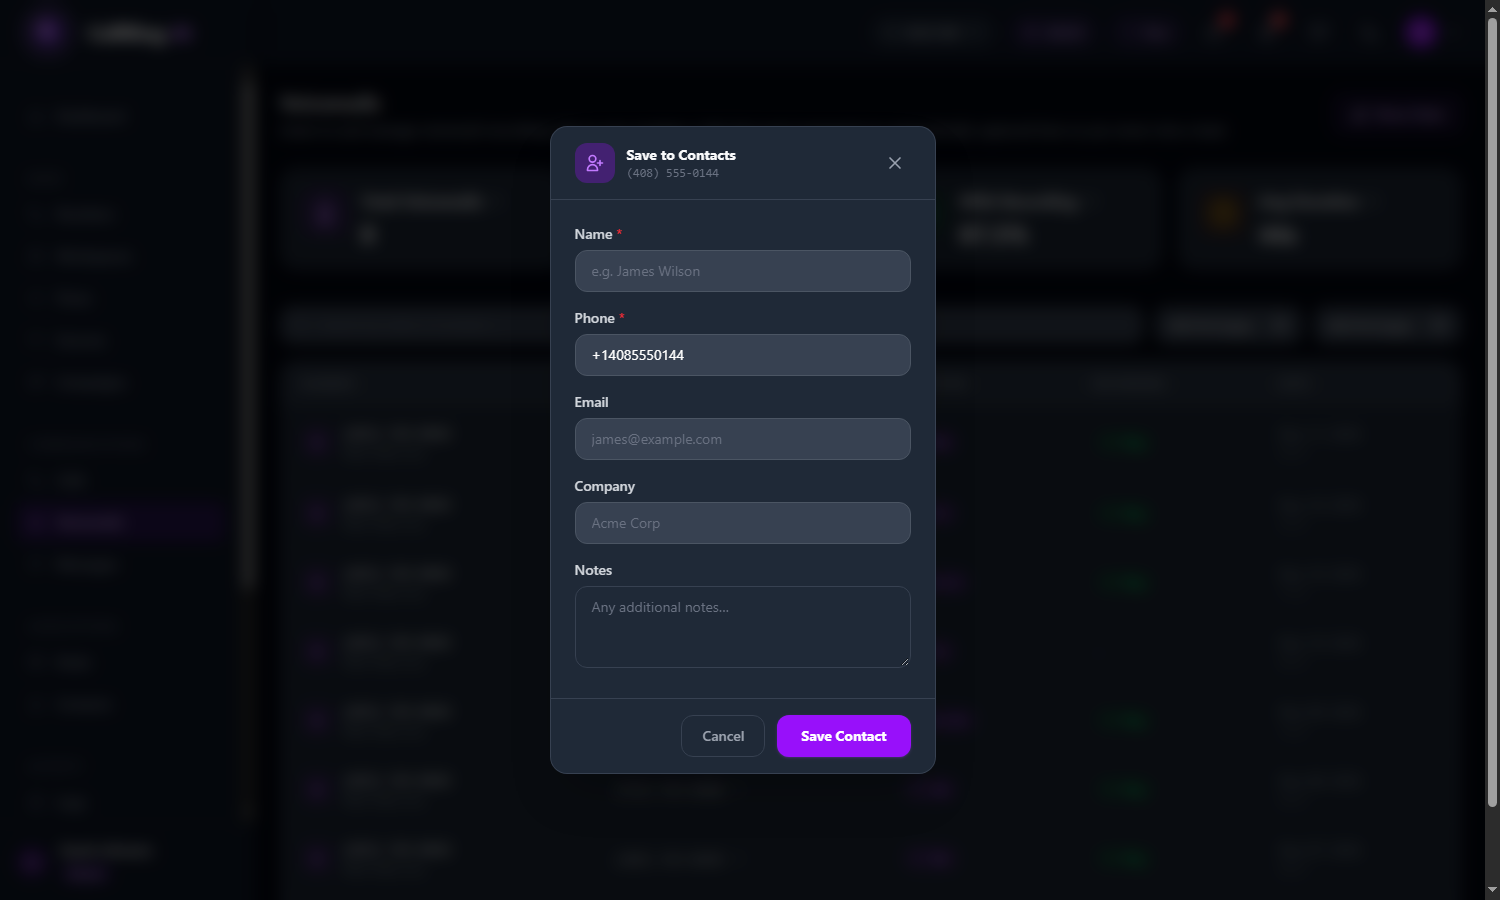
Save to Contacts: add a name so you know who called Note: Only owners can add contacts. Team members see the saved names but cannot add new contacts. -
Step 7: Read your voicemail statistics
On the Voicemails page, click Show Stats. Click Back to return to the list.
- You see This Month, This 7 Days and Today, each compared with the previous period.
- You also see Total, Month-over-Month, Week-over-Week and Avg / Day.
- The Daily Voicemails graph shows voicemails per day. Use Last 7 Days, Last 30 Days, Last 90 Days or Custom to change the range.
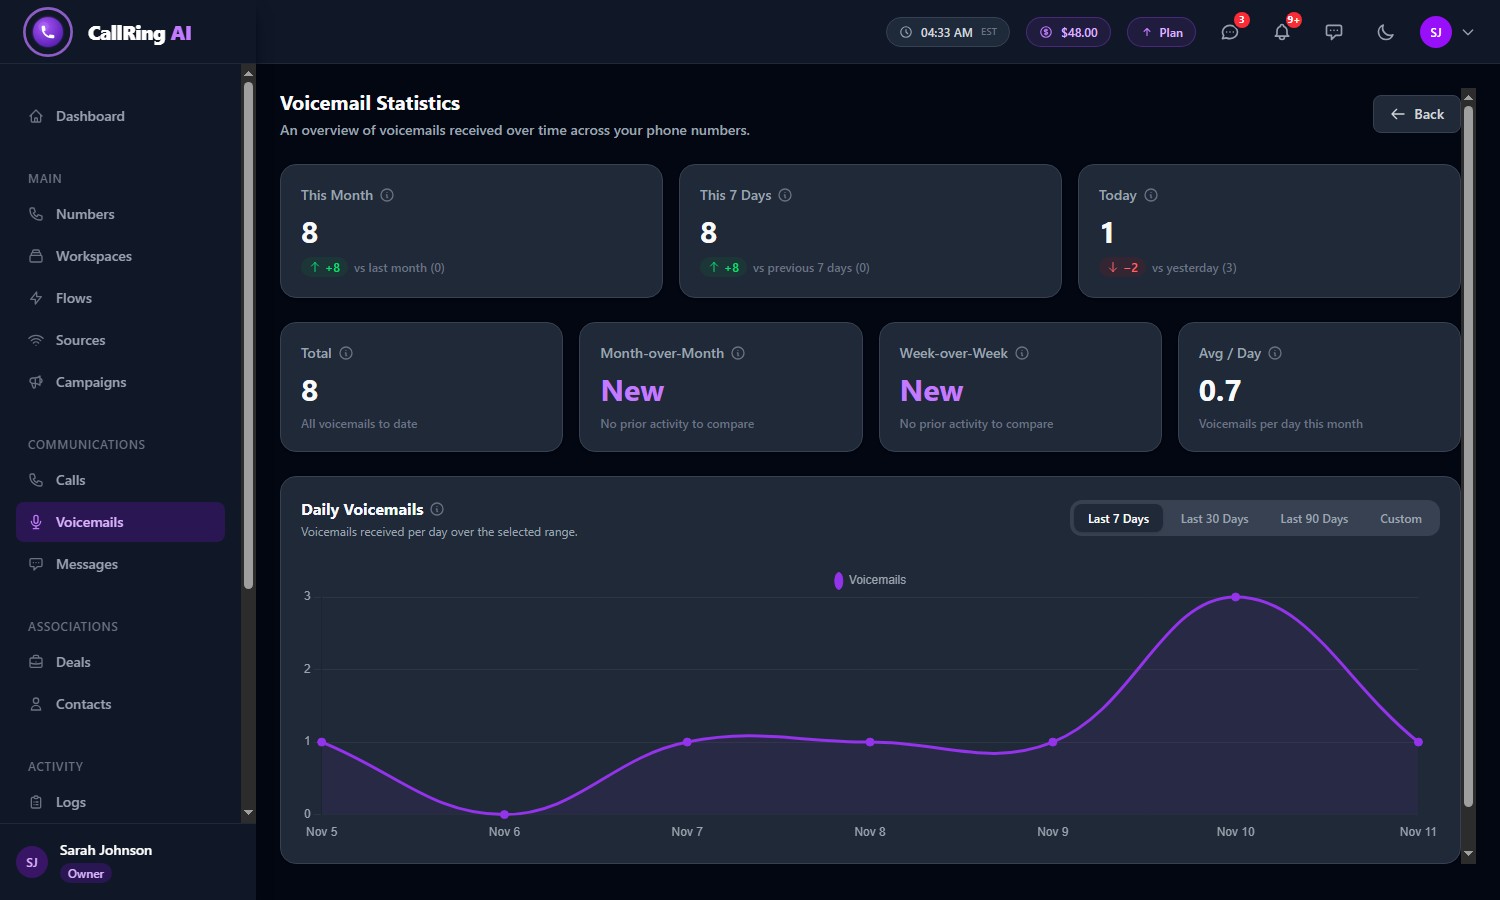
Voicemail Statistics: your totals and a daily graph
Good to know
- Team members only see voicemails on the numbers assigned to them.
- Callers can also reach voicemail from other flow steps. For example, “Send to Voicemail” can be the after-hours action in a Schedule step, or the flow can continue to the Voicemail step when nobody answers a forwarded call.
- Each voicemail is also a call. Open it from the Calls page (eye icon) to see its full detail.
- Voicemail events can also be sent to your connected tools (Slack, webhooks, Google Sheets, Zapier and others) if you have those integrations set up.
Need help? Open a support ticket from your account.