How to Create a Call Flow and Connect Your Number
A call flow is the set of instructions that decides what happens when someone calls your number. For example: play a greeting, ring your mobile, then take a voicemail. The screenshots use sample details, so use your own.
7 min read · 5 steps
Before you start
- A CallRing AI account (see the first guide)
- A phone number. If you do not have one yet, see How to buy a phone number
- The phone number you want calls to ring, for example your mobile
-
Step 1: Open Flows and click Create Flow
In the left menu, click Flows. Then click Create Flow.
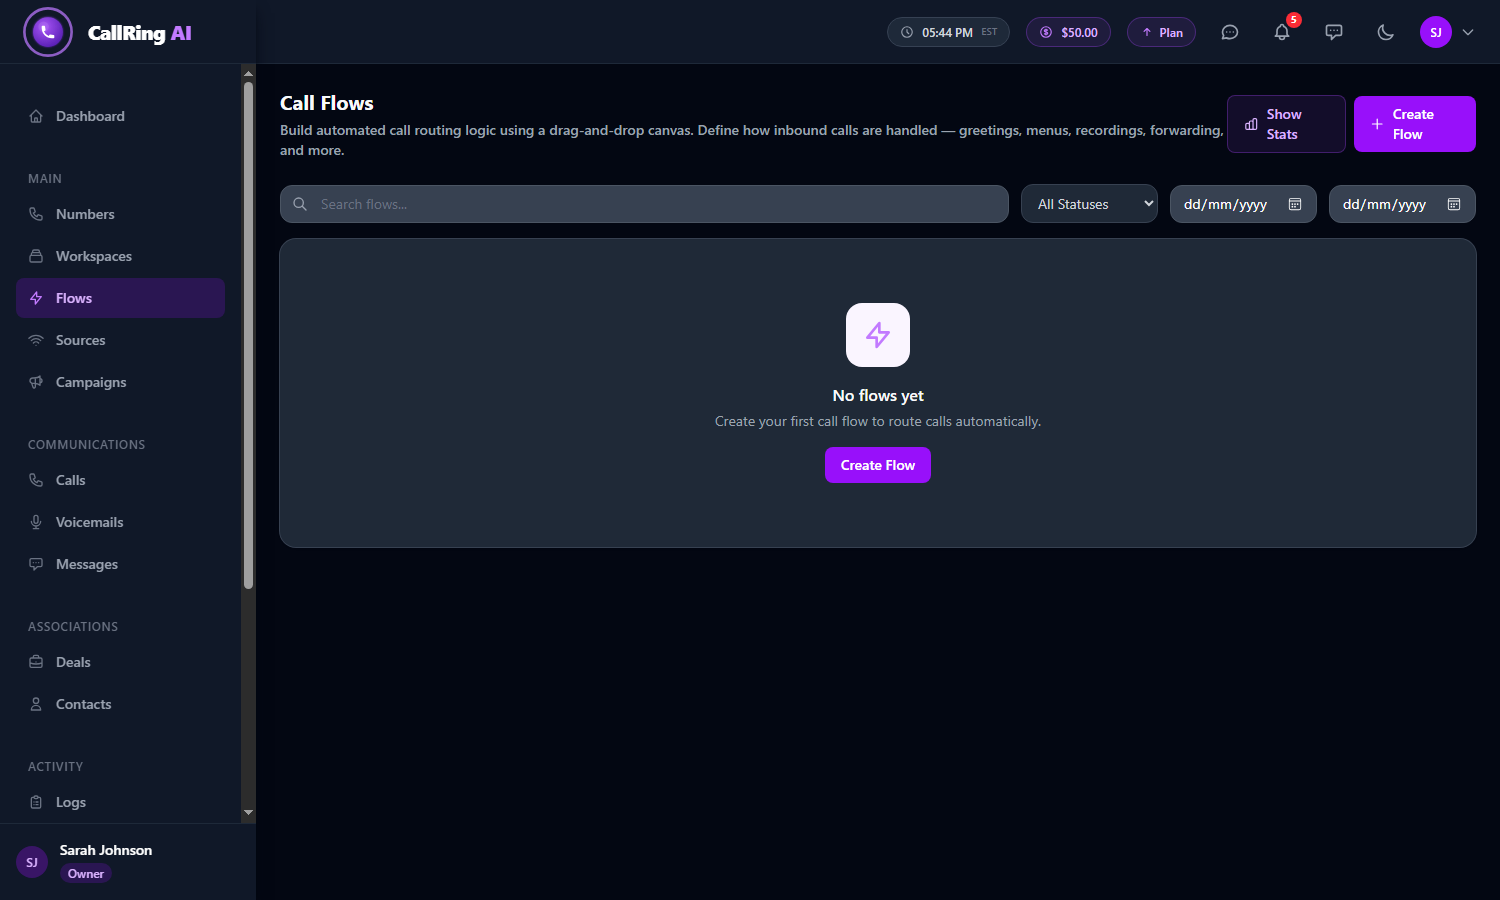
Open Flows and click Create Flow -
Step 2: Fill in the flow details
Under Flow Details, enter a Flow Name. It is required. You can also add a Description. Then click Create Flow when you are done.
- Set Status to Active so the flow answers calls. Draft and Inactive flows are for setting up or pausing.
- Under Call Handling, tick any options you want (see below).
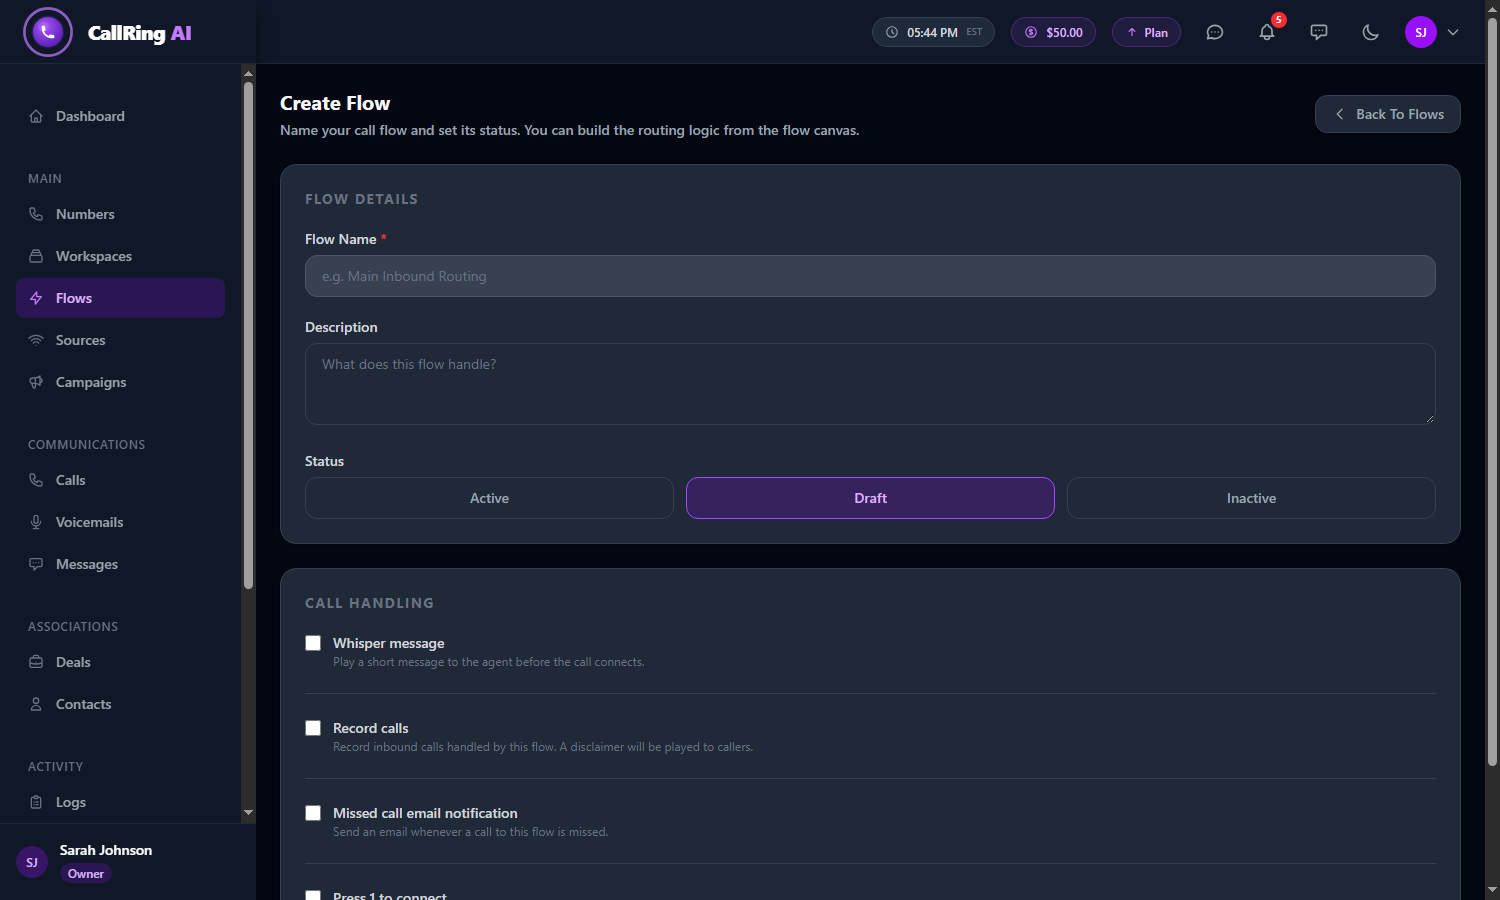
The Create Flow form 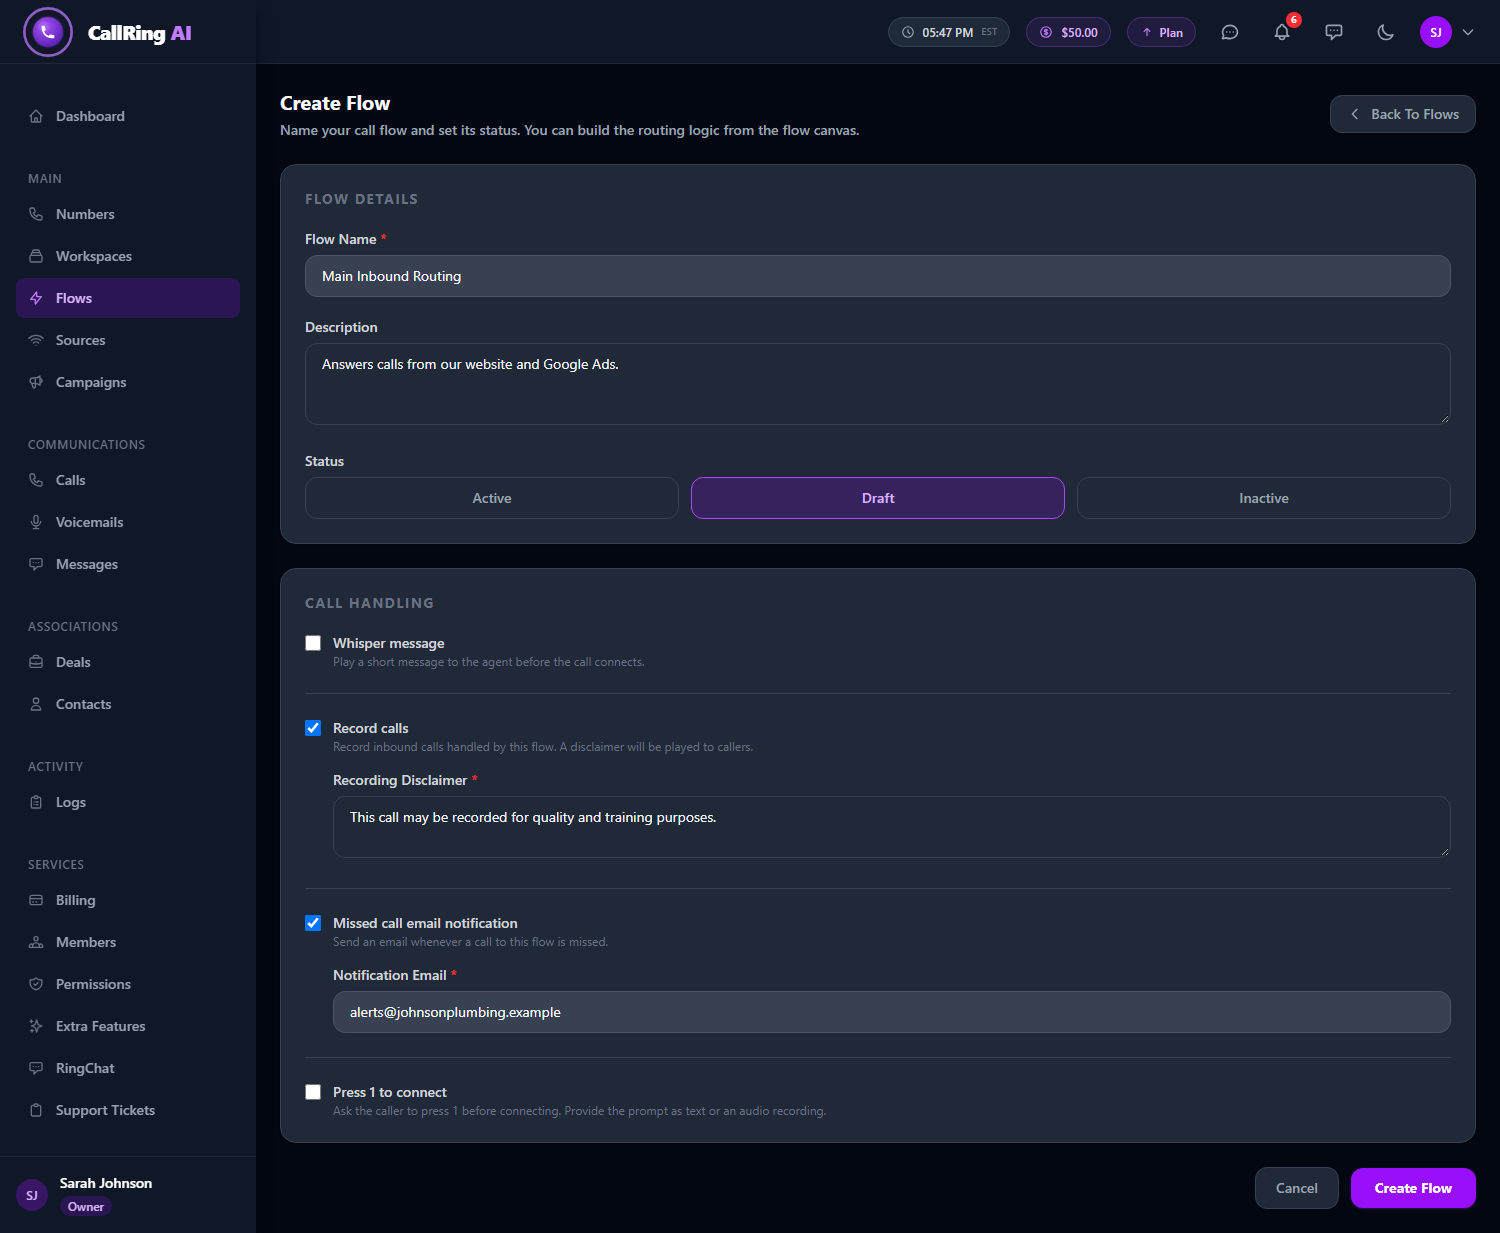
Name your flow, set it to Active and choose call-handling options Note: Call Handling options: Whisper message plays a short message to your team member before the call connects, such as “Incoming call from your website campaign”. Record calls records inbound calls. A Recording Disclaimer is required and is played to callers, such as “This call may be recorded for quality and training purposes”. Missed call email notification emails you whenever a call is missed: enter the Notification Email. Press 1 to connect asks the caller to press 1 before connecting. Give the prompt as typed text or an audio file (mp3, wav, m4a, ogg or aac, up to 10 MB). -
Step 3: Click Manage Flow
On the Call Flows page, find your new flow and click Manage Flow. This opens the Flow Builder.
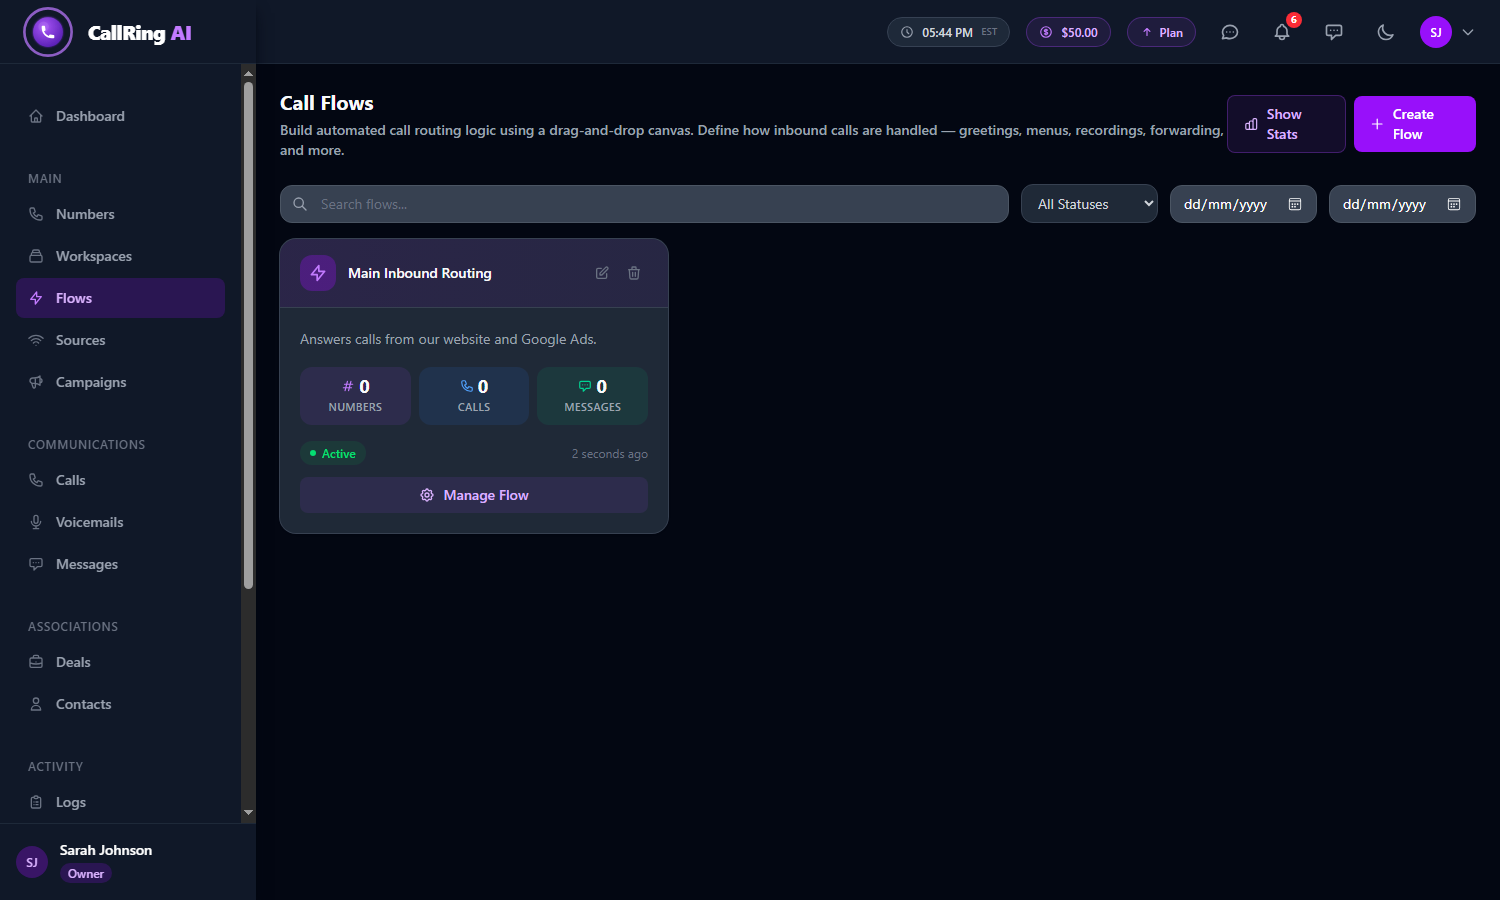
Your flow appears. Click Manage Flow -
Step 4: Build your flow with widgets
The Widget Library on the left lists the building blocks. Click a widget to add it as the next step. Steps run from top to bottom when a call comes in. Fill in the widget’s settings on the right, then click Save Settings before you add the next one.
- A simple example: Greeting, then Forward to your mobile, then Voicemail.
- Phone numbers in widgets must be valid US numbers, for example (415) 555-0199.
- Nothing can be added after a Hang Up or Voicemail widget, because they end the call. To add more, delete the last widget with its delete icon and confirm.
- You can drag steps to change their order.
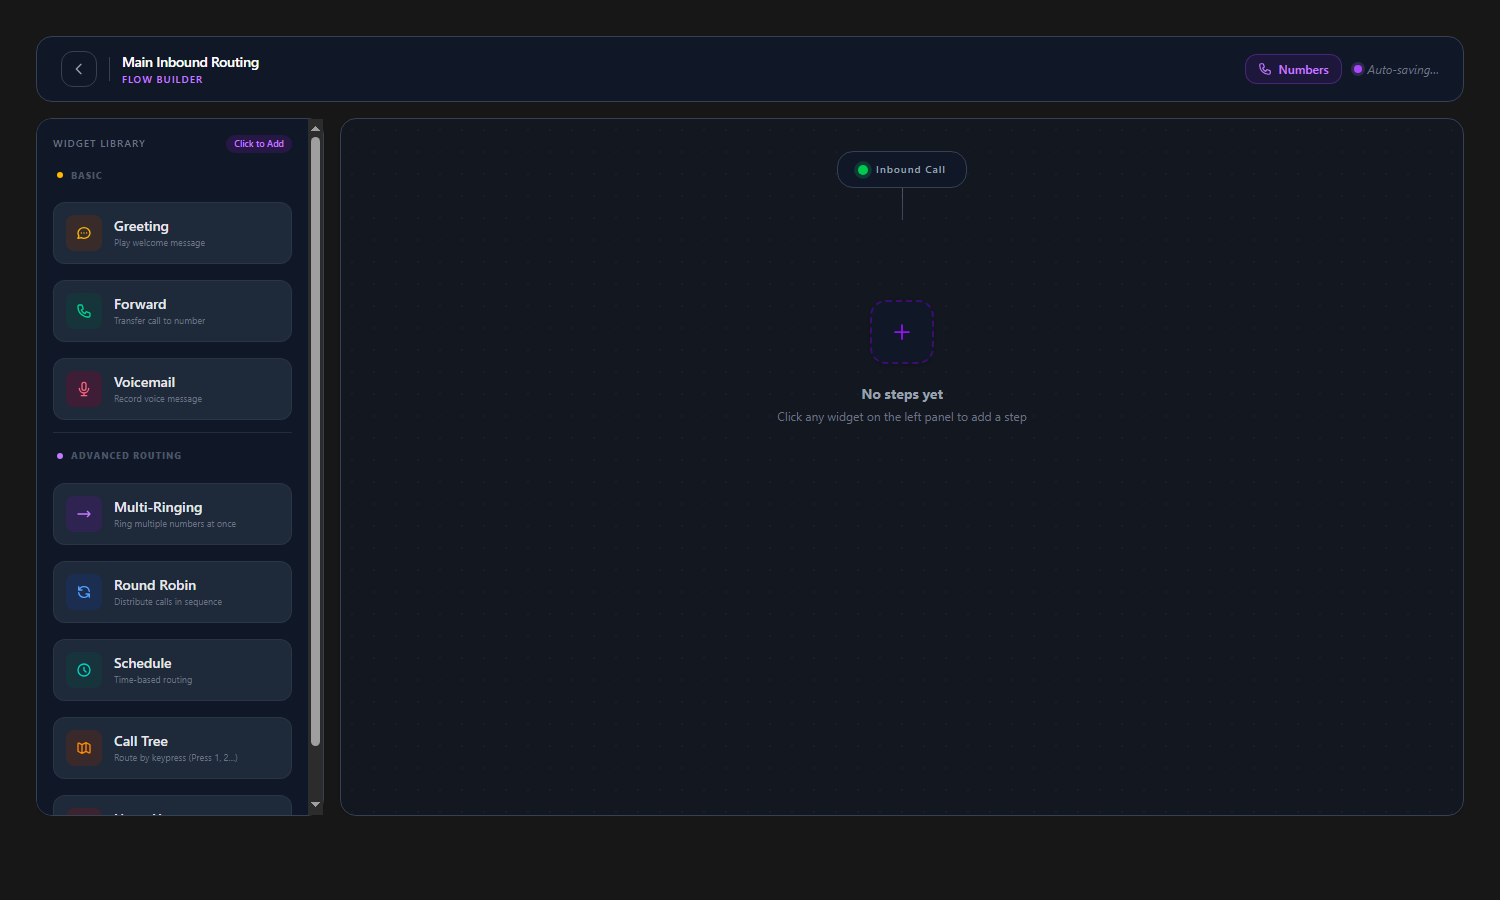
The Flow Builder: your widgets are on the left 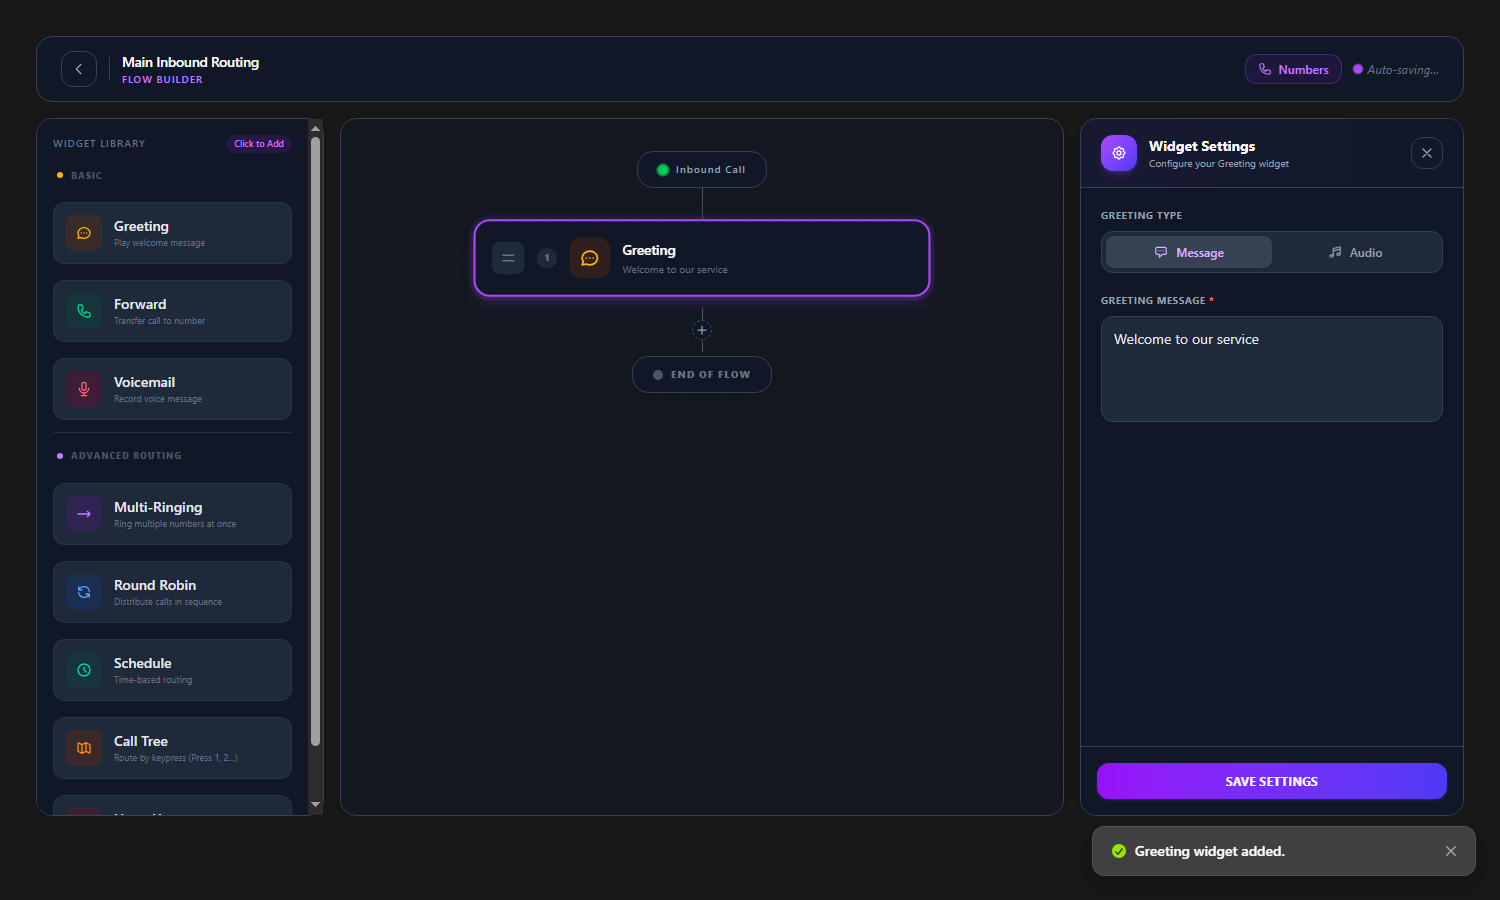
Click a widget to add it. Its settings open on the right 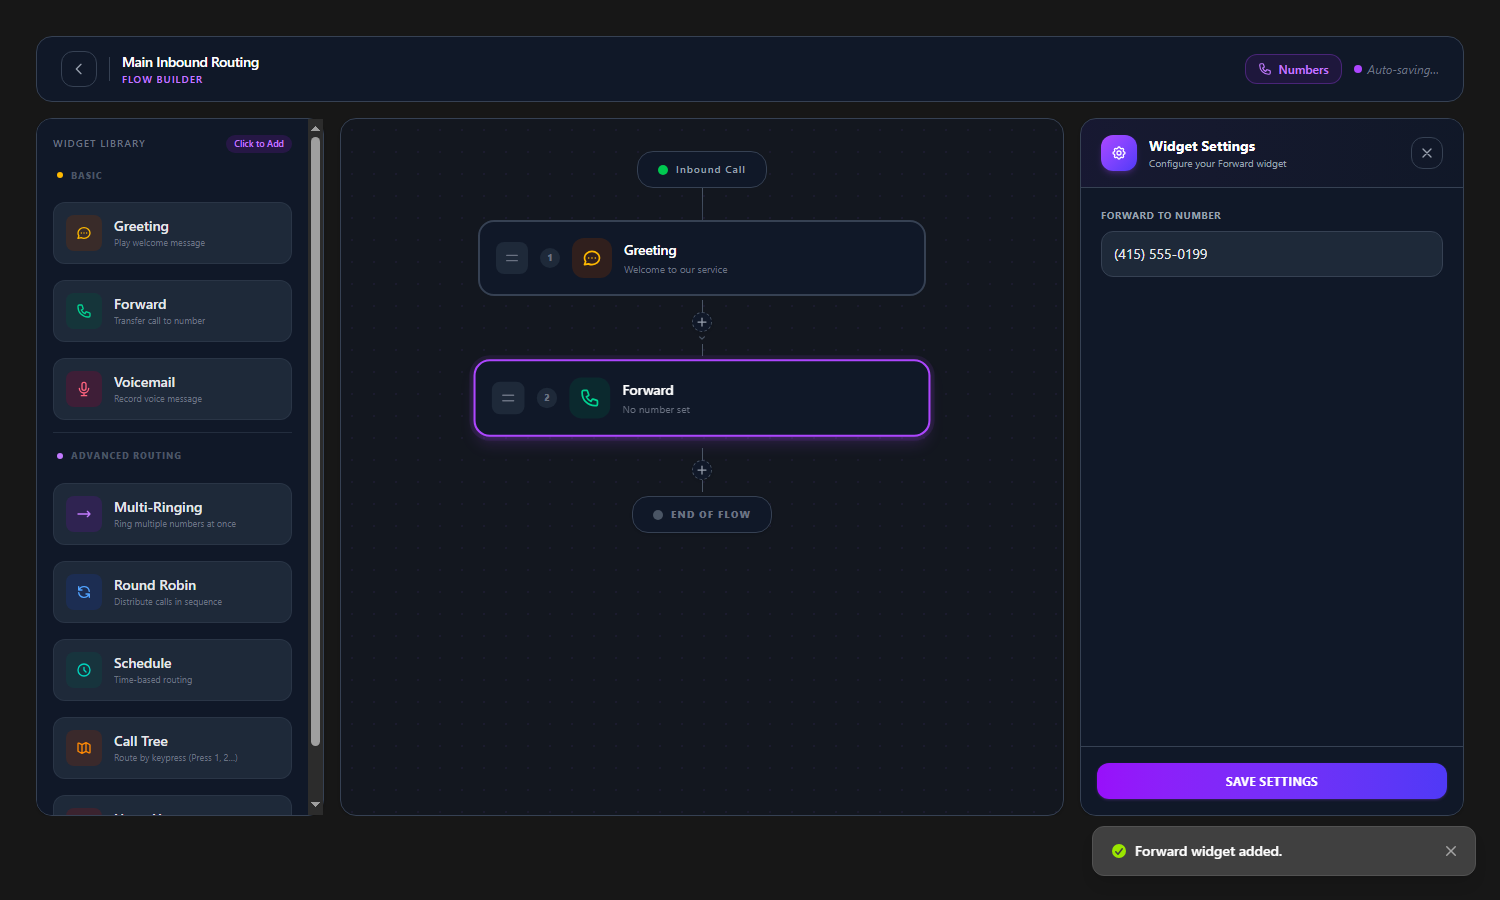
Enter the phone number to ring, then click Save Settings 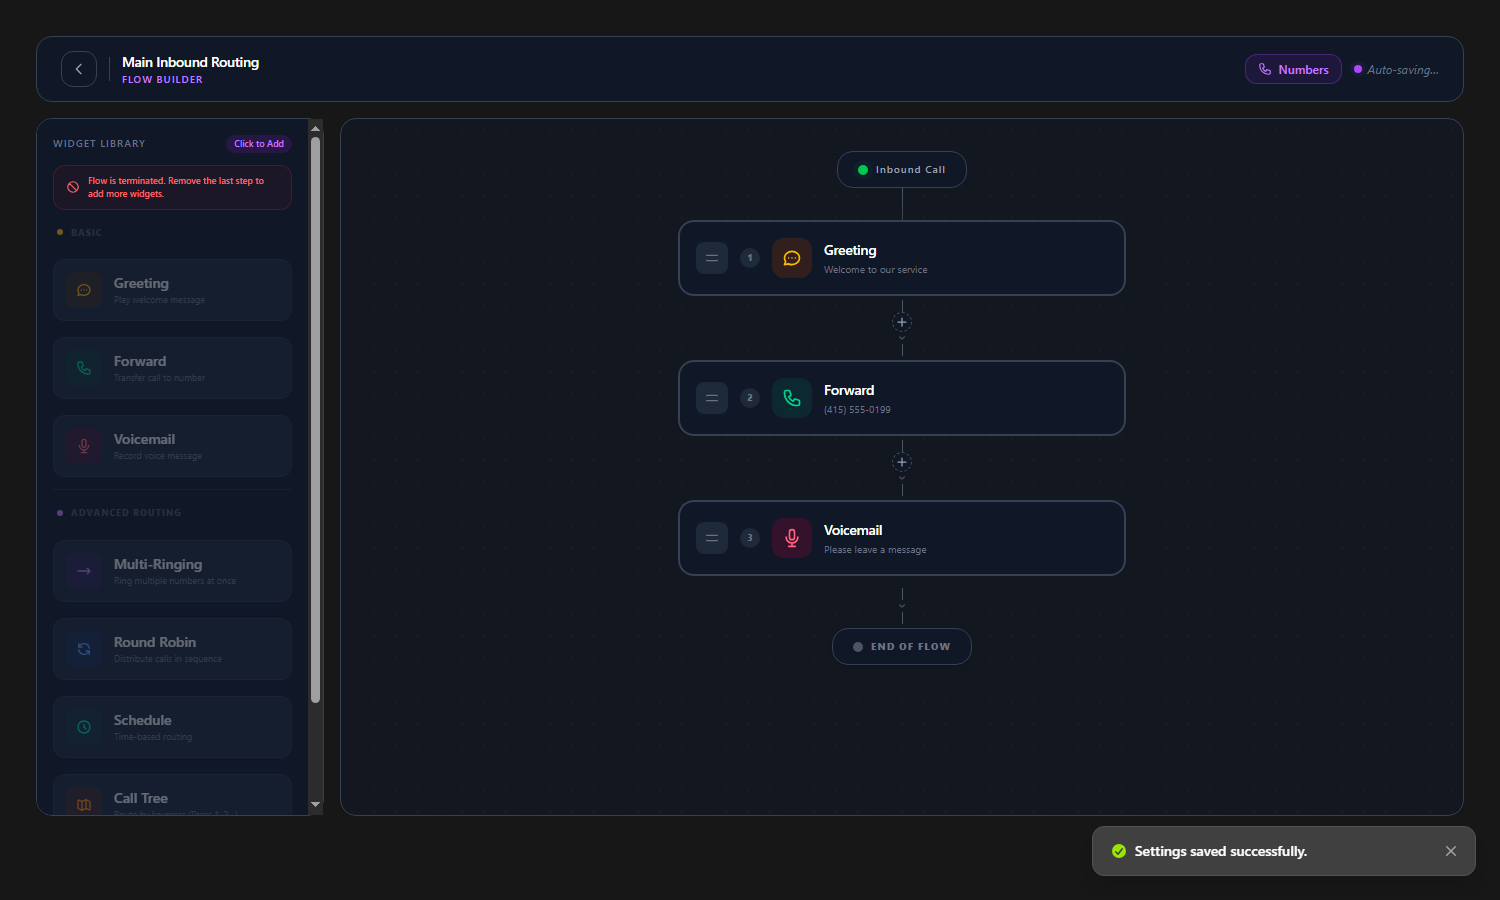
Your finished flow Tip: The numbers in the screenshots are samples. Use your own phone number in the Forward widget. -
Step 5: Connect your phone number
Click Numbers at the top of the Flow Builder, or open the flow’s Numbers page. Under Add numbers to this flow you will see your numbers that are not on any flow yet. Click Assign next to the number you want.
- The number moves up to Numbers on this flow. Callers to that number now follow your flow.
- To disconnect a number, click Remove.
- You can also choose a flow while buying a number, using Assign Flow.
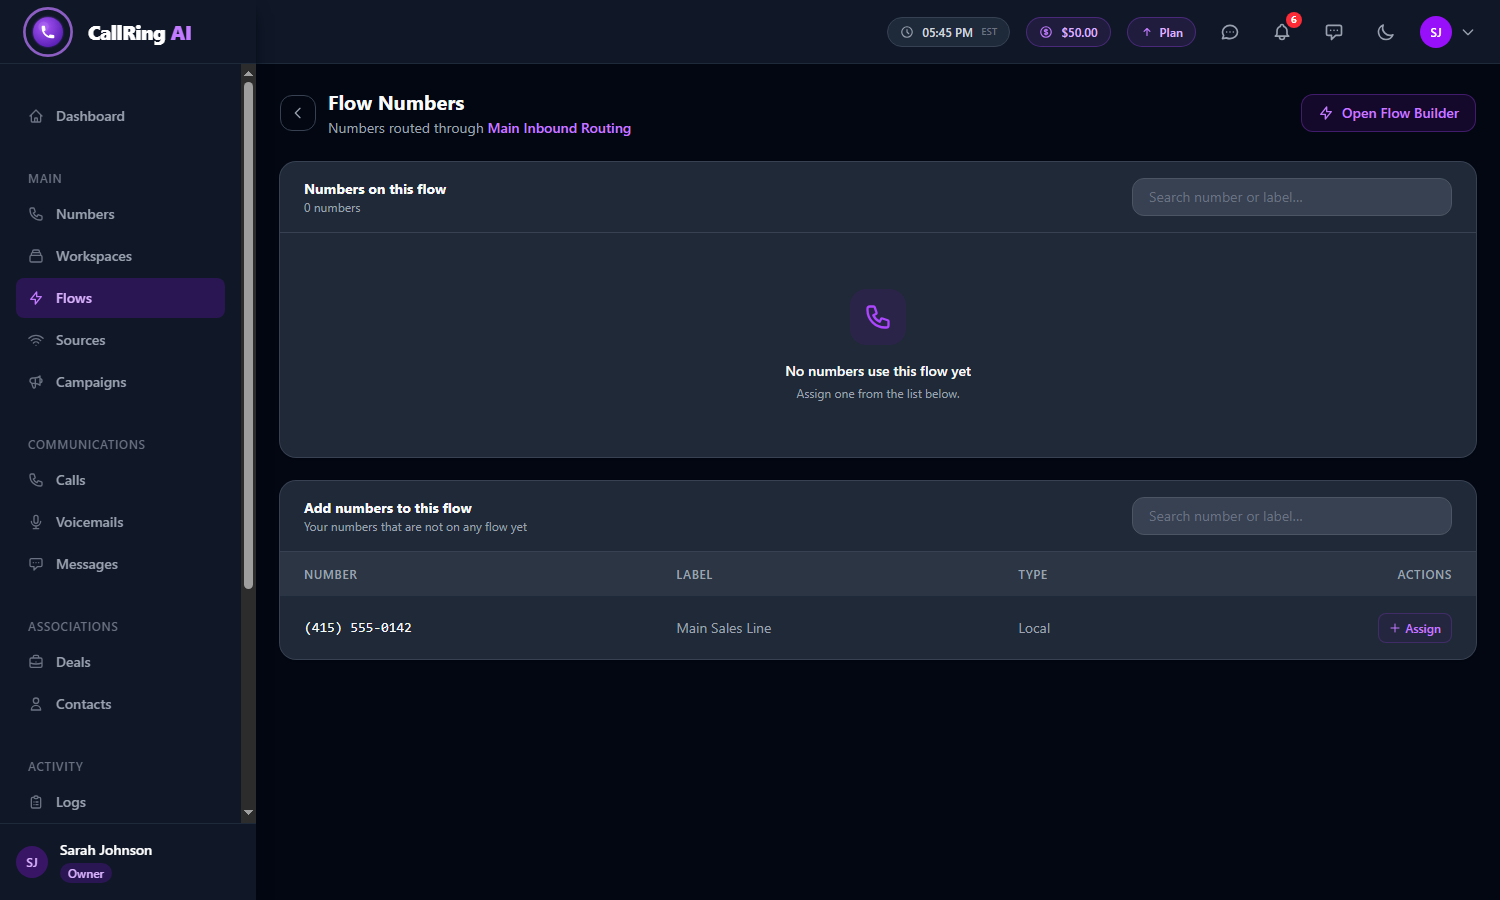
Open Numbers and click Assign next to a number 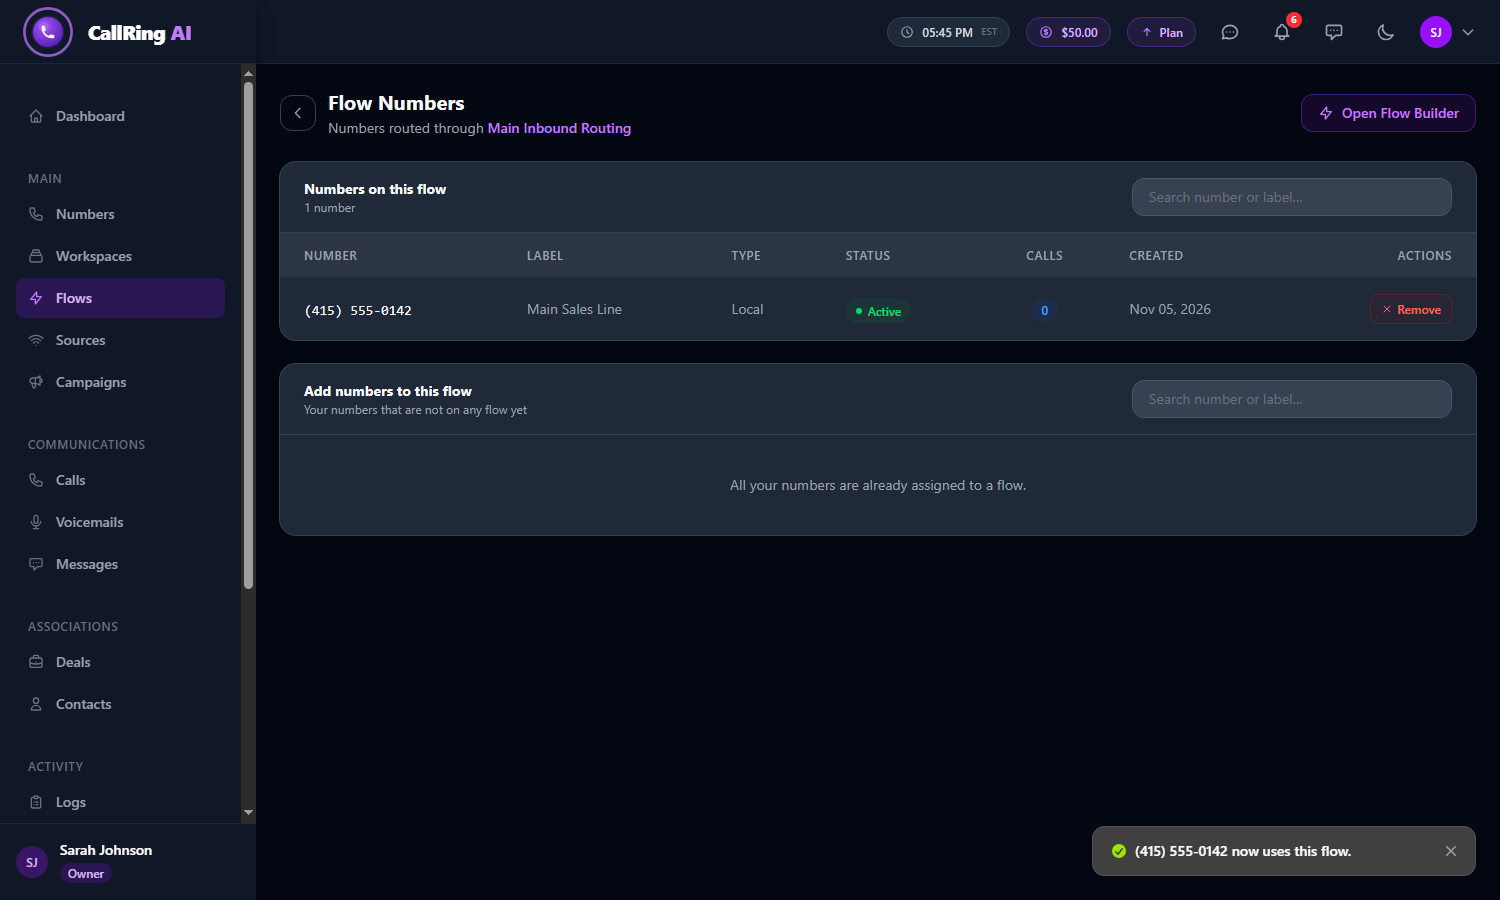
Your number is now connected
Widget reference
| Widget | What it does |
|---|---|
| Greeting | Plays a welcome message, as typed text or an audio file. |
| Forward | Transfers the call to one phone number. |
| Voicemail | Lets the caller leave a message. You can enter an email address for the voicemail. |
| Multi-Ringing | Rings several numbers at the same time. |
| Round Robin | Passes calls to your team’s numbers one after another. |
| Schedule | Routes calls by day and hours. Choose an after-hours action: Send to Voicemail, Forward to Number, or Hang Up. |
| Call Tree | A menu where callers press 1, 2 and so on to reach different numbers. |
| Hang Up | Ends the call. |
Good to know
- A number can be on one flow at a time.
- Changes in the builder save when you click Save Settings.
- You need a number first. See How to buy a phone number in CallRing AI.
Frequently asked questions
What does Whisper do?
Whisper plays a short message to your team member before the call connects, for example “Incoming call from your website campaign”. The caller does not hear it.
Why can’t I add a widget after Voicemail?
Voicemail and Hang Up end the call, so nothing can come after them. To add more steps, delete the last widget first.
Can I use one flow for several numbers?
Yes. You can assign the same flow to several numbers. Each number can be on only one flow at a time.
How do I change which flow a number uses?
You can click Remove next to the number on its current flow’s Numbers page, then assign it to another flow.
Do I need to record my own audio?
No. Greeting and Press 1 to connect can use typed text. Audio files are optional.
What is the difference between Multi-Ringing and Round Robin?
Multi-Ringing rings several numbers at the same time. Round Robin passes calls to your team’s numbers one after another.
Your call flow is answering calls. Next, group your numbers into a workspace to keep locations, clients or teams separate.