How to Give a Team Member Access to a Workspace (Permissions)
Adding a team member to a workspace is not enough on its own. You also need to give them a permission for that workspace. The permission decides whether the member can enter and switch into the workspace, and only the main account owner can manage permissions. A member who has no active permission in any workspace cannot log in at all. Your members and workspaces will look different from the sample data in the screenshots.
5 min read · 7 steps
Before you start
- The team member must already be added to the workspace. See How to Assign a Workspace to a Team Member.
- When you create a team member, CallRing automatically gives them a permission for their Main Workspace. For any other workspace, you must add the permission yourself, as shown here.
-
Step 1: Open the Permissions page
In the left menu, under Services, click Permissions. The cards at the top show Total Permissions, Total Workspaces, Workspaces Covered, Members with Access and Members without Access.
- Use Members without Access to spot members who still need a permission.
- The table lists each permission with its Workspace, Member, Status (Active or Disabled) and the date Created.
- Use the search box and the status and date filters to find one.
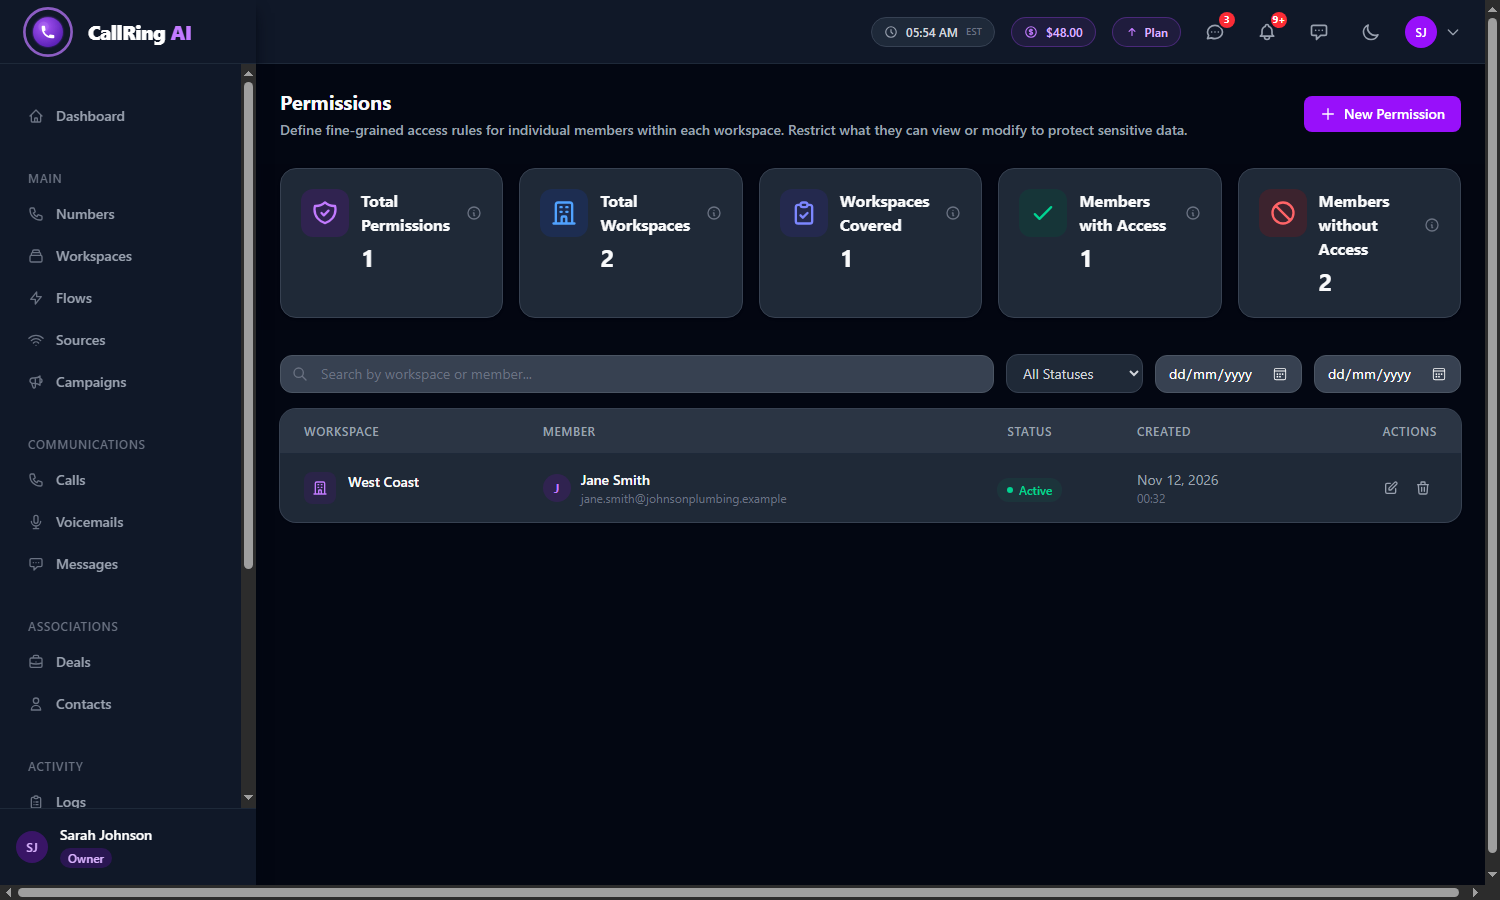
The Permissions page lists who can enter which workspace -
Step 2: See what a member sees without a permission
A member who is added to a workspace but has no permission sees that workspace greyed out, with a red Not Allowed label, in the workspace switcher at the top of the page. They cannot switch into it.
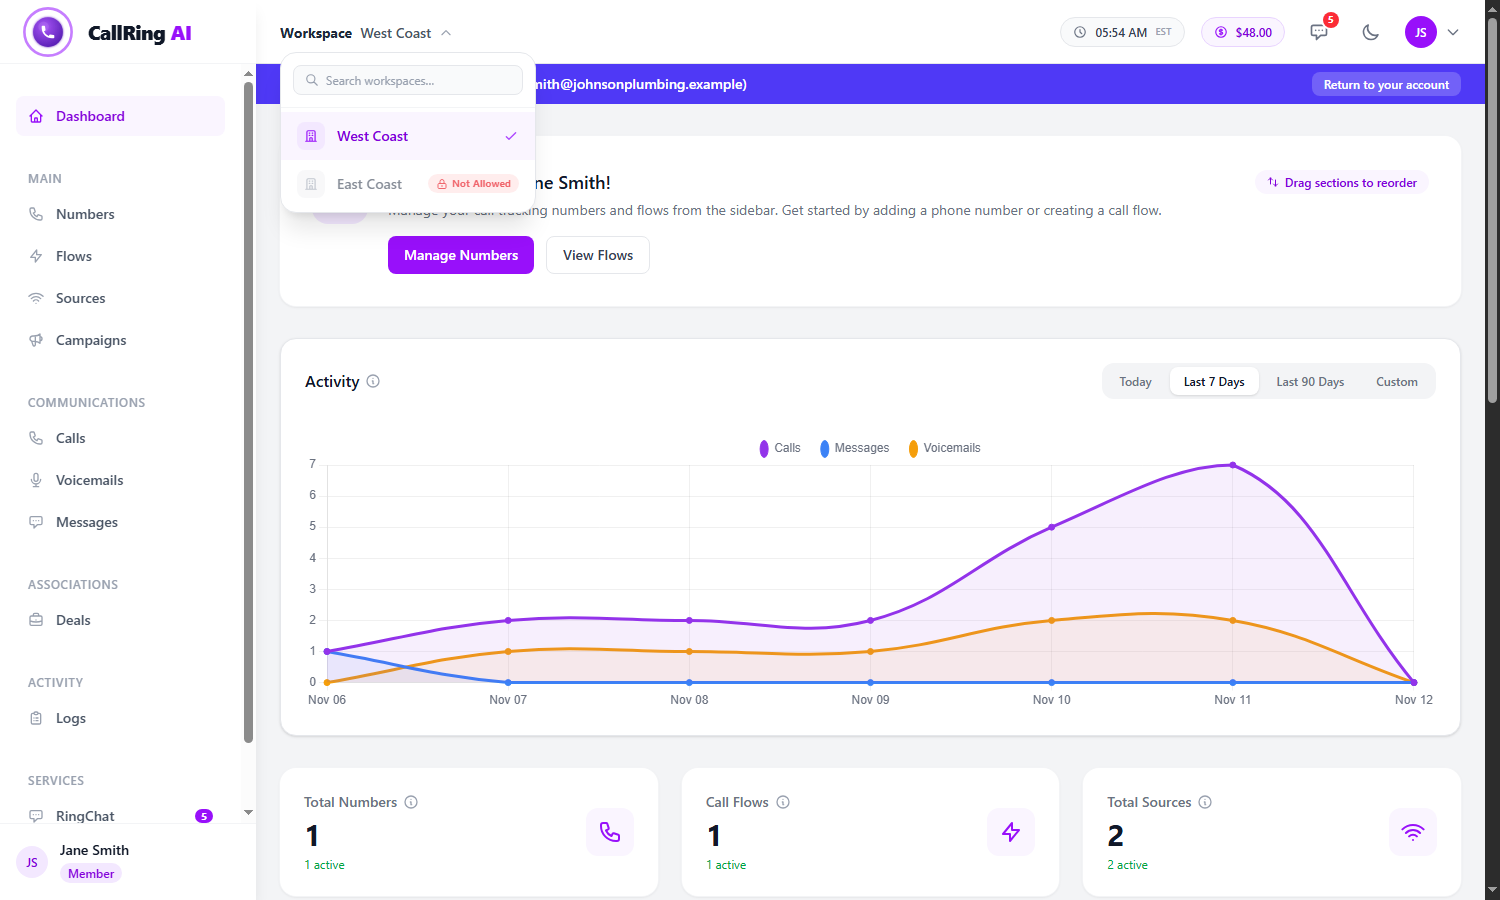
Without a permission, the workspace shows as Not Allowed in the switcher Tip: If a team member tells you they cannot open a workspace, check the Permissions page first. -
Step 3: Create the permission
Back on the Permissions page, click the purple New Permission button (top right). The New Permission page opens with two parts: Access (Workspace and Member) and Status.
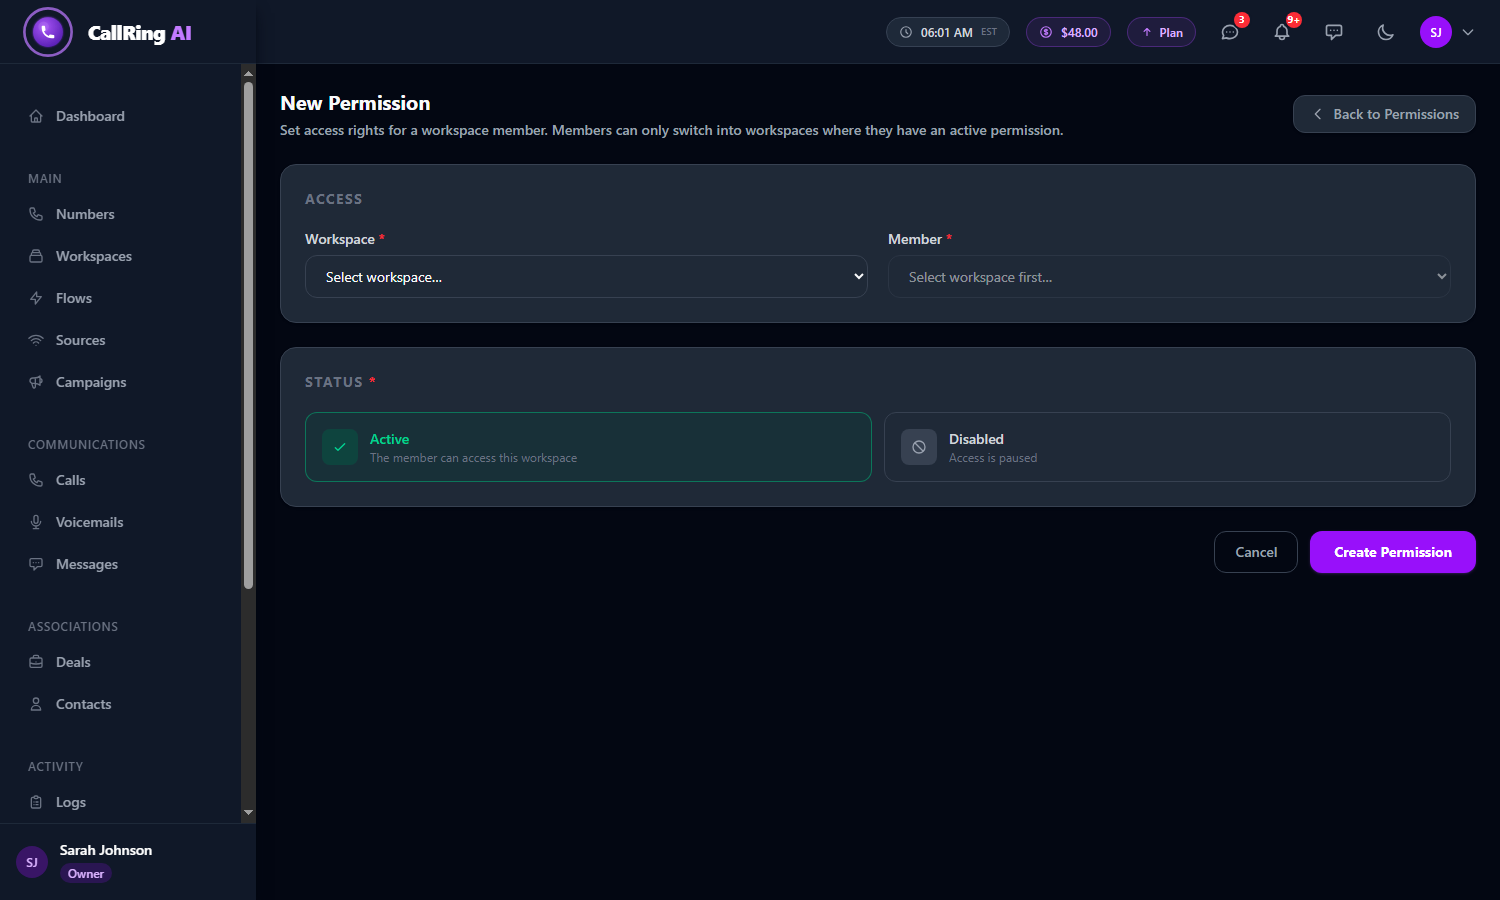
The New Permission page: choose a workspace and a member -
Step 4: Choose the workspace, the member and the status
Fill in the form:
- Workspace: select the workspace the member should enter.
- Member: select the team member. This list only shows members of the workspace you chose, and only those who do not yet have a permission there.
- Status: keep Active (“The member can access this workspace”).
- Click the purple Create Permission button. Click Cancel to leave without saving.
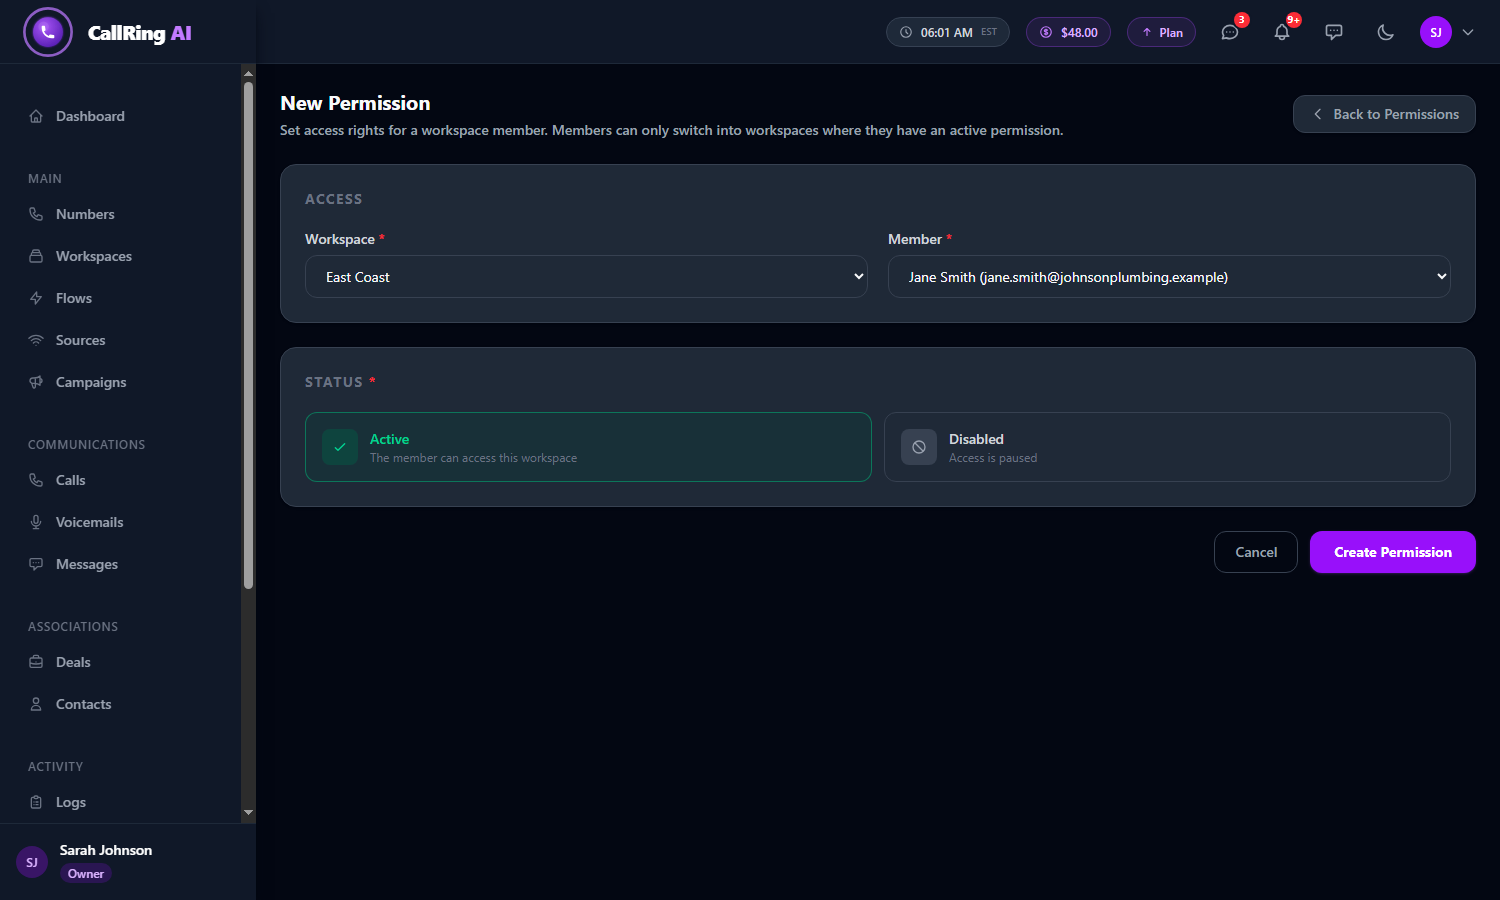
Workspace and member chosen, with Status set to Active Note: Each member can have only one permission per workspace. -
Step 5: Check the result
You return to the Permissions list, and a green message says “Permission created successfully.” The new permission appears in the table as Active, and Members without Access goes down.
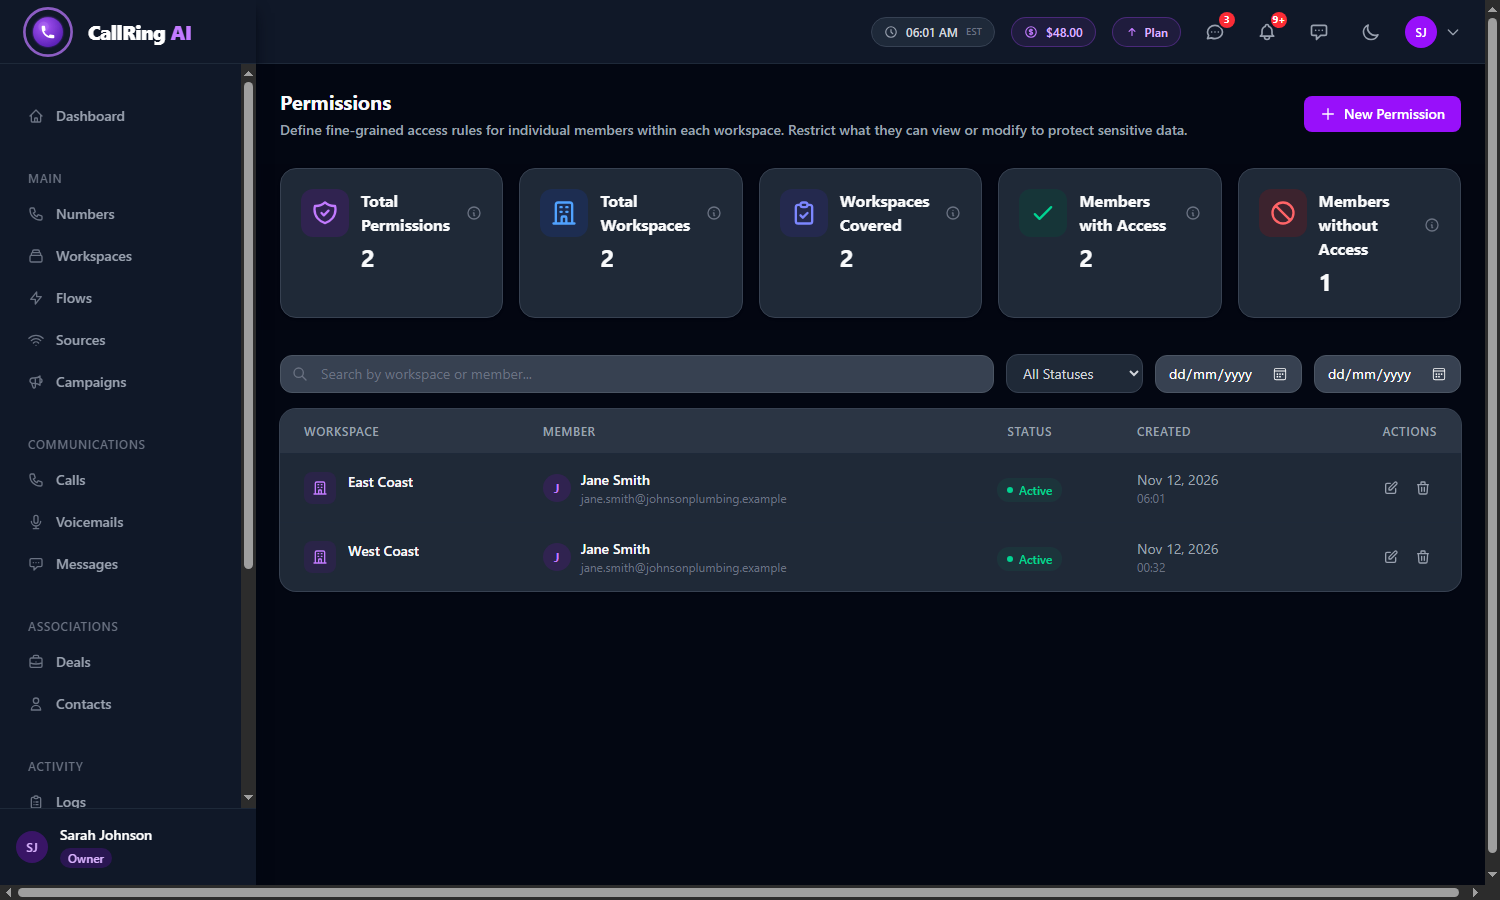
The new permission appears in the list as Active -
Step 6: The member can now enter the workspace
In the workspace switcher, the workspace is no longer greyed out. The member can click it to switch into it.
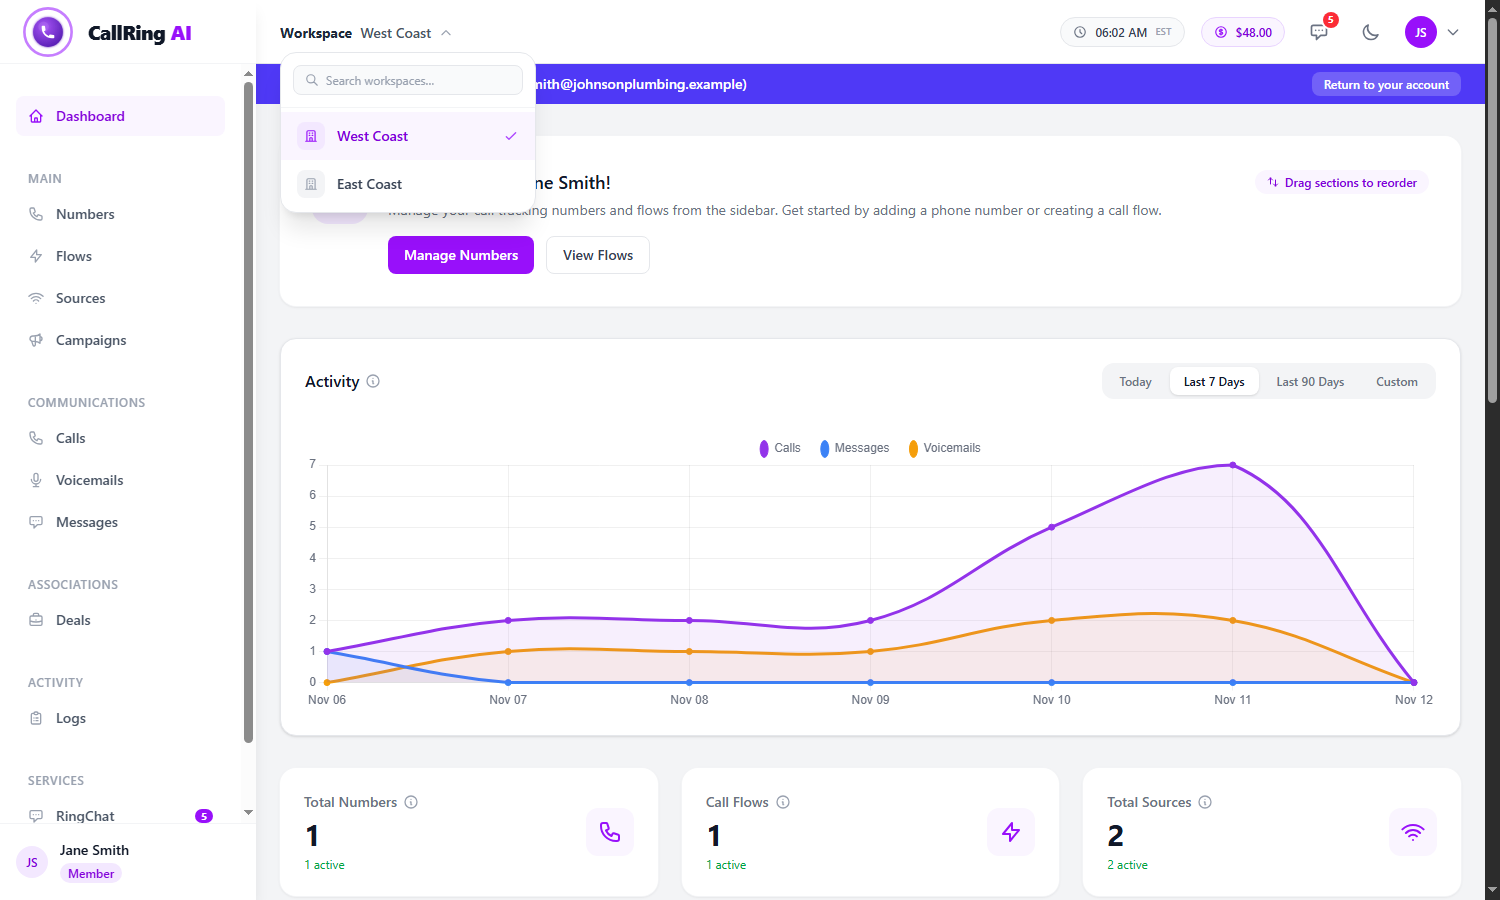
The workspace is no longer greyed out in the switcher -
Step 7: Pause access without deleting
On the Permissions list, click the pencil icon (Edit) on a row. Under Status, choose Disabled (“Access is paused”) and click Update Permission.
- The member can no longer switch into that workspace. Choose Active again to give access back.
- To remove a permission completely, click the bin icon (Delete) and confirm. This cannot be undone.
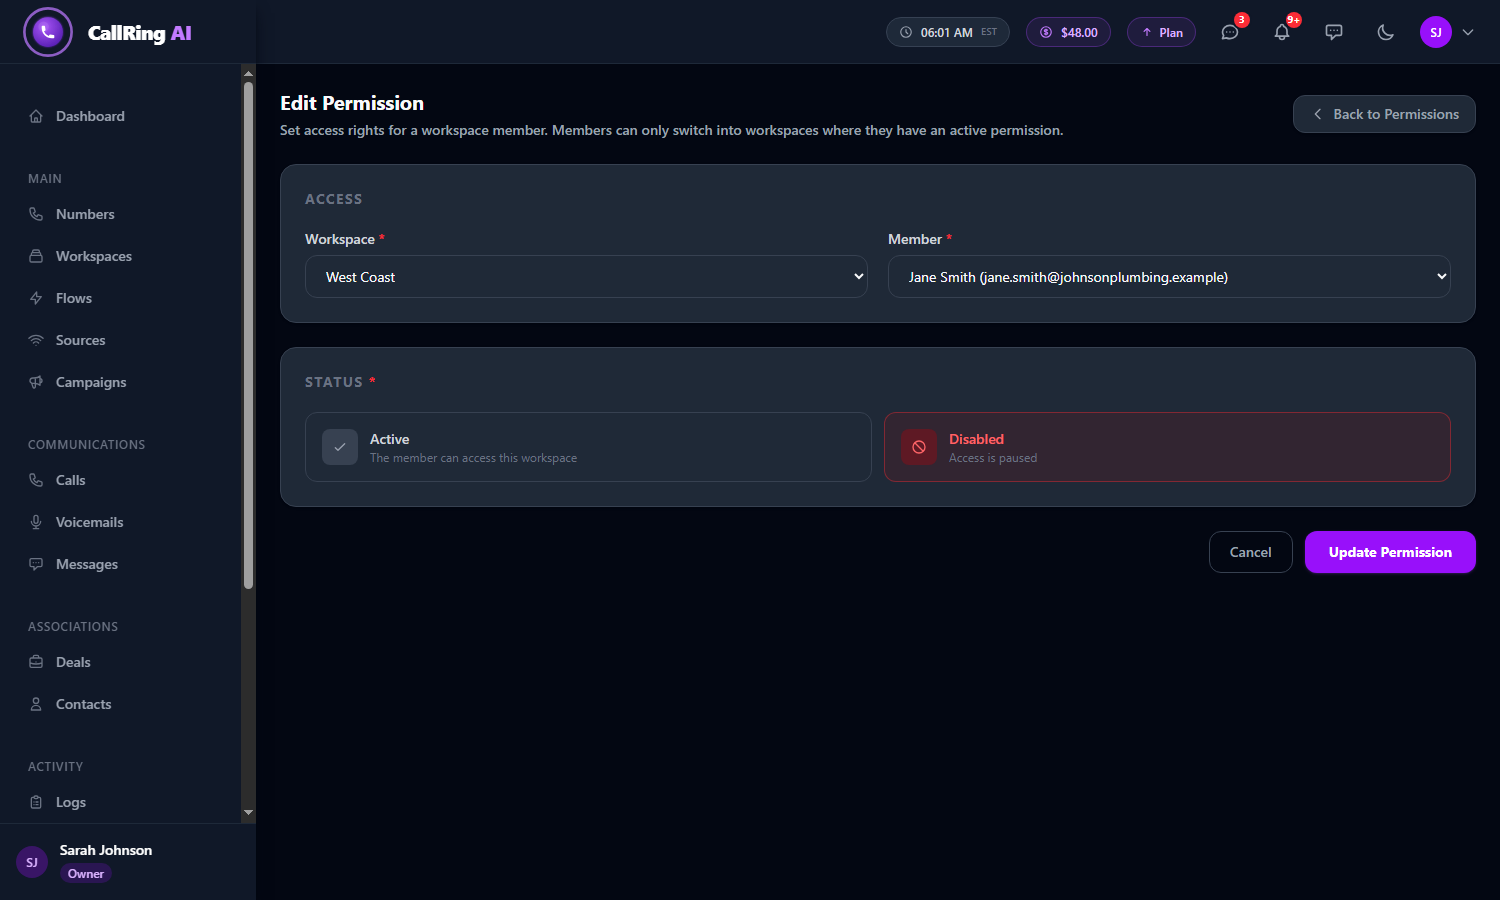
Choose Disabled to pause access, then click Update Permission
Good to know
- Permissions control entry to a workspace. What the member can do inside it (view, create, update) is set separately in the member’s Job permissions. See How to Manage Permissions for a Team Member.
- Members cannot see the Permissions page.
- If you disable or delete every permission a member has, they can no longer log in.
Need help? Open a support ticket from your account.