How to Assign a Workspace to a Team Member
A workspace is a separate area of your account, for example one per location or brand, with its own phone numbers. A team member can only log in to or switch into the workspaces you assign to them. Use this guide to give an existing team member access to another workspace. Only the main account owner can do this. Your members and workspaces will look different from the sample data in the screenshots.
3 min read · 6 steps
Before you start
- The team member must already exist. If not, see How to Create a Team Member.
- The workspace must already exist. If you have none, the page shows “No workspaces yet” with a link, Create a workspace first.
- Example used in this guide: the team member Jane Smith can currently use only “Johnson Plumbing - West Coast”. We will add “Johnson Plumbing - East Coast”.
-
Step 1: Open the Members page
In the left menu, click Members. Find the team member in the list. The Workspaces column shows how many workspaces they have today (here: “1 workspace”). In the Actions column on the right, click the pencil icon (Edit).
- If you cannot see the icons, scroll the table to the right.
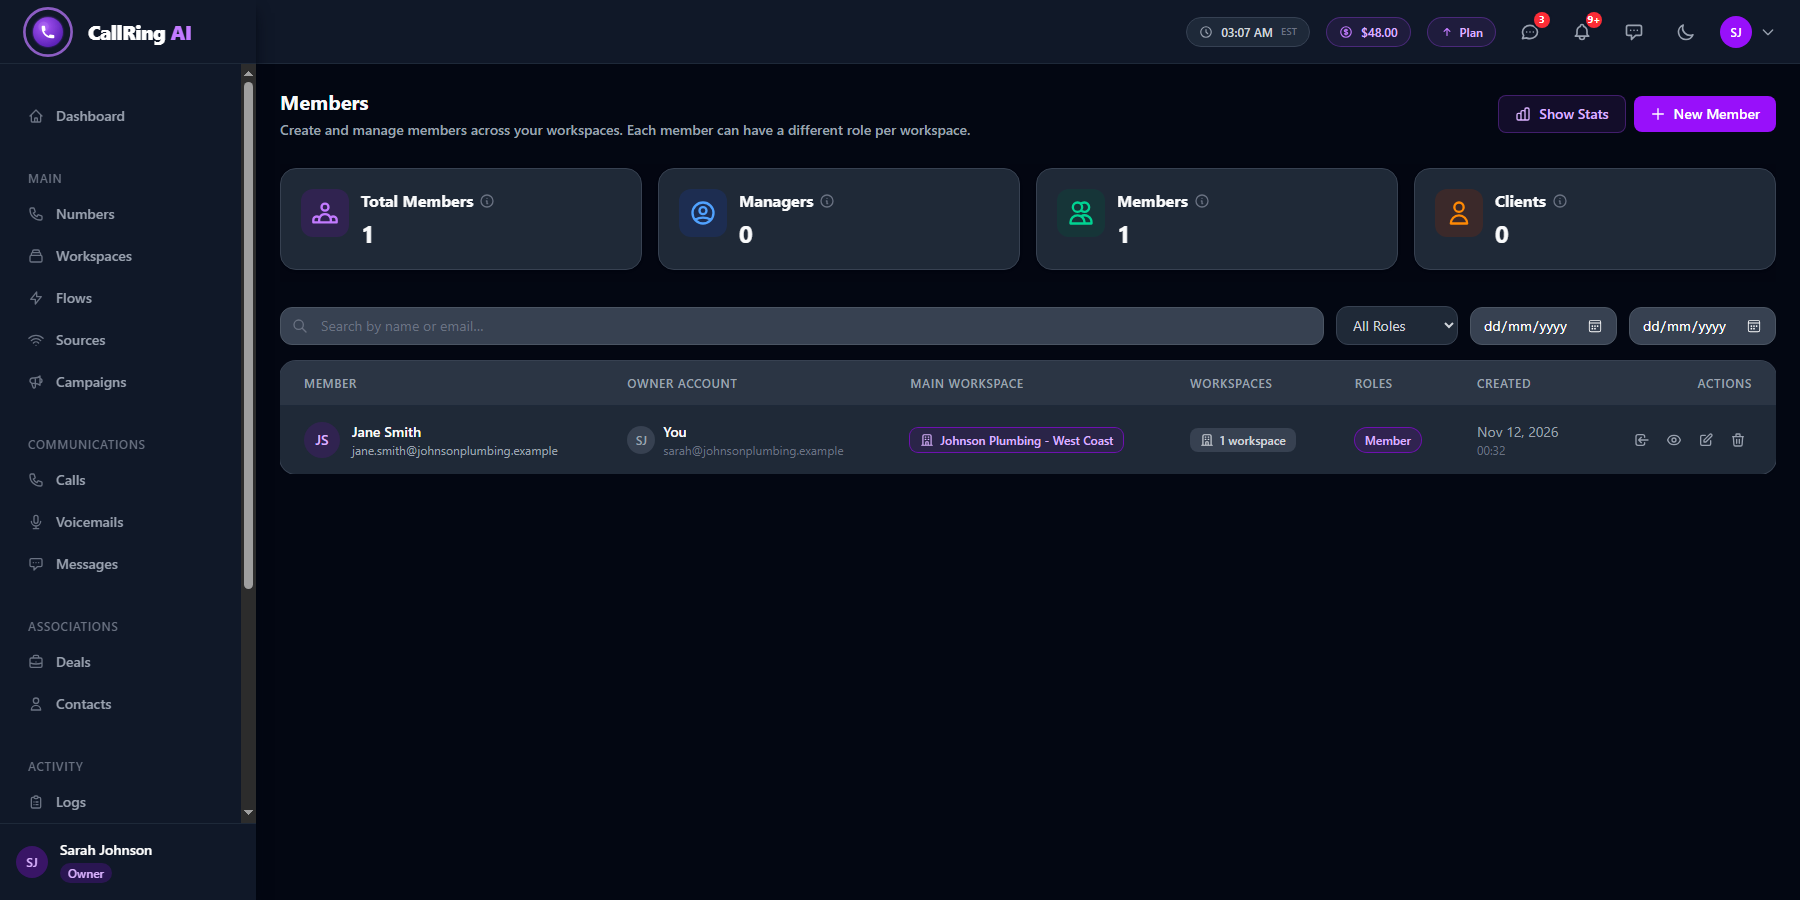
Click the pencil icon next to the member to edit them -
Step 2: Check the Edit Member page
The Edit Member page opens with the member’s name, email, role and Main Workspace. You do not need to change anything here.
- Main Workspace is the workspace they land in right after they log in.
- Leave New Password empty to keep their current password.
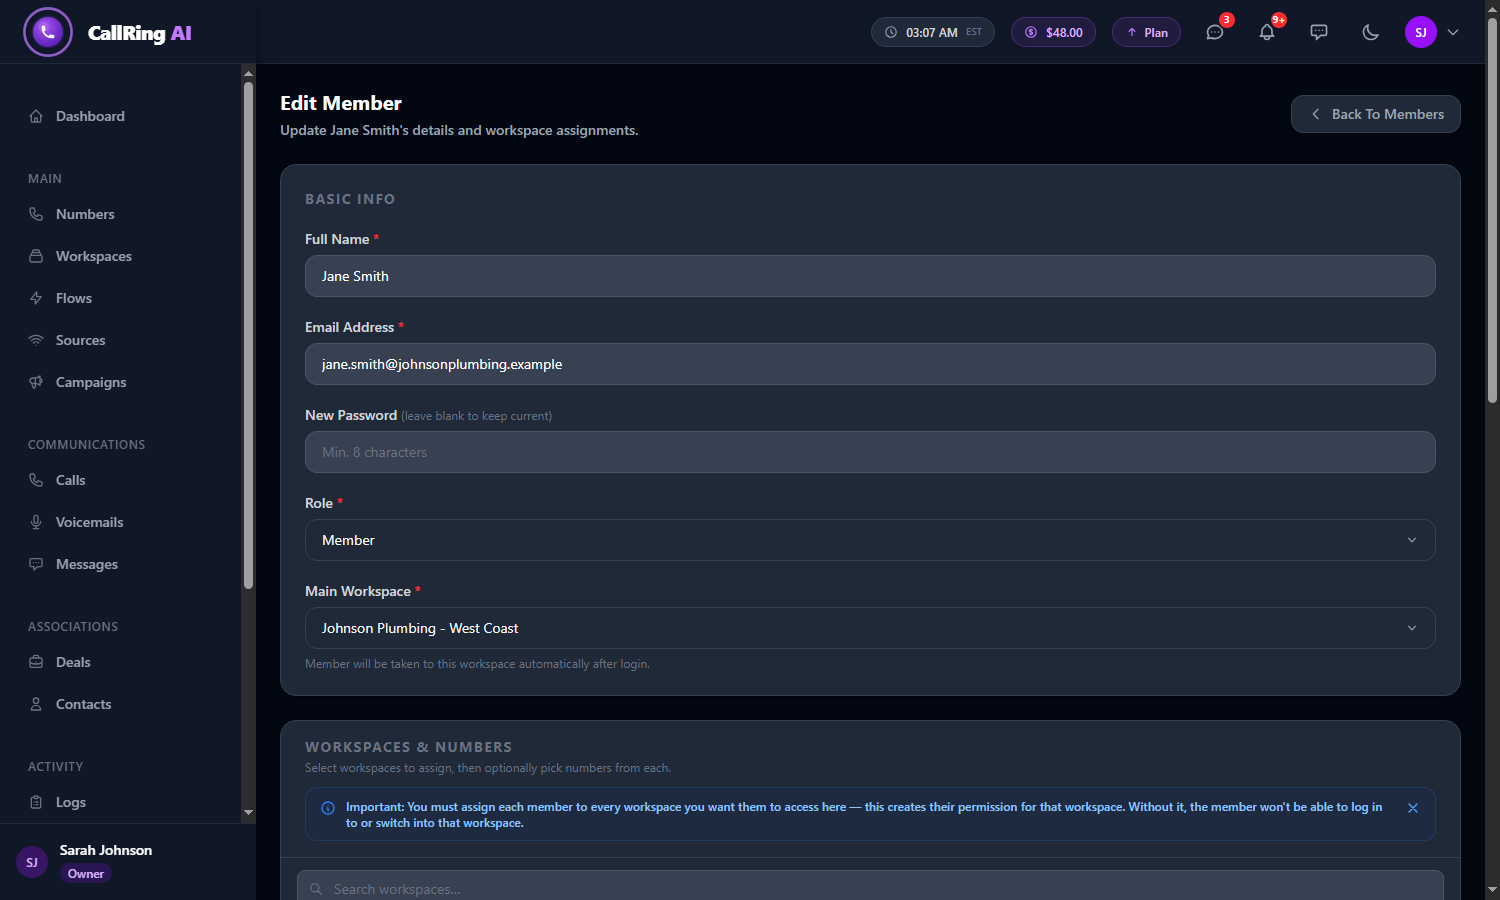
The Edit Member page: nothing to change at the top -
Step 3: Find “Workspaces & Numbers”
Scroll down to the Workspaces & Numbers section. Each workspace is a row with a tick box. Ticked rows are the workspaces the member can already use. Under each ticked workspace you see its phone numbers.
- Use Search workspaces... if you have many workspaces.
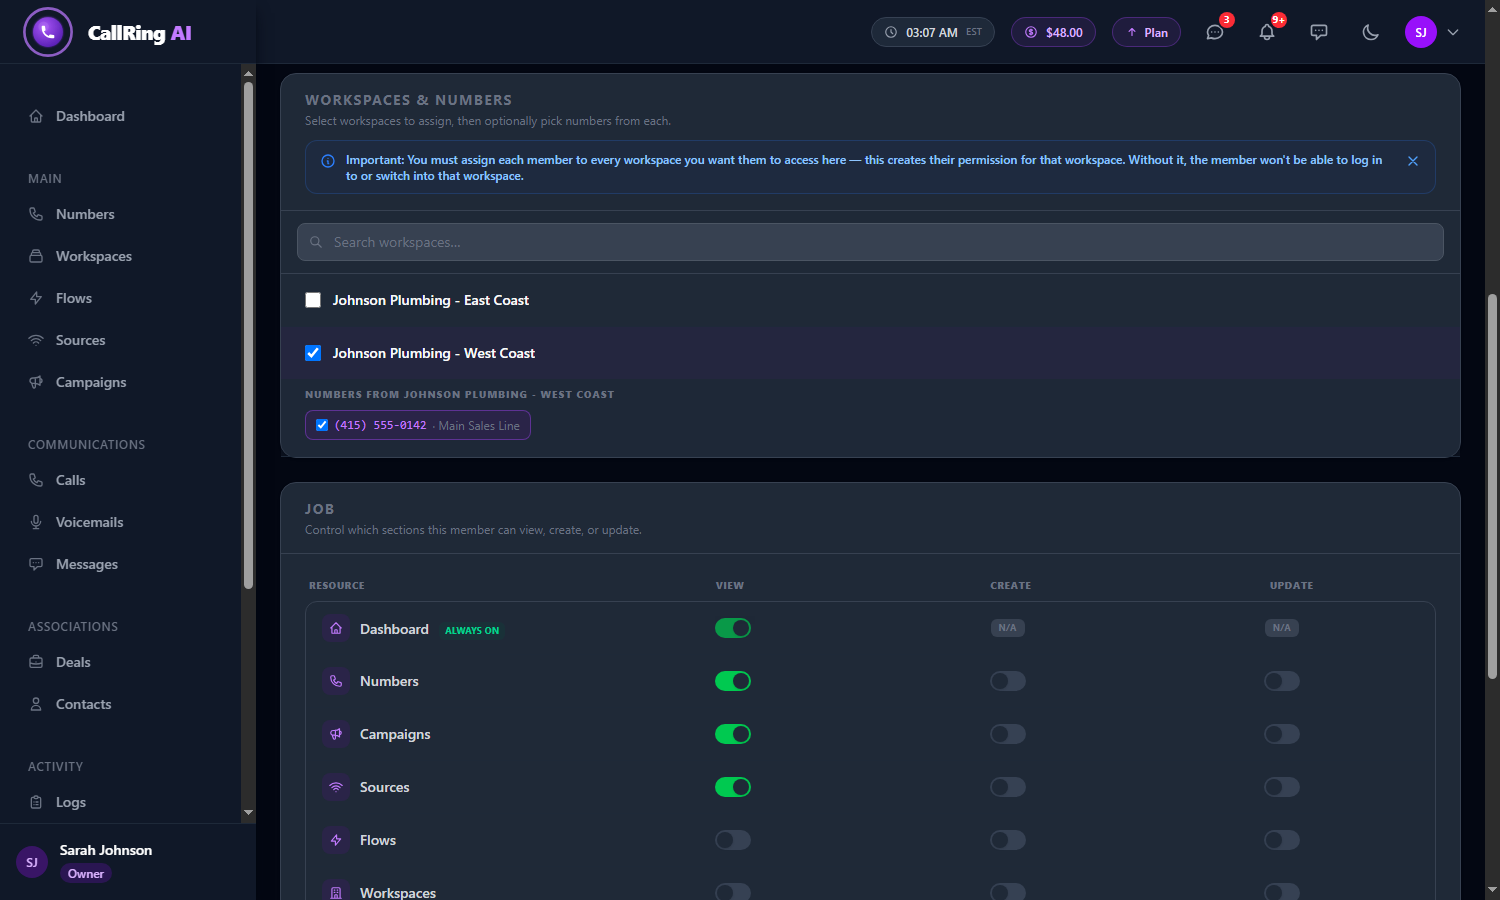
Workspaces & Numbers: the ticked workspace is one the member can already use Note: The blue message on this page says it too: you must assign each member to every workspace you want them to access. Otherwise they cannot log in to or switch into that workspace. -
Step 4: Tick the new workspace
Tick the box next to the workspace you want to add (here: “Johnson Plumbing - East Coast”). The row turns purple, and Numbers from and the workspace name appear under it, listing that workspace’s phone numbers.
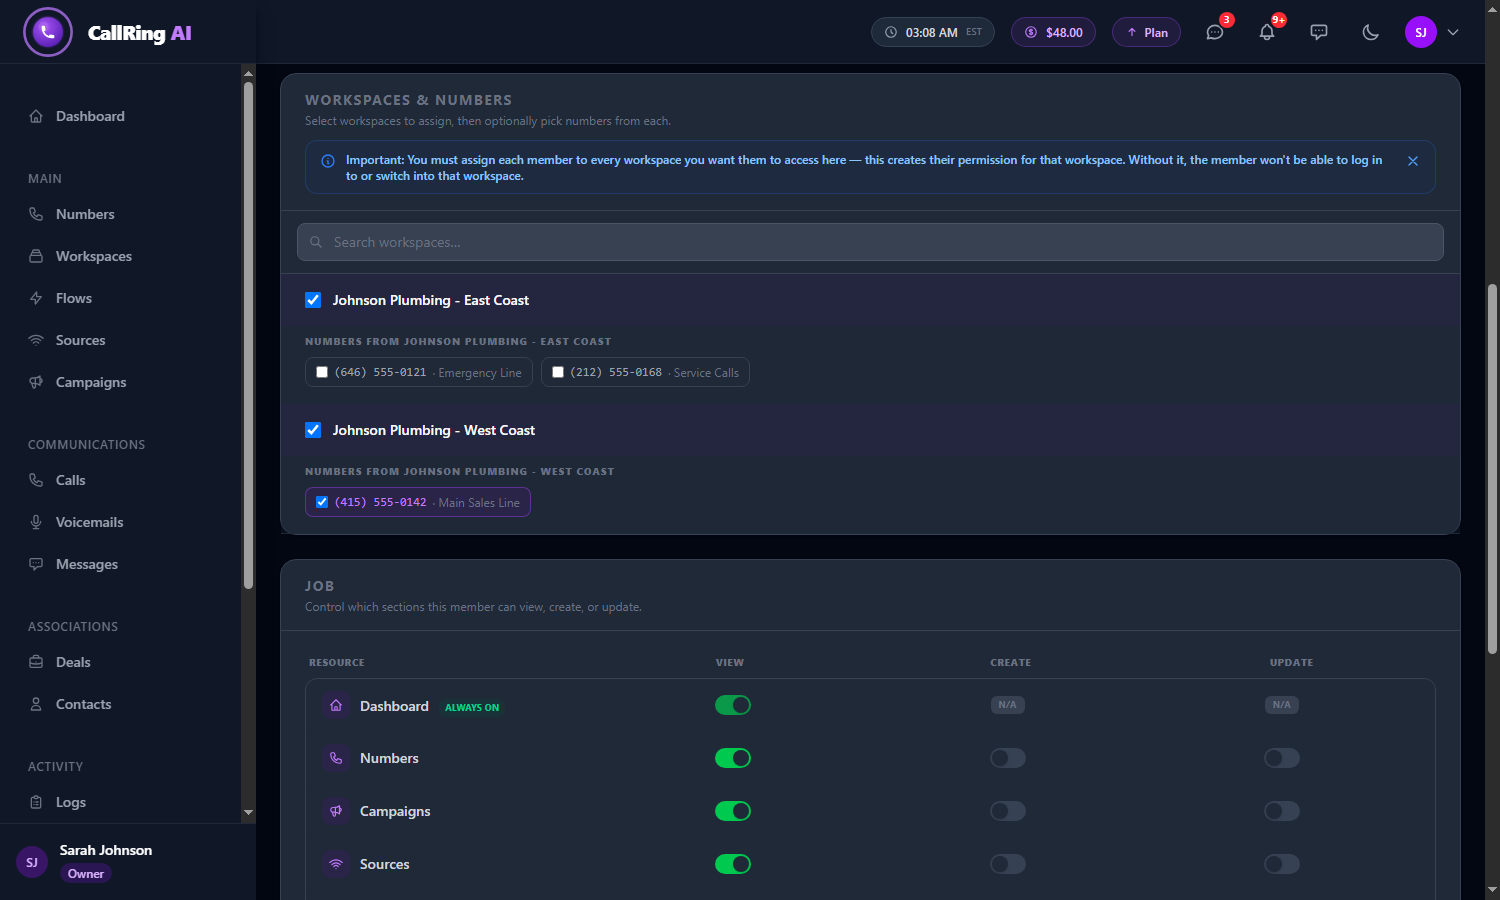
Tick the new workspace to see its phone numbers -
Step 5: Choose the phone numbers
Tick the phone numbers the member may use in that workspace (here: (646) 555-0121 Emergency Line and (212) 555-0168 Service Calls).
- To remove a workspace later, untick its box and save.
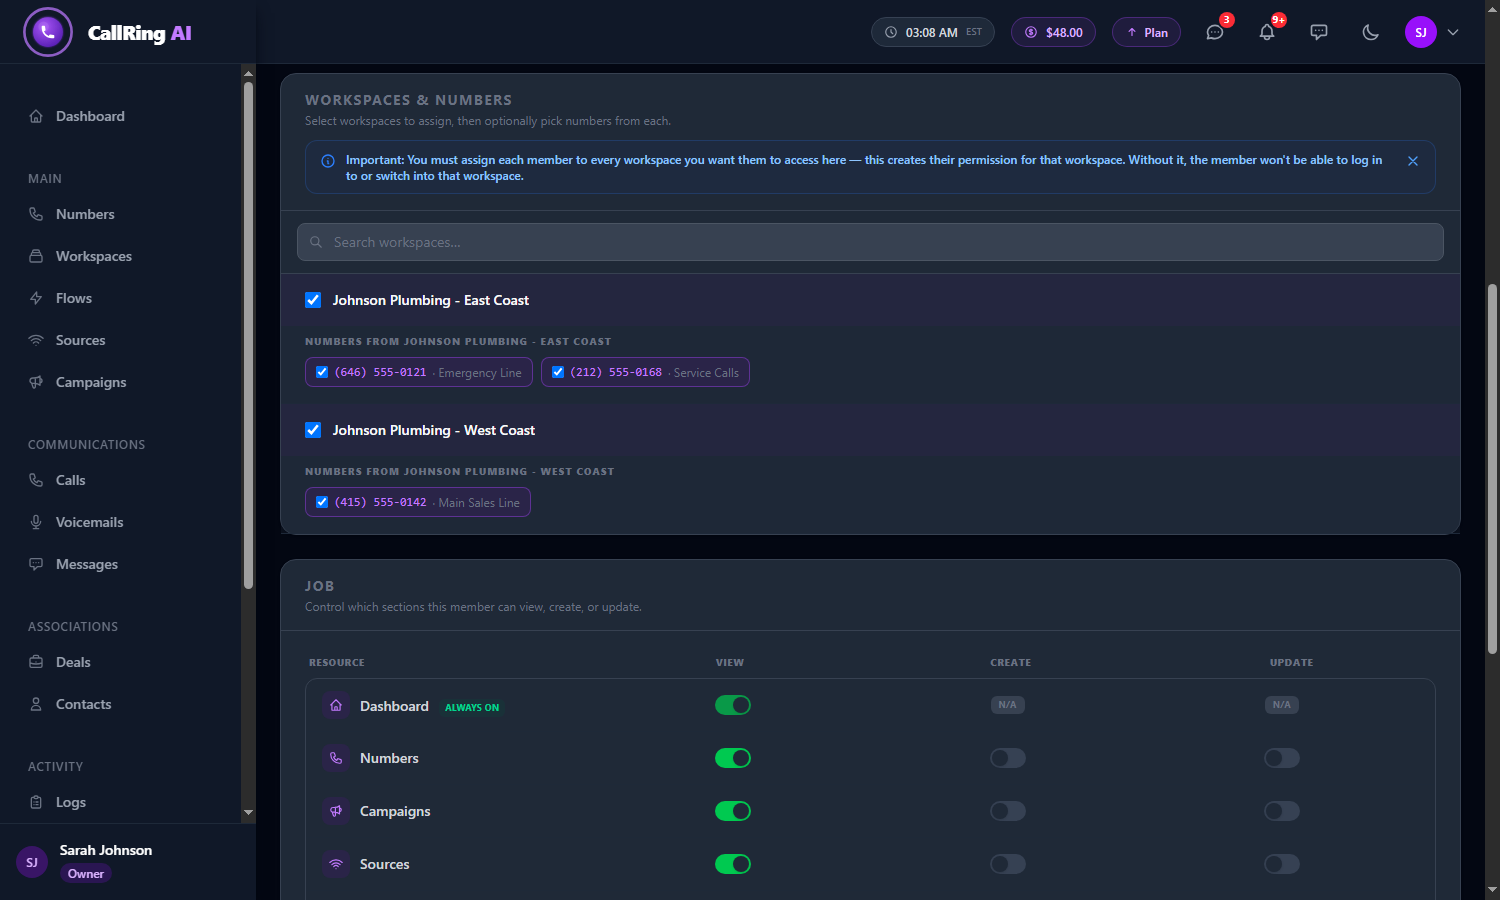
Tick the phone numbers the member may use Note: If you tick no numbers for a workspace, the member sees no data in it. If you tick numbers, they see all calls, messages and voicemails of those numbers. -
Step 6: Save
Scroll to the bottom and click the purple Update Member button. Cancel leaves without saving. You return to the Members list, and a green message says “Member updated successfully.” The Workspaces column now shows the new count (here: “2 workspaces”).
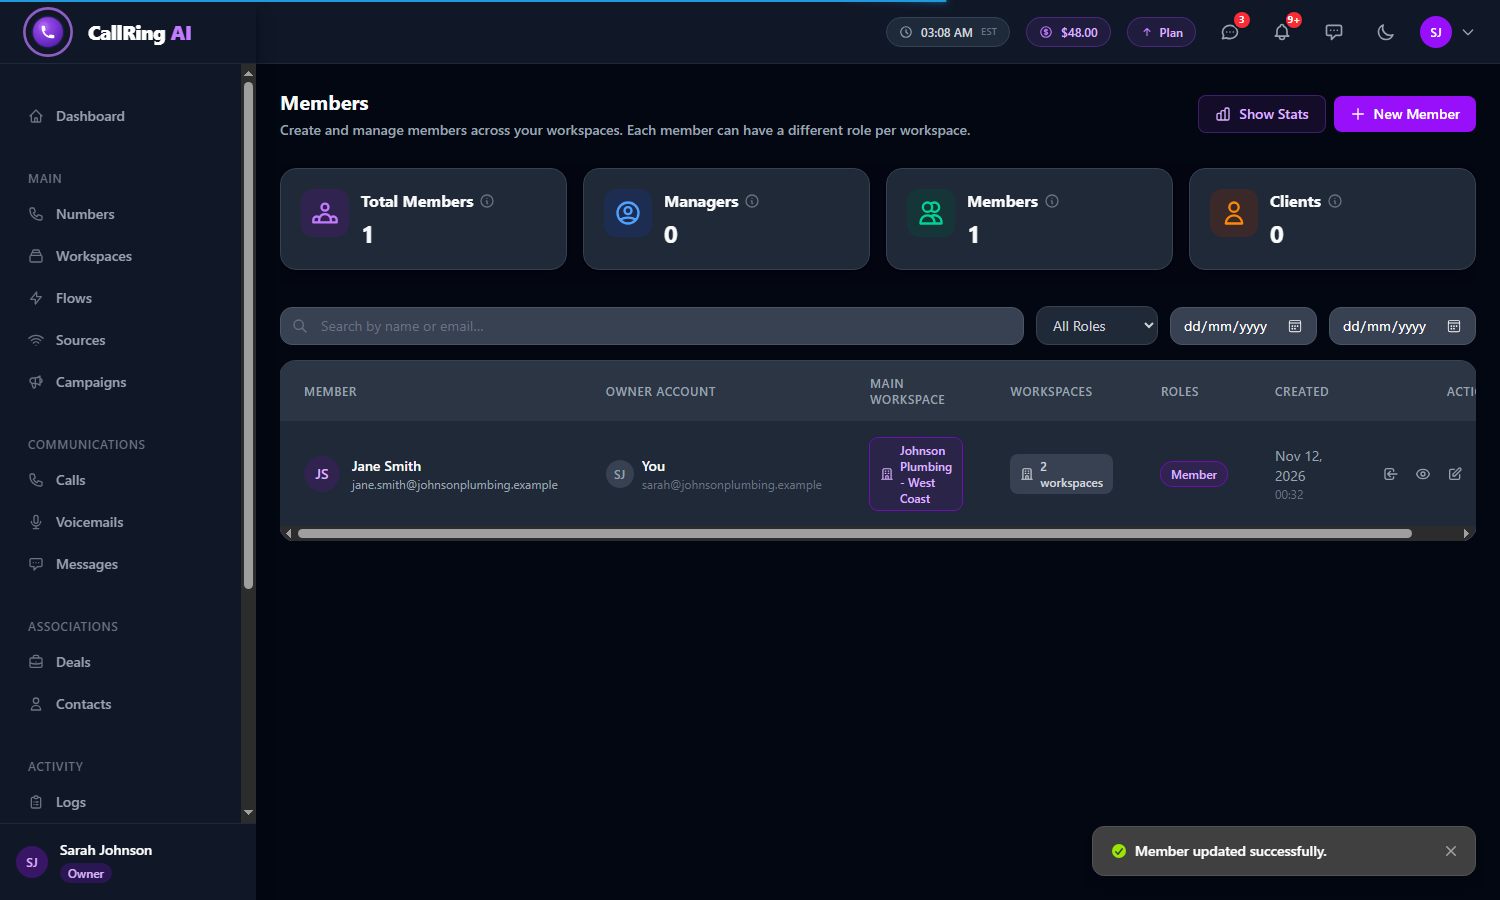
A green message confirms the member was updated, and the count now shows 2 workspaces
Good to know
- The member can now switch into the new workspace, and sees only the numbers you ticked.
- The member’s permissions (the Job section) apply to all of their workspaces. See How to Create a Team Member.
- Main Workspace is the workspace they open after login. Change it on the same page if you want a different one.
Need help? Open a support ticket from your account.