How to Manage Permissions for a Team Member
Permissions decide which parts of CallRing a team member can see and change. You set them in the Job section on the Edit Member page, and only the main account owner can change them. Your members will look different from the sample data in the screenshots.
4 min read · 6 steps
Before you start
- Permissions belong to the team member, not to one workspace. The same permissions apply in every workspace you have given them.
-
Step 1: Open the member
In the left menu, click Members. Find the team member. In the Actions column on the right, click the pencil icon (Edit).
- If you cannot see the icons, scroll the table to the right.
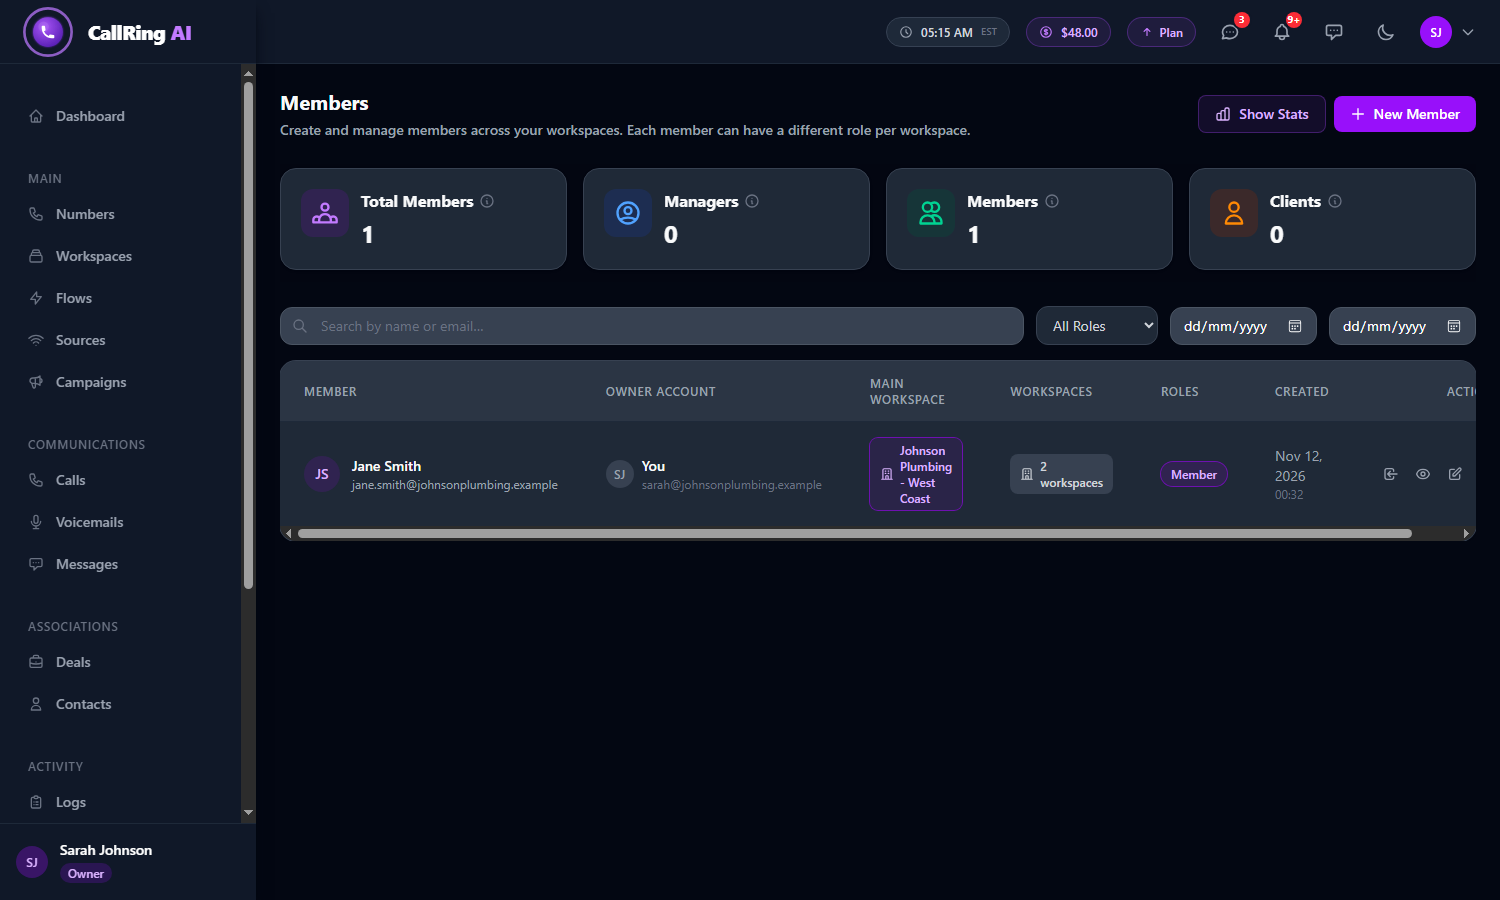
Click the pencil icon next to the member to edit them -
Step 2: Find the “Job” section
Scroll down to the section called Job (“Control which sections this member can view, create, or update.”). Each row is a part of CallRing. There are three columns: View, Create and Update.
- The colors: green switch = View, purple = Create, amber = Update. A gray switch is off.
- N/A means that permission does not exist for that row.
- Rows marked Always on cannot be changed: Dashboard, Calls, Messages and Voicemail. They are always visible, but only for the phone numbers you assigned to the member.
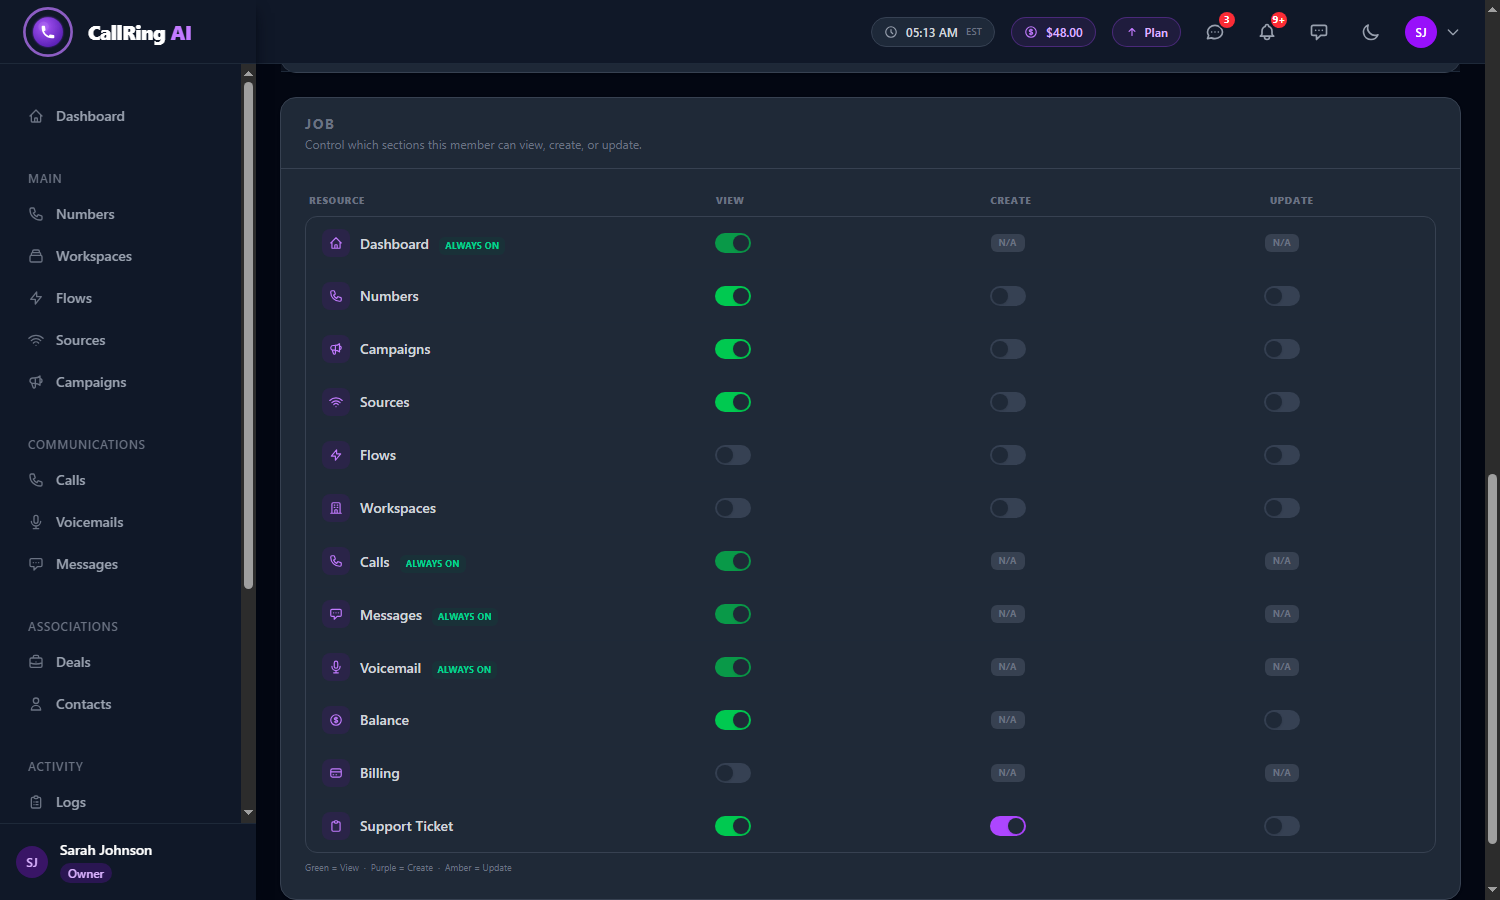
The Job section: each row is a part of CallRing, with View, Create and Update switches -
Step 3: Switch permissions on or off
Click a switch to turn it on or off. The columns mean:
- View: the member sees that section in their left menu and can open it. Without View, the section is hidden from their menu.
- Create: the member can add new items there, for example a new campaign.
- Update: the member can edit existing items.
- You can change Numbers, Campaigns, Sources, Flows and Workspaces (View, Create, Update).
- You can change Balance (View, Update), Billing (View only) and Support Ticket (View, Create, Update).
- In the screenshot: Flows View is switched on, Campaigns Create and Update are switched on, and Support Ticket Create is switched off.
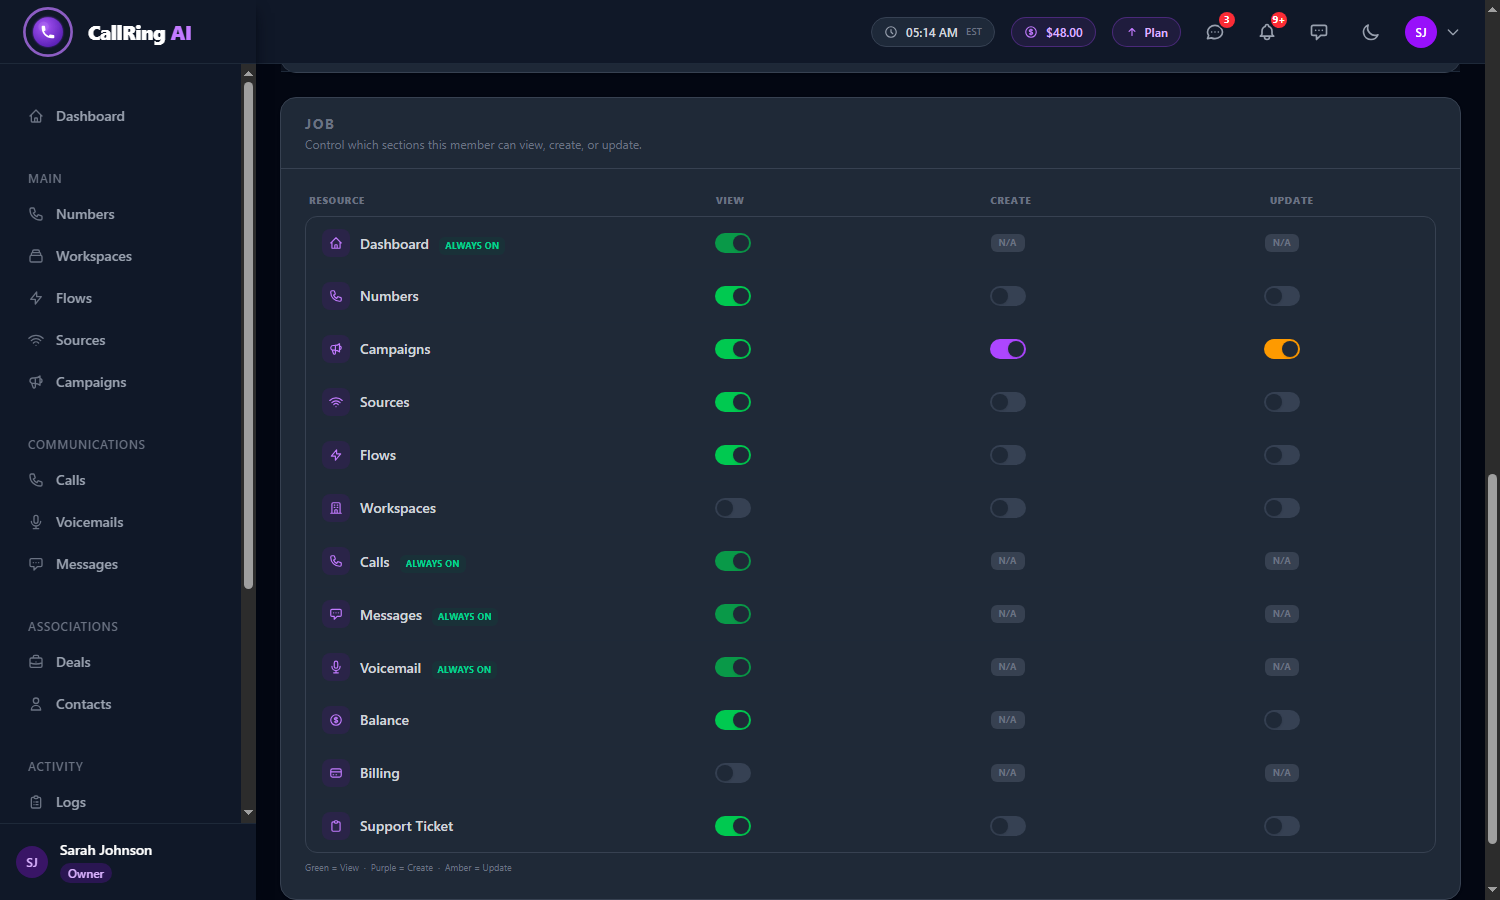
Switch on only what the member needs Warning: Create and Update do not switch View on for you. If a member should work in a section, switch on View as well, so they can see it in their menu. -
Step 4: Save
Scroll to the bottom of the page and click the purple Update Member button. Cancel leaves without saving.
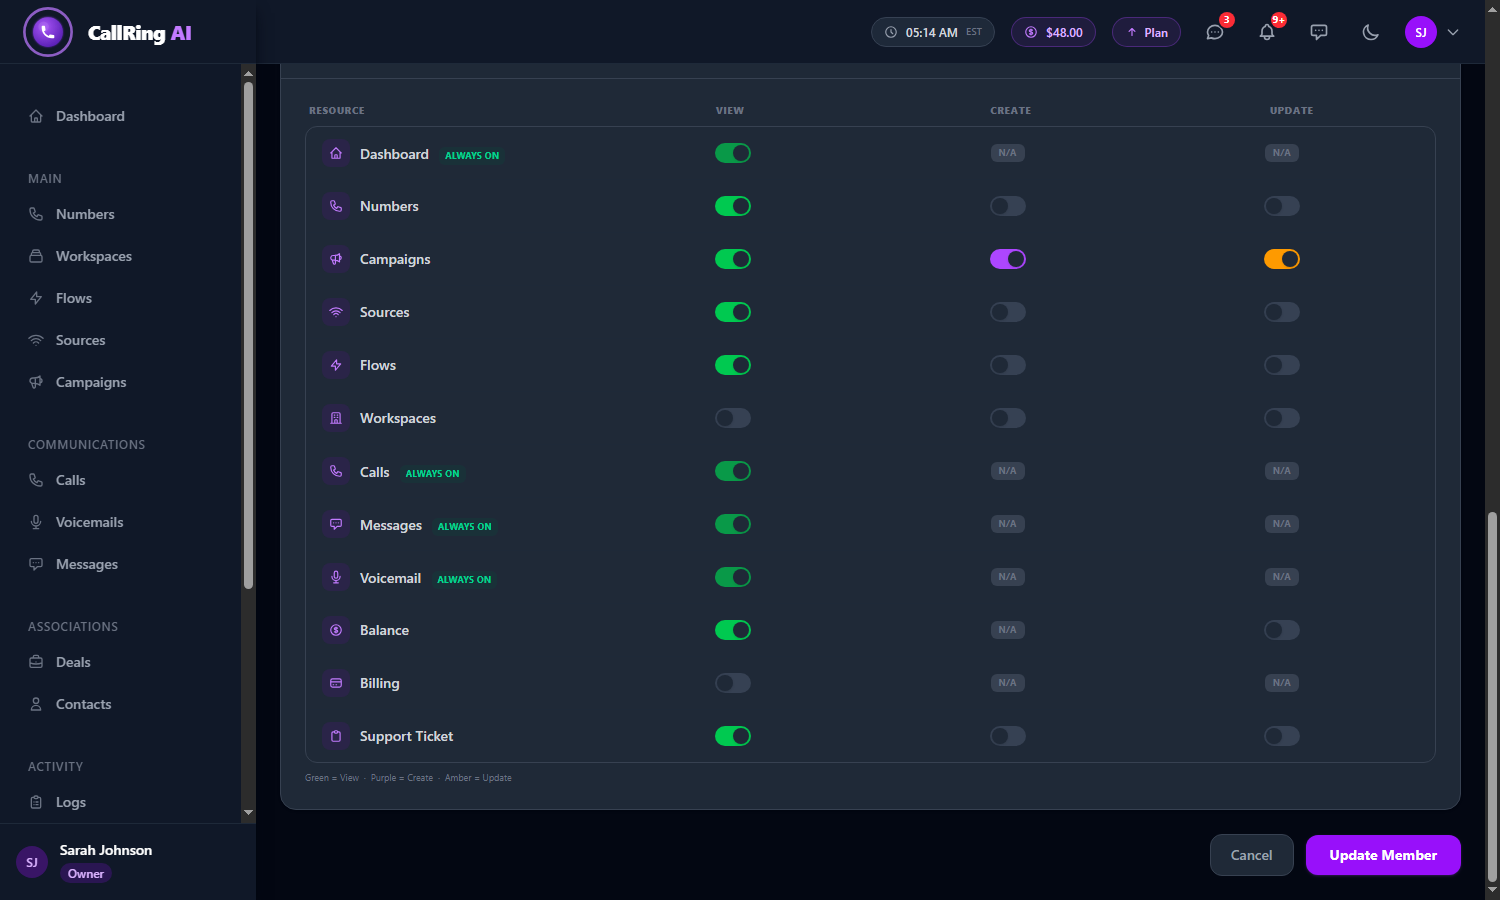
Click Update Member at the bottom of the page Tip: Give the minimum the member needs. You can add more later. -
Step 5: Confirm it was saved
You return to the Members list, and a green message says “Member updated successfully.” The change applies the next time the member opens or refreshes a page.
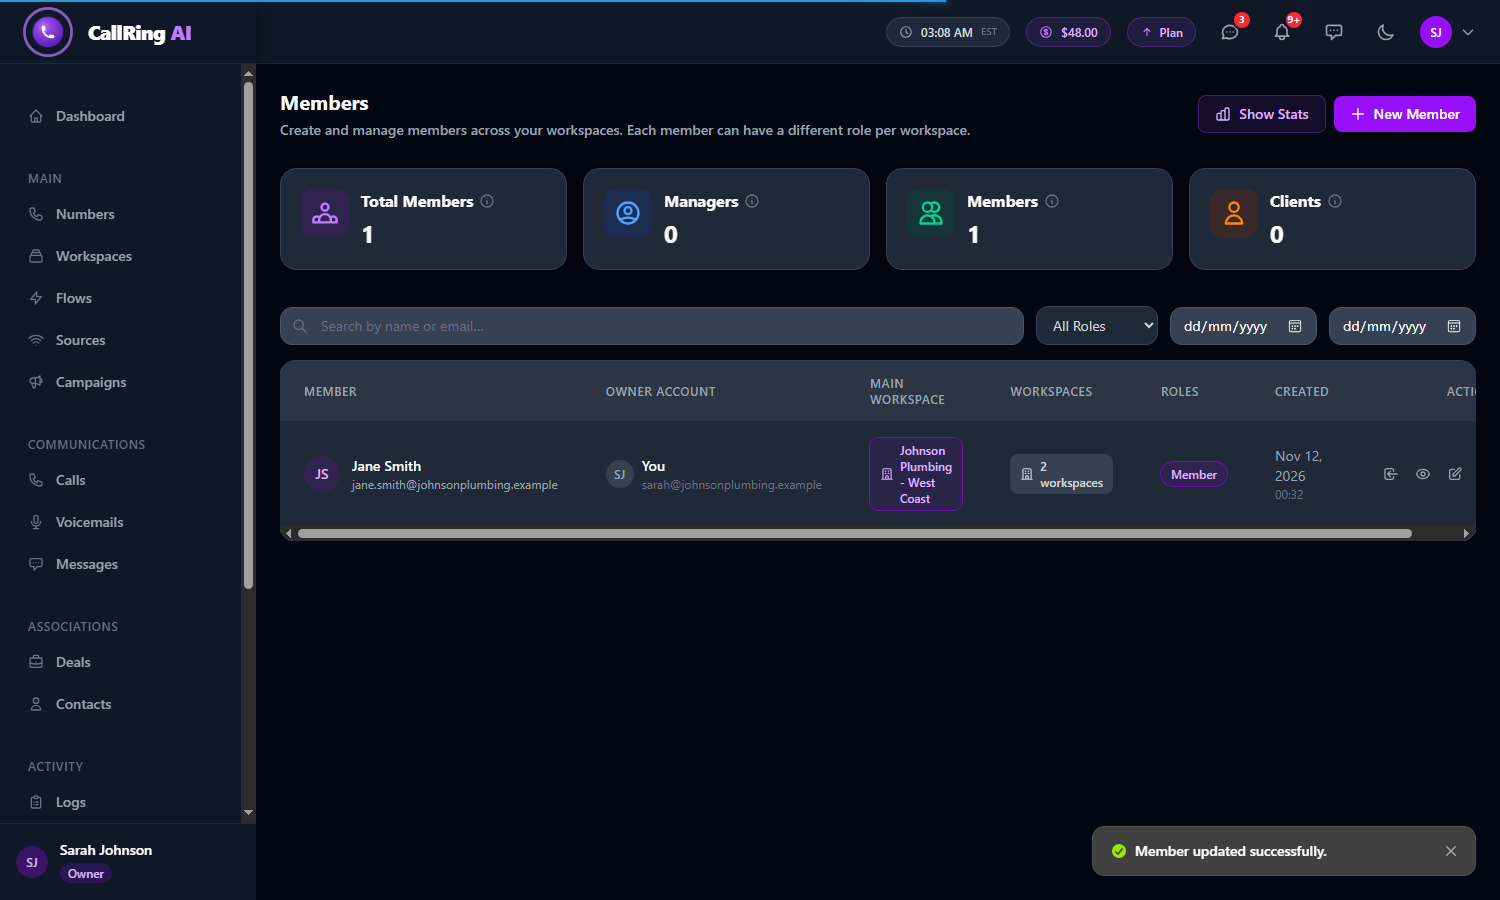
A green message confirms the member was updated -
Step 6: Double-check with “View Job”
On the Members list, click the eye icon (View Job) in the Actions column. A window, Job Access for and the member’s name, lists every row with On or Off for View, Create and Update. Click Close when done.
- Use this any time to check what a member can do, without opening the edit page.
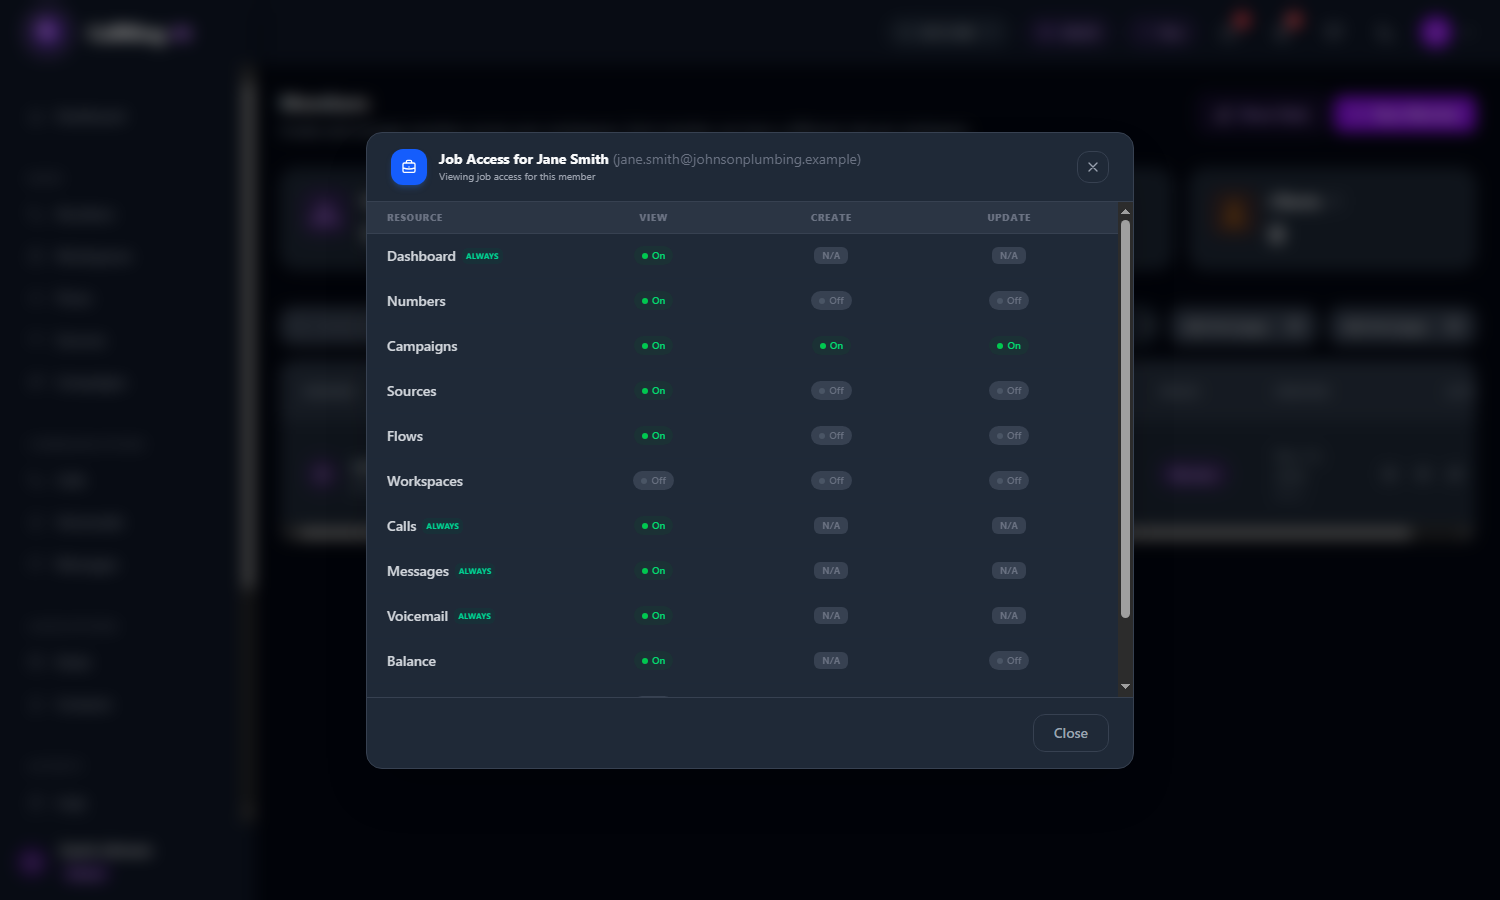
View Job lists what the member can do, with On or Off for each switch
Good to know
- Members never see a section whose View is off. Their left menu only shows what you allowed.
- Members can only see the calls, messages and voicemails of the phone numbers assigned to them. See How to Assign a Workspace to a Team Member.
- If a member says they cannot see something, check their Job access first.
- Billing is visible only when you switch on Billing View. Balance View shows the balance; the full Balance page needs Balance Update.
Need help? Open a support ticket from your account.