How to Handle Custom Webhooks
A webhook lets CallRing automatically send the details of a call to another system the moment something happens, for example to your CRM, your own software or an automation tool. You choose which numbers it covers, which events to send, which details to include, and where to send them. CallRing sends each event as an HTTP POST with a JSON body to a web address (URL) that you provide. The receiving system must be reachable on the internet at an “https://” address. Only the main account owner can set this up. Your records and values will look different from the sample data in the screenshots.
7 min read · 7 steps
Before you start
- You need a web address (URL) that can receive the data, for example from your developer or your automation tool. It must start with https://.
- The steps in CallRing itself need no technical knowledge.
-
Step 1: Enable Custom Webhook
In the left menu, under Services, click Extra Features. Scroll down to Integrations. Find the card Custom Webhook and switch it on (in the example, it is free). When it shows Enabled, click Manage Custom Webhook.
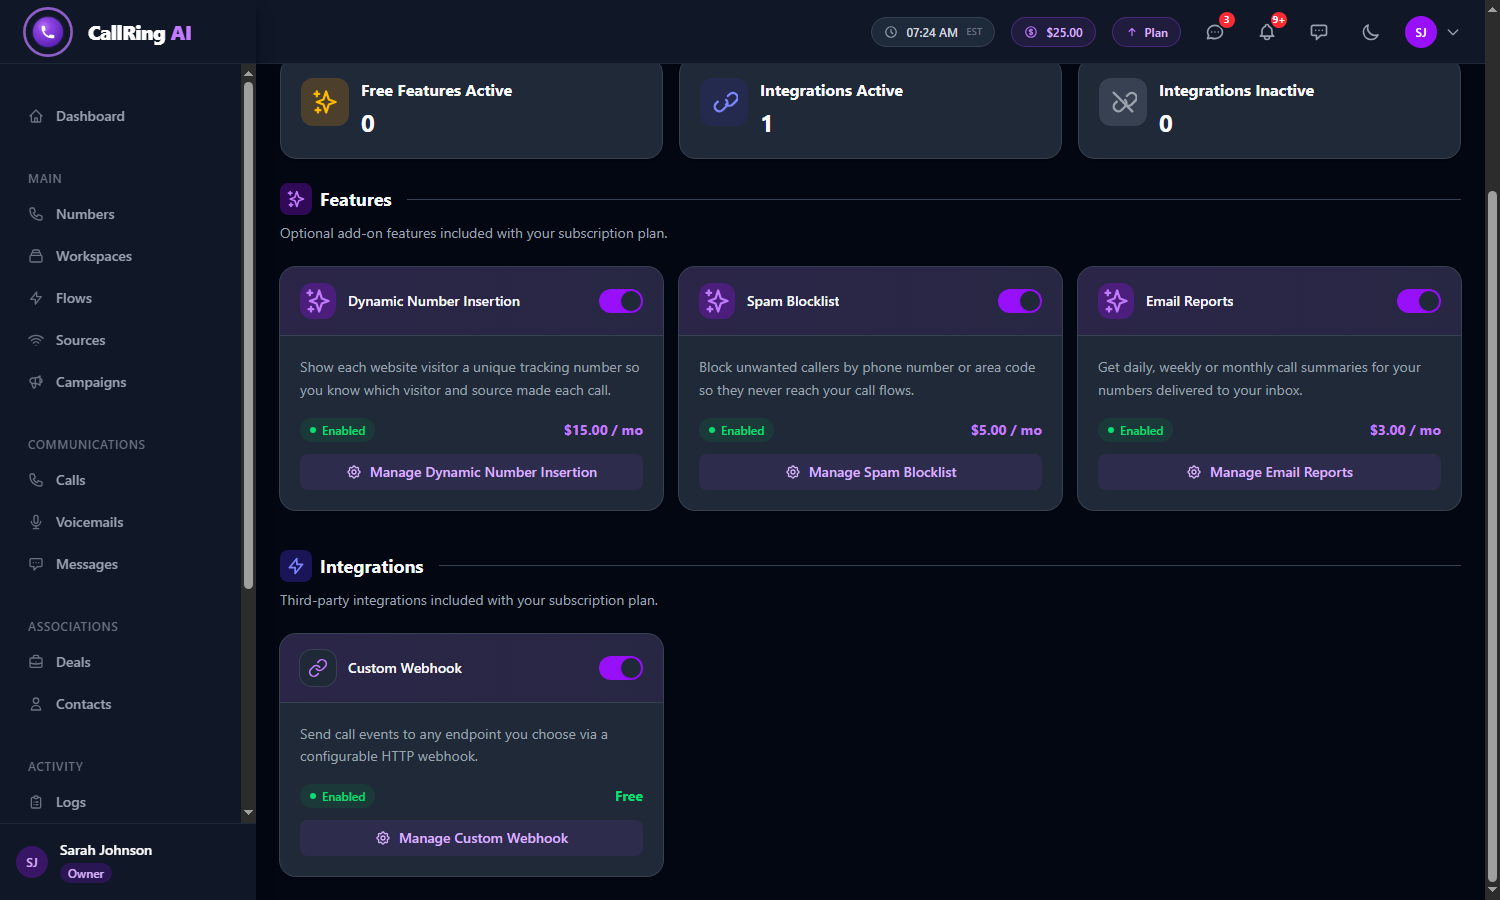
Under Integrations, the Custom Webhook card shows Enabled: click Manage Custom Webhook -
Step 2: Turn the master switch on
The Custom Webhook page opens. At first, the switch at the right of the card says Webhooks paused. Click it so it says Webhooks on.
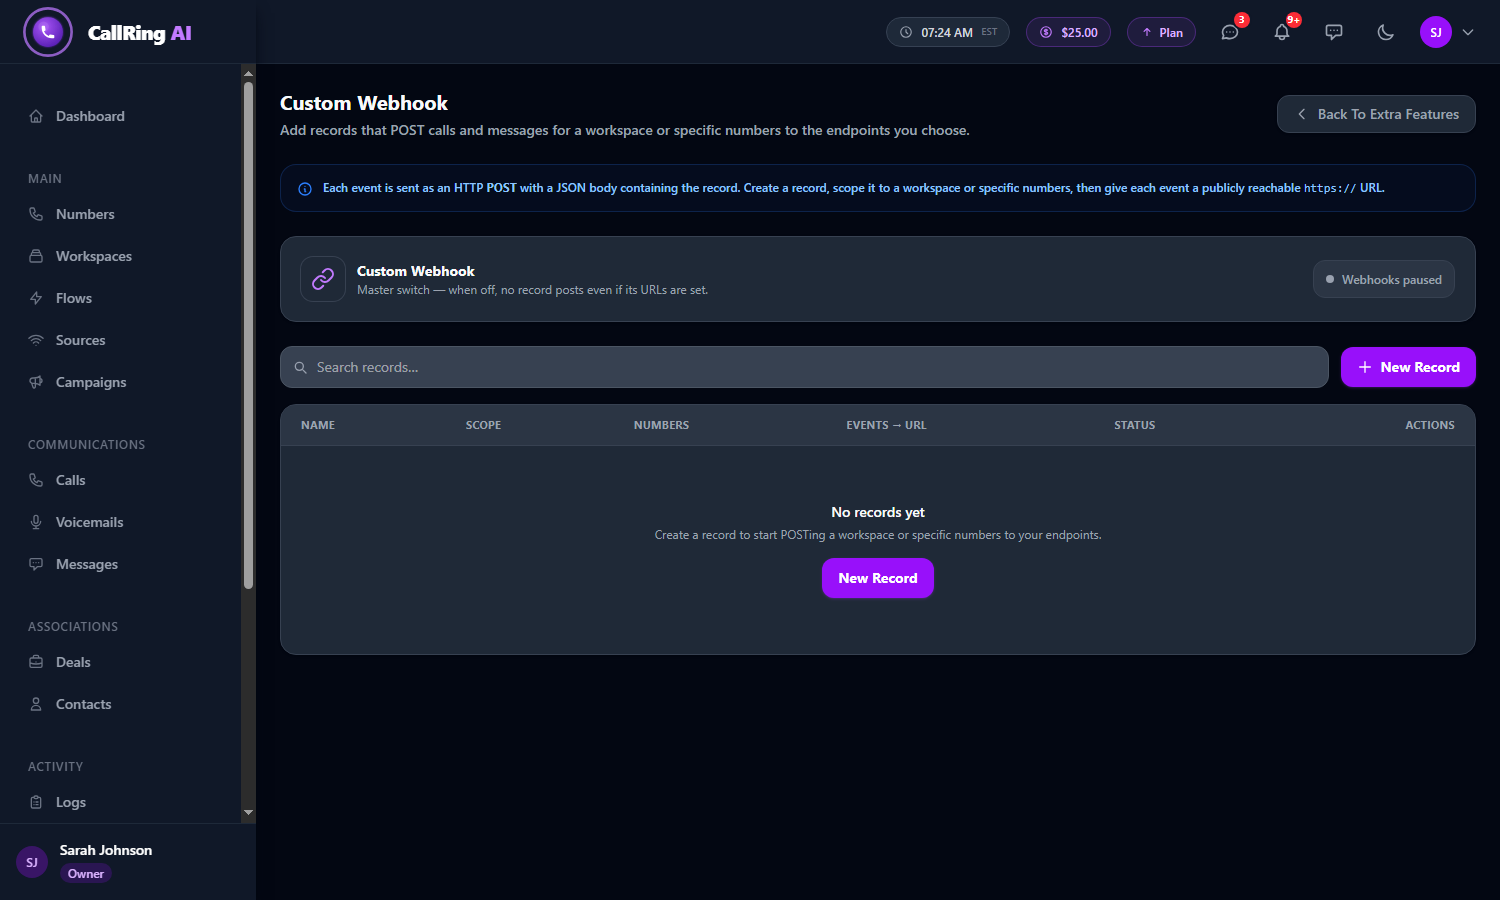
At first, the switch says Webhooks paused 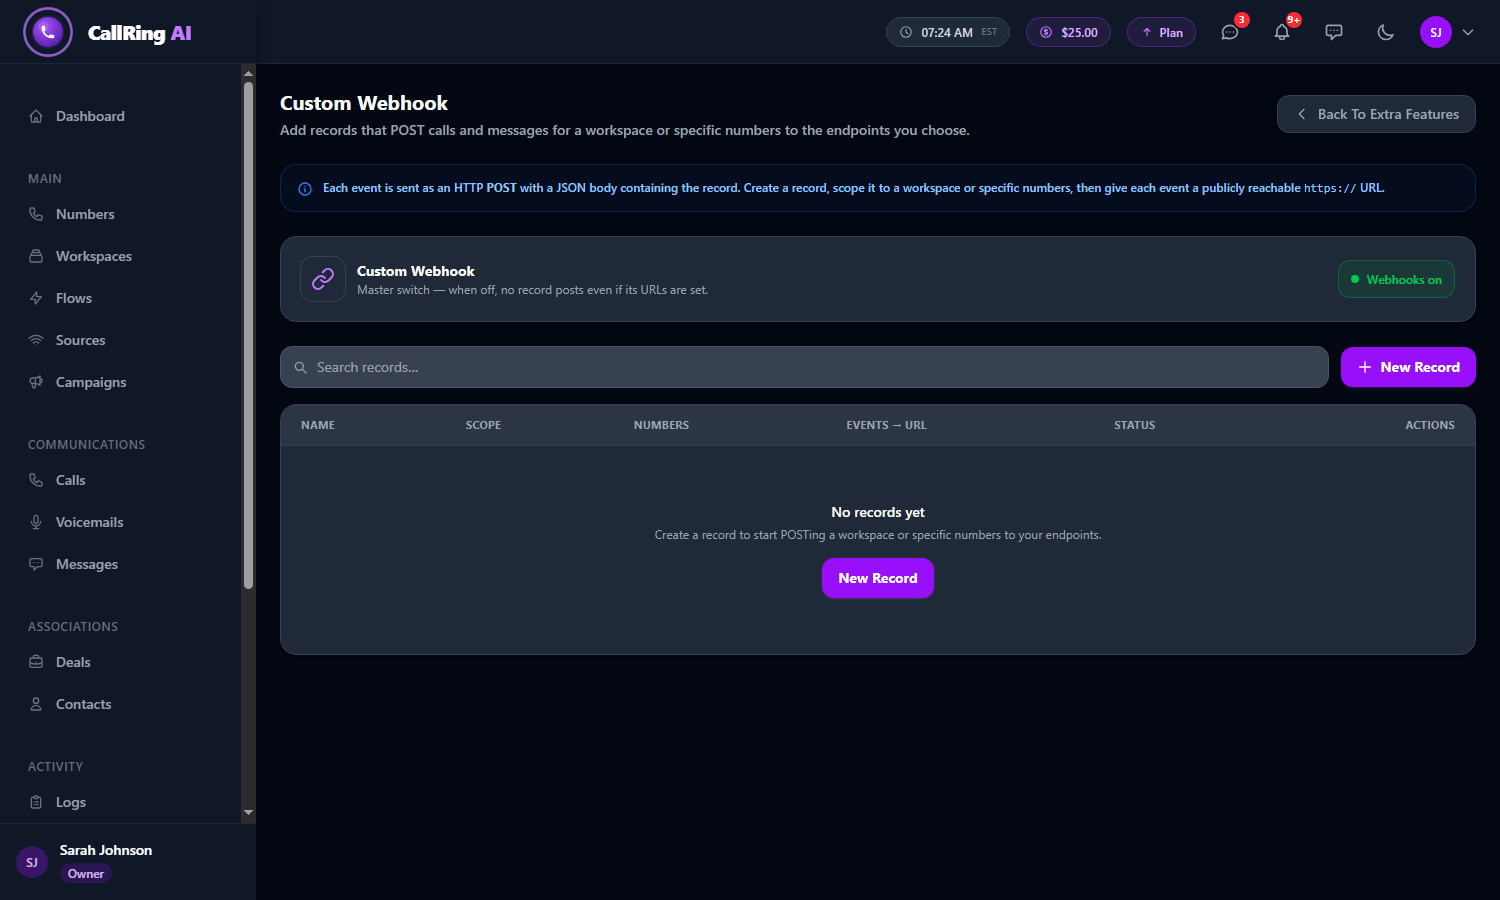
Click it so it says Webhooks on Warning: This is a master switch. While it says Webhooks paused, nothing is sent, even if you have set up records with URLs. -
Step 3: Create a record
Click the purple New Record button. A “record” is one webhook rule: which numbers, which events, and where to send them.
- Record name: a name you will recognize, for example “Sales Team - East Coast”.
- What should this record cover? Choose By workspace (pick a workspace; all its numbers are included, and you can untick some), or By specific numbers (tick any of your numbers from all workspaces).
- The line Numbers (2 of 2 selected) shows how many numbers are included. Use All or None and the search box to change the selection.
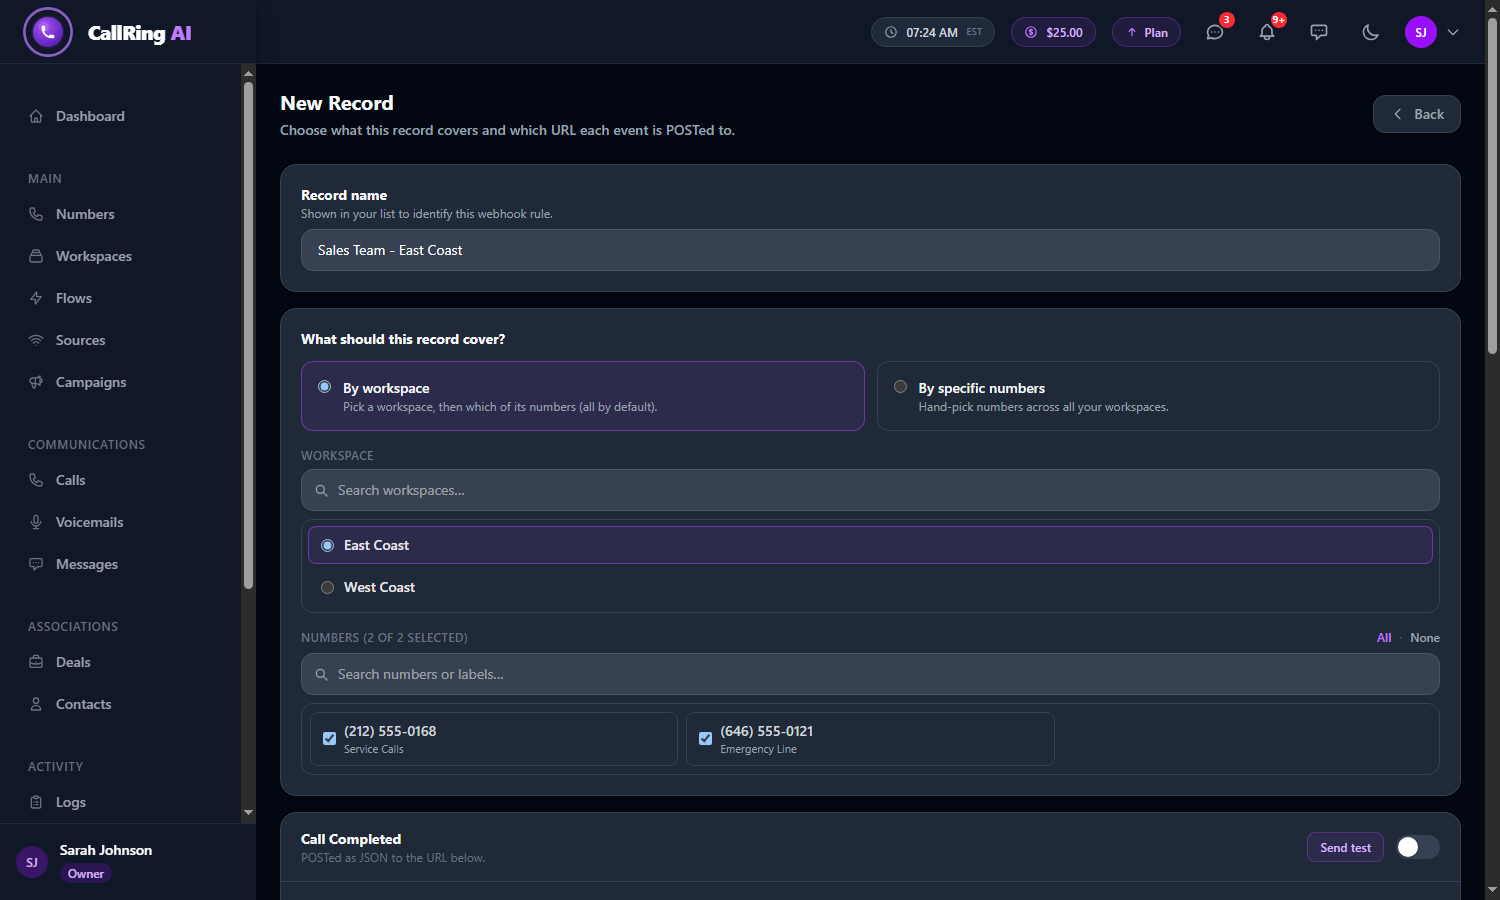
New Record: name it and choose By workspace 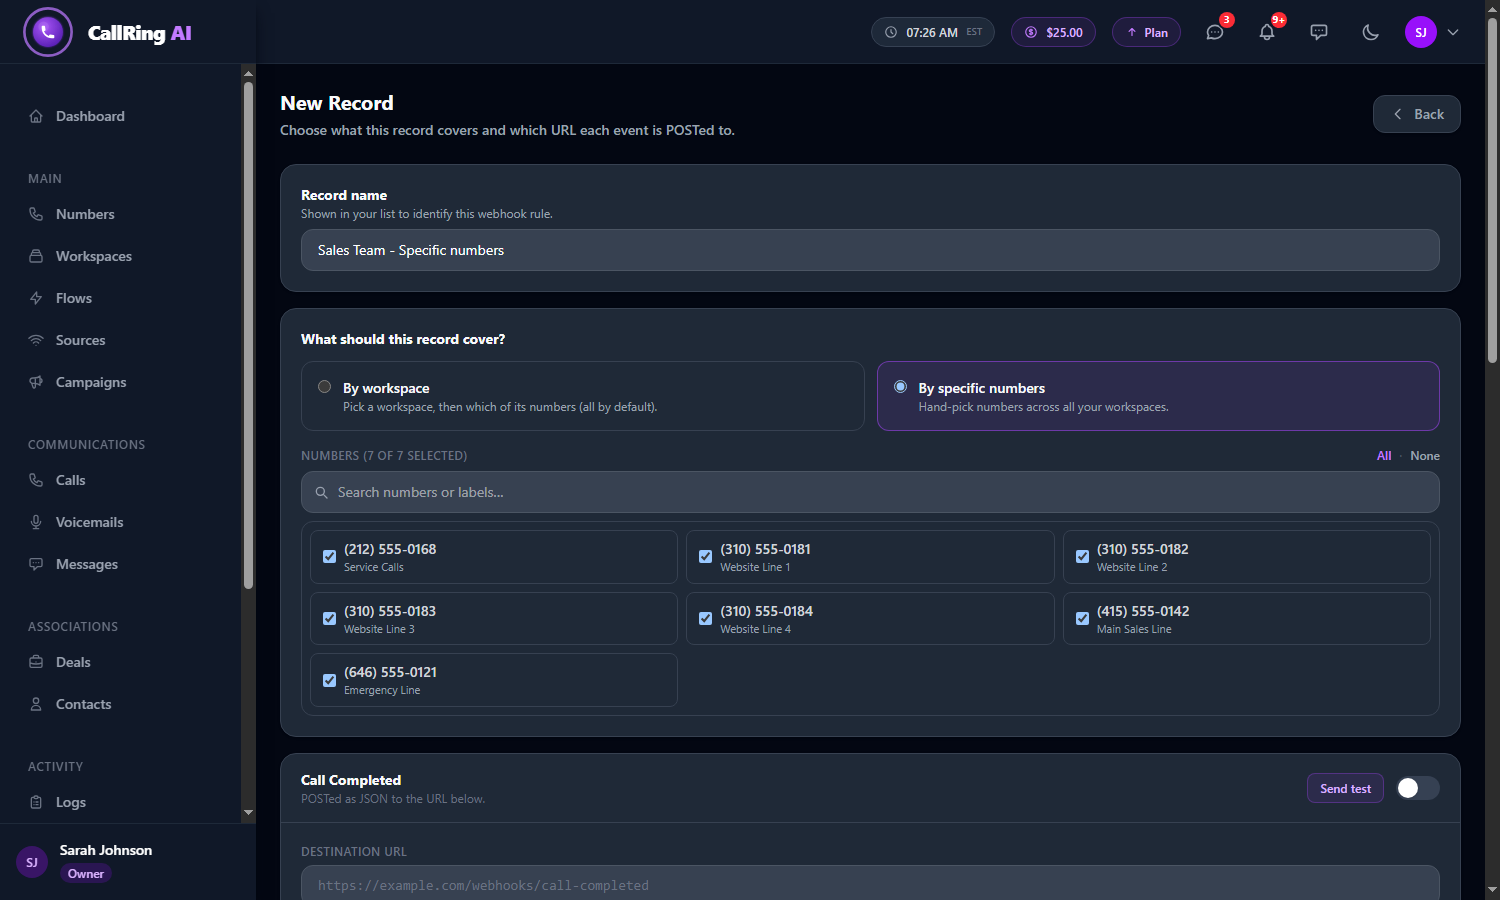
Or choose By specific numbers and tick your numbers Note: Events are only sent for the numbers in the record. At least one number must be selected. -
Step 4: Choose events, URLs and details
Scroll down to the event cards: Call Completed, Voicemail and Missed Call.
- Call Completed: sent when a call has finished.
- Voicemail: sent when a caller leaves a voicemail.
- Missed Call: sent when a forwarded call was not answered.
- For each event you want, switch its toggle on, then paste the address into Destination URL (for example https://example.com/webhooks/call-completed). Each event can have its own URL.
- Fields to include: tick the details you want in the message. The choices are Date & Time, Business Number, Caller Number, Contact Name, Direction, Call Status, Duration, Source, Recording Link and Associated Deal.
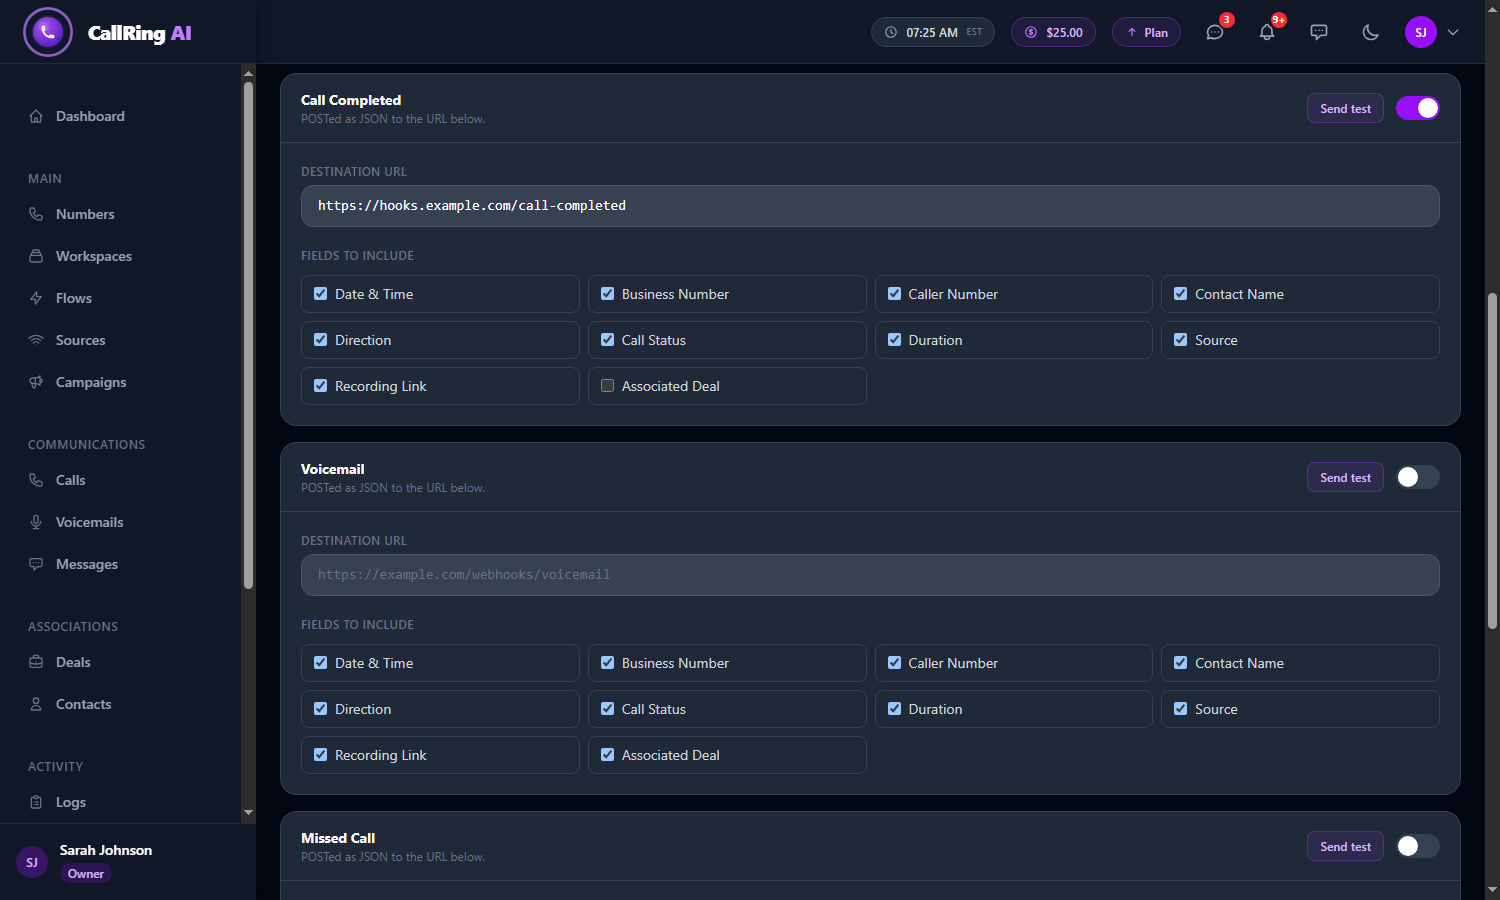
Switch an event on, add its Destination URL and tick the fields to include 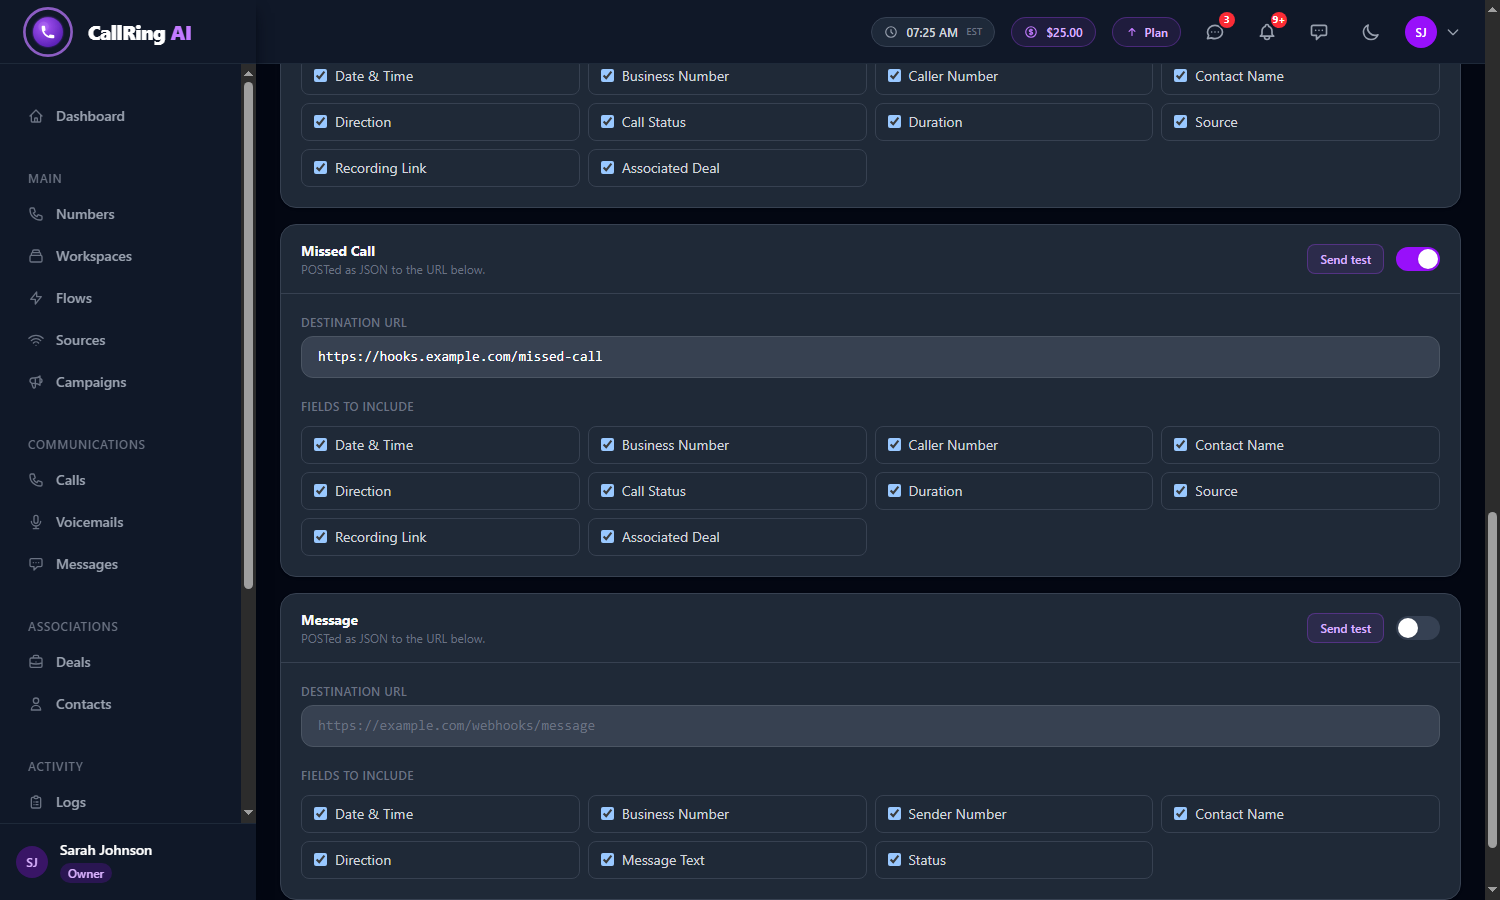
Each event has its own switch, URL and fields Warning: If you switch an event on, you must add its URL, or CallRing asks you to add one or turn the event off. Only include the details the receiving system needs. -
Step 5: Test it first
Click Send test on the event. CallRing sends a sample message to your URL right away. A green message, “Test payload delivered to your endpoint.”, means your system accepted it.
- A red message means CallRing could not reach it. Check the URL, and check that your system answers with a success code (2xx).
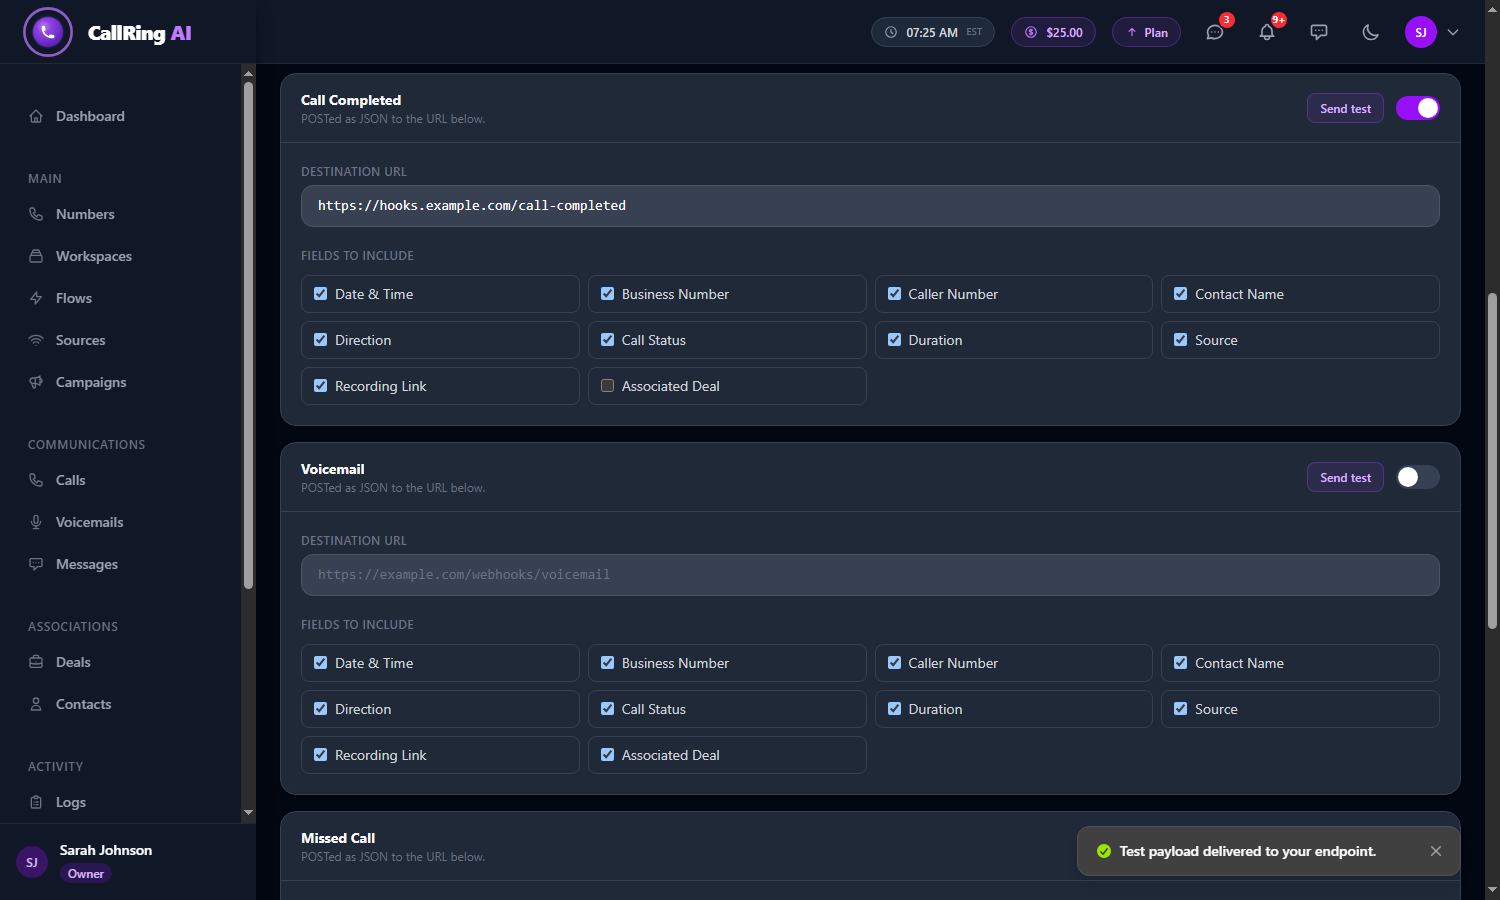
A green message confirms the test was delivered Note: Test messages use placeholder values such as “sample”, and the data contains every field, whatever you ticked. A real message holds the real values for only the fields you ticked. -
Step 6: Save and manage your records
Click the purple Create Record button at the bottom. A green message, “Record saved.”, appears. The list shows each record’s Name, Scope (the workspace or “Specific numbers”), how many Numbers, the events with their URLs, and the Status (Active or Paused).
- The pause/play icon pauses or resumes one record.
- The pencil edits it. Click Save Changes to update it.
- The bin deletes it.
- Use the search box to find a record by name or workspace.
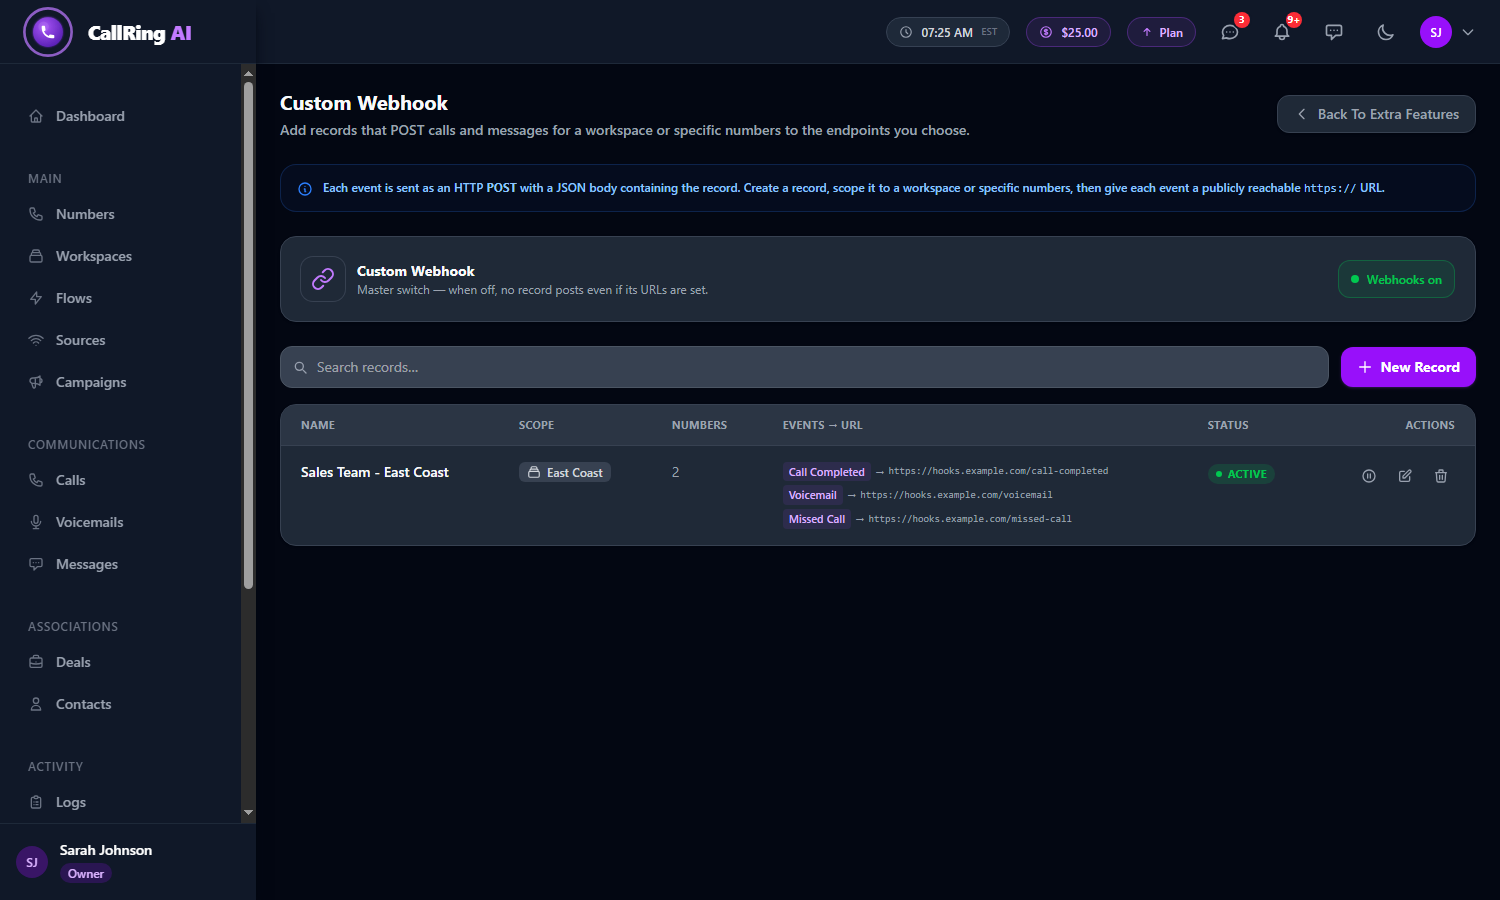
Your records list, with its events and URLs -
Step 7: What your system receives
This part is for your developer or automation tool. Each event is one HTTP POST request with a JSON body. A real message has your real values and only the fields you ticked. This is an example:
{ "event": "call_completed", "test": false, "sent_at": "2026-11-13T12:25:11+00:00", "data": { "datetime": "Nov 13, 2026 12:25", "number": "(415) 555-0142", "from_number": "(310) 555-0111", "contact": "Jane Smith", "direction": "Inbound", "status": "completed", "duration": "02:15", "source": "Google Ads", "recording": "https://...", "deal": null } }- event is call_completed, voicemail or missed_call. test is true only for messages sent with Send test.
- Your system should answer quickly with a success code (2xx). CallRing waits up to 10 seconds for the answer.
Note: These are sample values for illustration. Do not copy them as exact formats.
Good to know
- You can create several records, for example one per workspace, each with its own URLs.
- To stop sending without deleting anything, pause a single record, or switch the master switch to Webhooks paused to stop everything.
- Events are queued and sent shortly after the call, not at the exact second.
- CallRing does not add a password or signature to the messages. Use a hard-to-guess URL or protect your endpoint on your side.
Need help? Open a support ticket from your account.