How to Create a Team Member
A team member is someone you invite into your CallRing account, such as a sales rep or a manager. They log in with their own email and password. You decide which workspaces they can enter, which phone numbers they can see, and what they can view, create or edit. Their role can be Manager, Member or Client, and only the main account owner can create members.
5 min read · 6 steps
Before you start
- You need at least one workspace, with your phone numbers attached to it. See How to Create a Workspace and Connect a Number.
- If you have no workspace, the page shows “No workspaces yet” with a link, Create a workspace first.
-
Step 1: Open the Members page
In the left menu, under Services, click Members. Four cards show Total Members, Managers, Members and Clients. Then click the purple New Member button at the top right.
- Hover over the i icon on a card to see how it is calculated.
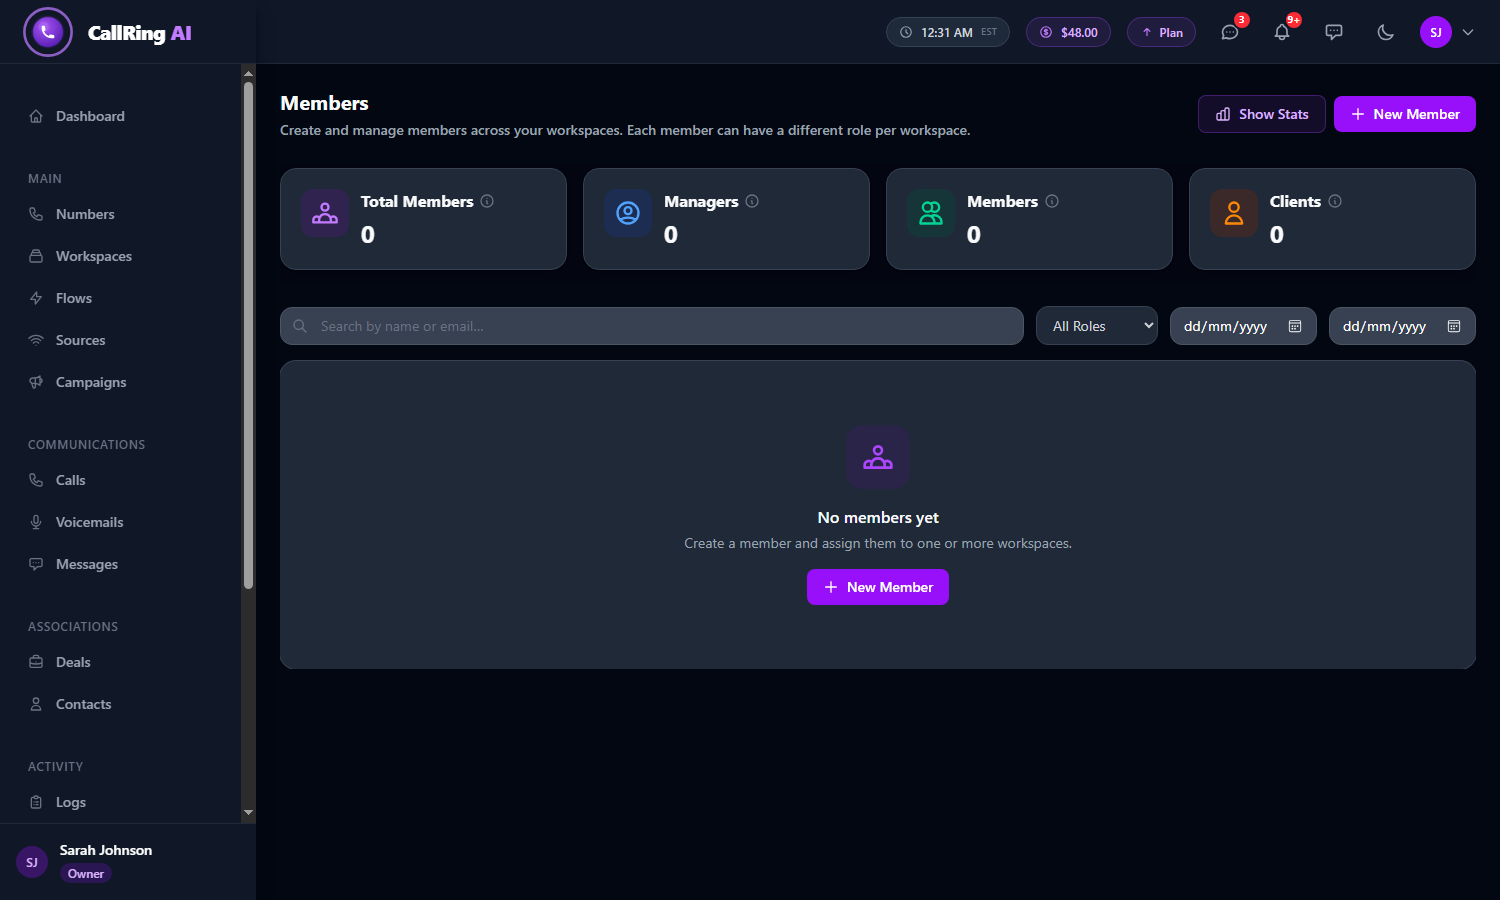
The Members page: click New Member at the top right Note: Your members and workspaces will look different from the sample data in the screenshots. -
Step 2: Check the cost banner
The Create Member page opens with a banner at the top.
- Green banner: “You have X free member slots remaining. This member will be added at no charge.”
- Amber banner (no free slots left): “Adding this member will deduct $X from your balance.” The amount depends on your plan.
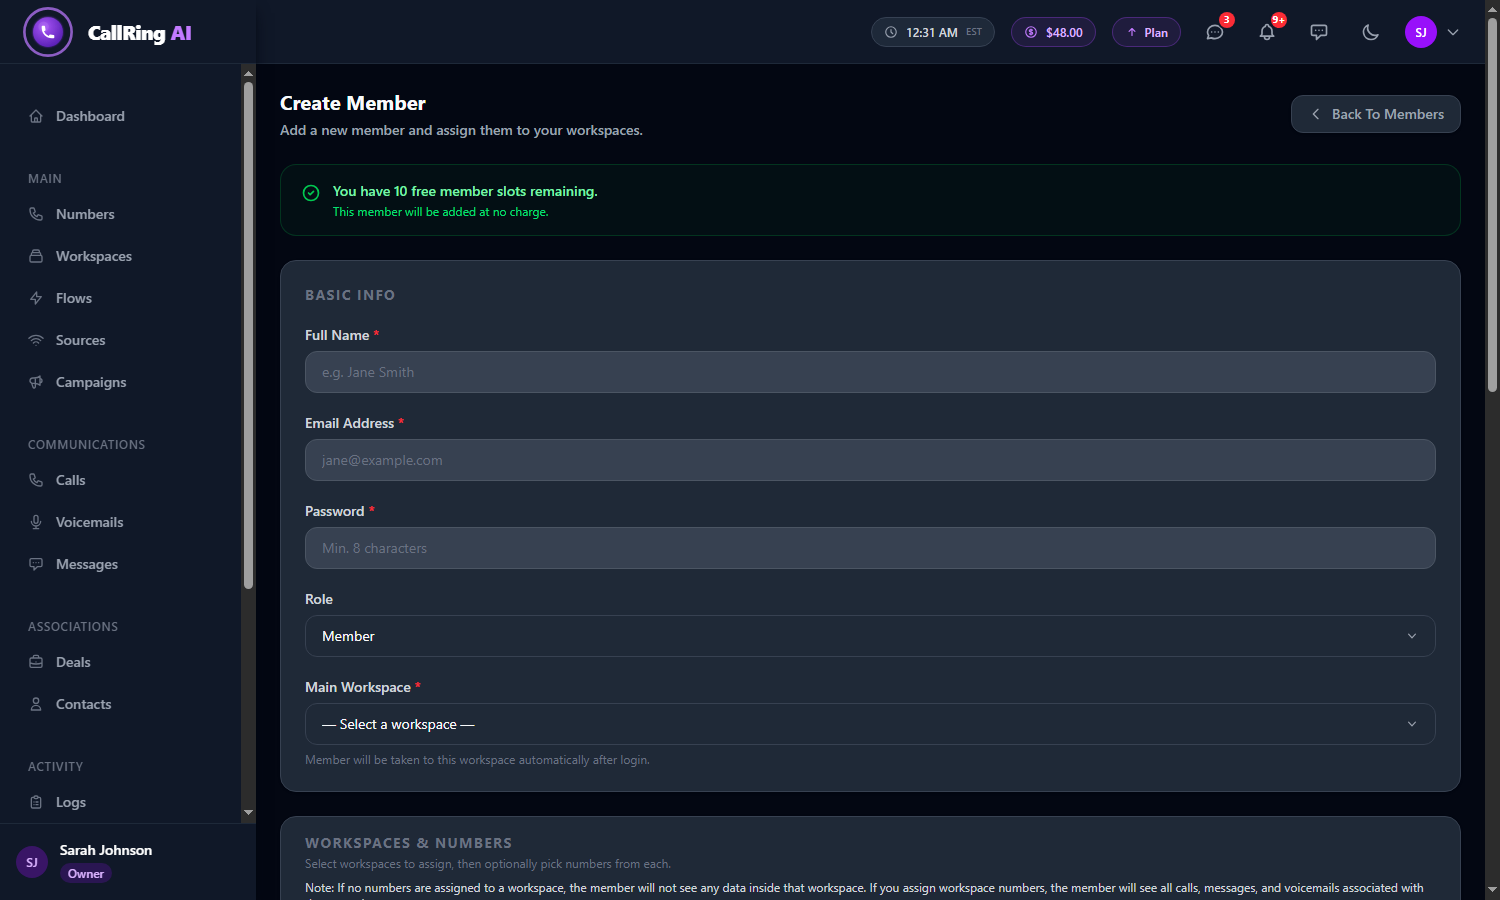
The Create Member page, with the green free-slot banner at the top -
Step 3: Fill in the basic info
Under Basic Info, fill in these fields:
- Full Name (required), for example “Jane Smith”.
- Email Address (required): the email the member will log in with. It must not already be used by anyone else in CallRing.
- Password (required): at least 8 characters.
- Role: Manager, Member (the default) or Client.
- Main Workspace (required): the workspace the member lands in right after logging in.
- If you click Create Member before filling the required fields, red messages appear under the fields. At the top you see “The name field is required.”, “The email field is required.” and “The password field is required.”
- Further down you see “Please select a main workspace.” and “Please select at least one workspace.” Fix them and try again.
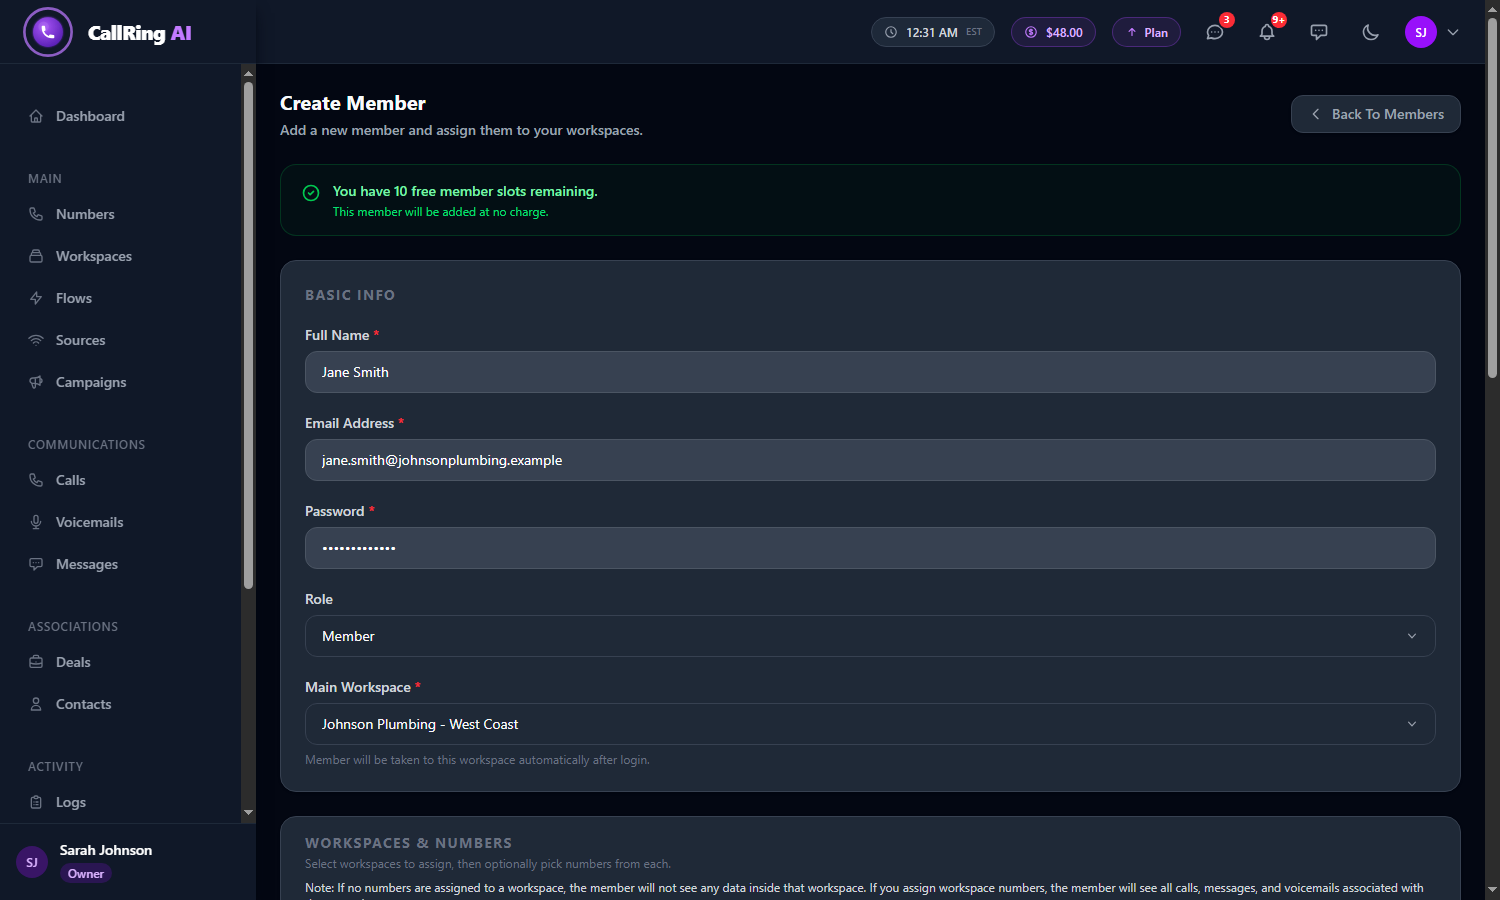
Basic Info filled in with sample details 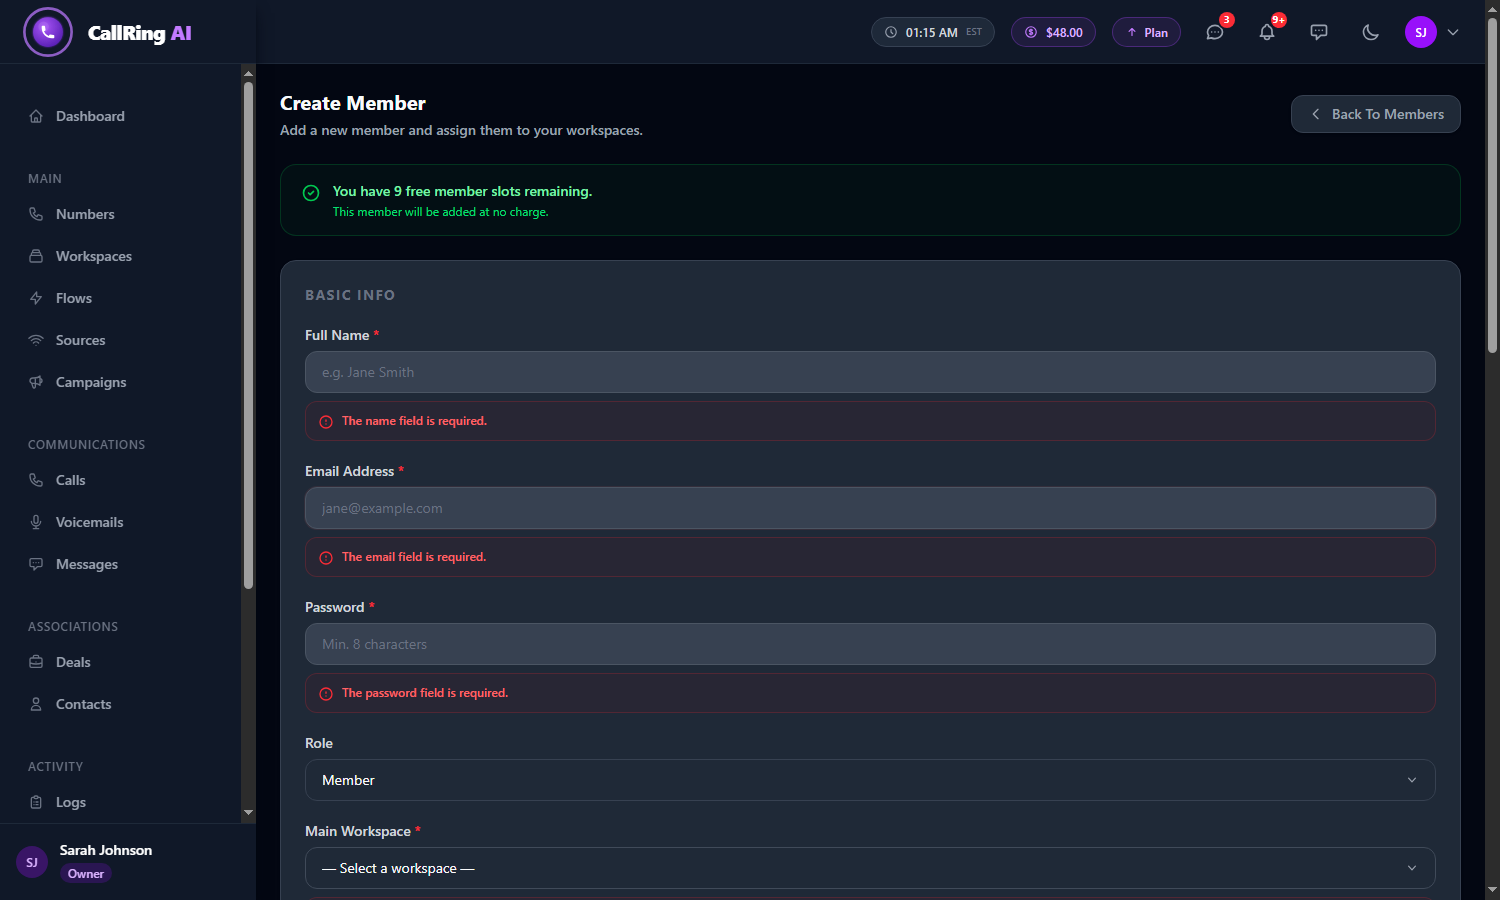
Red messages appear under any required field you left empty 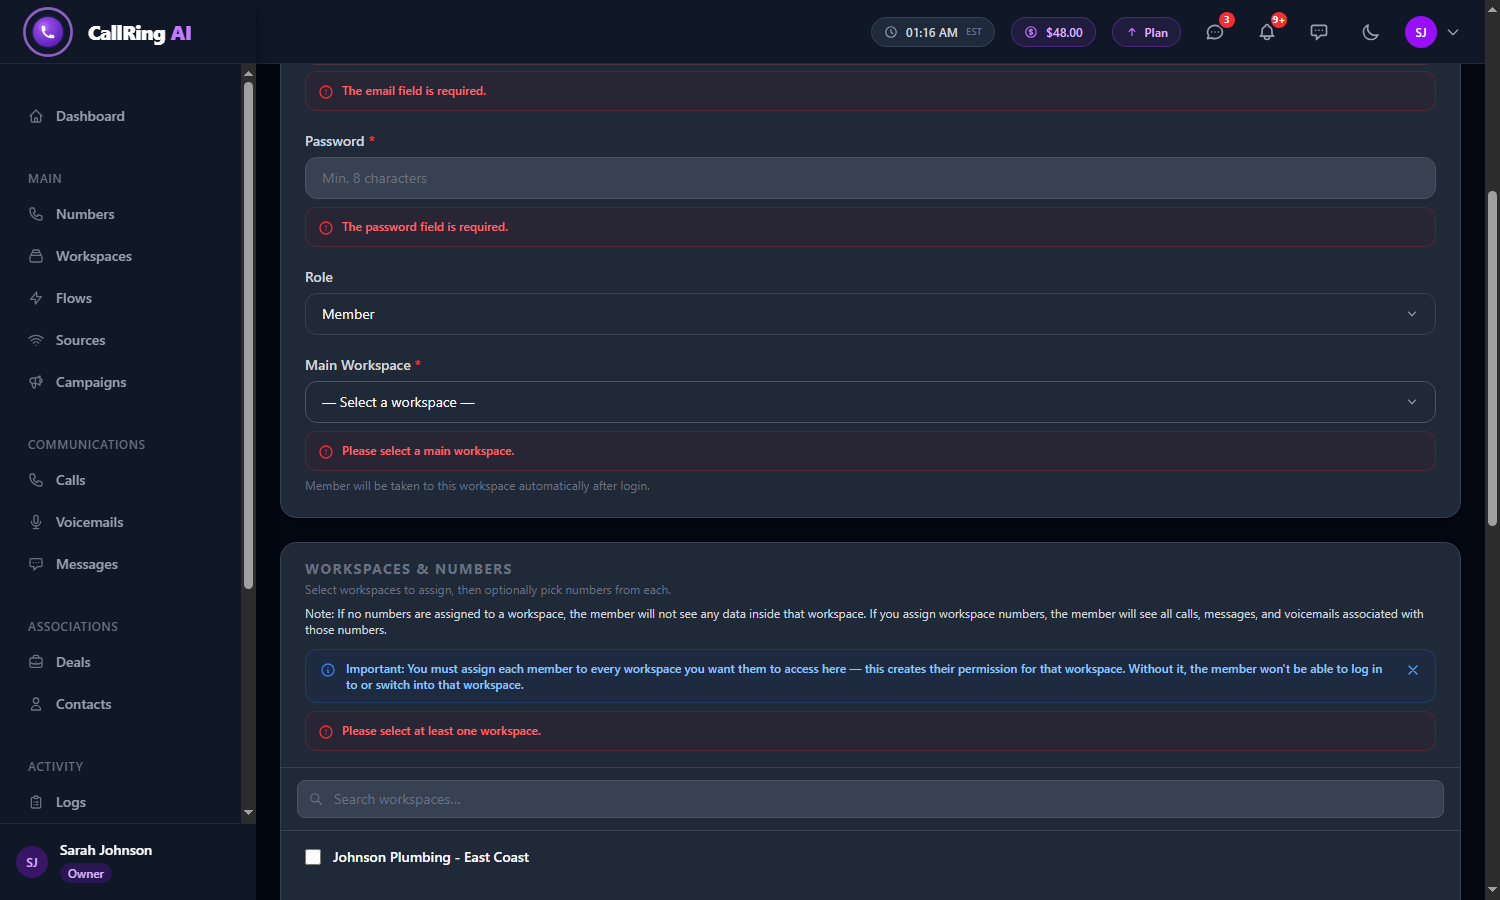
Further down, you must pick a main workspace and at least one workspace Tip: Choose a temporary password and ask the member to change it after their first login. You share the email and password with them yourself. CallRing does not email them. -
Step 4: Choose workspaces and numbers
In Workspaces & Numbers, tick every workspace the member should access. The Main Workspace is ticked automatically and carries a Main Workspace label.
- Under each ticked workspace you see “Numbers from” and the workspace name. Tick the phone numbers the member may use.
- Use Search workspaces... if you have many workspaces.
- If you pick no numbers for a workspace, the member sees no data in it. If you pick numbers, they see all calls, messages and voicemails of those numbers.
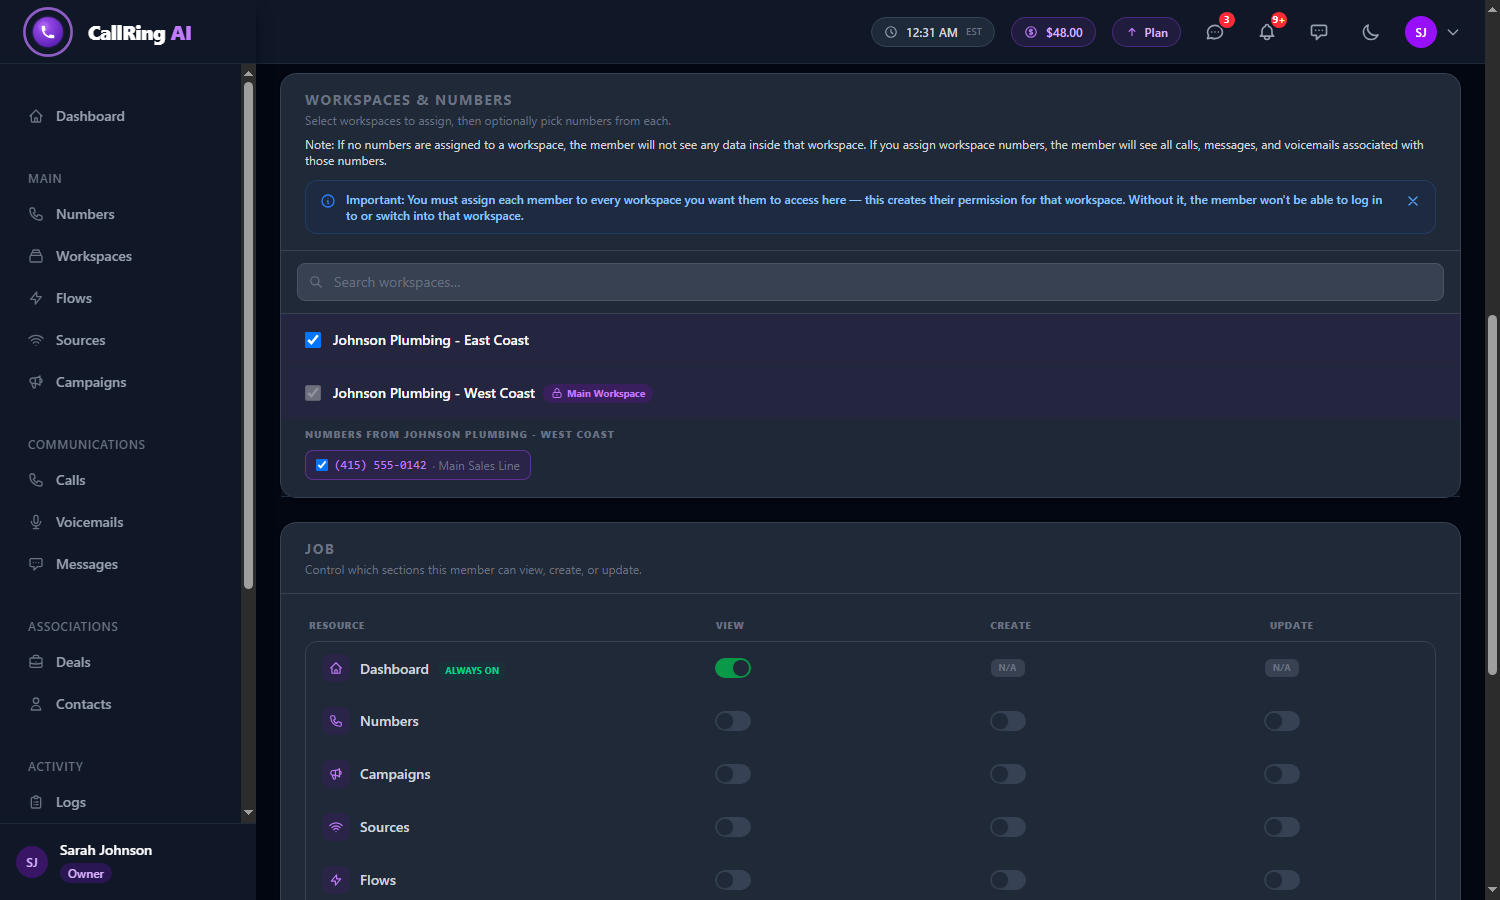
Tick the workspaces and the phone numbers the member may use Warning: Assign the member to every workspace they need. Without that, they cannot log in to or switch into that workspace. -
Step 5: Decide what they can do (Job)
In the Job section, each row is a part of the app and each column is a permission: View, Create and Update. Switch on only what the member needs.
- The colors: green switch = View, purple = Create, amber = Update.
- Rows marked Always on cannot be changed. Dashboard, Calls, Messages and Voicemail are always visible, on the member’s assigned numbers.
- You can switch Numbers, Campaigns, Sources, Flows and Workspaces (View, Create, Update).
- You can switch Balance (View, Update), Billing (View) and Support Ticket (View, Create, Update).
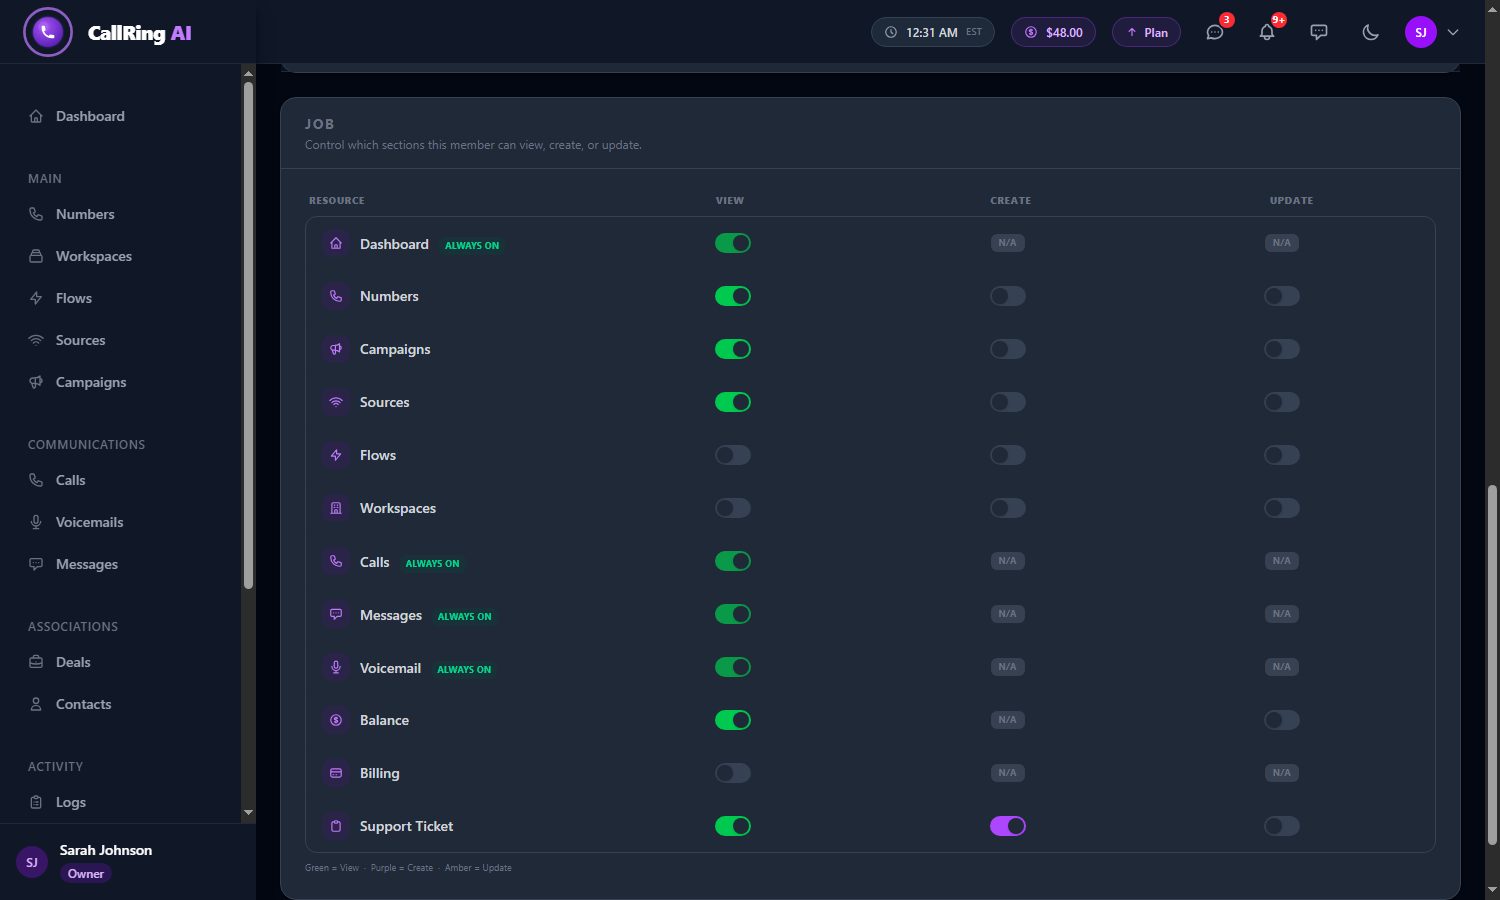
Job: switch on only what the member needs to view, create or update Tip: Start with the minimum. You can change it later with the pencil icon on the Members page. -
Step 6: Create the member
Click the purple Create Member button at the bottom of the page. Click Cancel to leave without saving. You return to the Members list, and the new member appears. The Total Members card goes up by one.
- The row shows the member’s name and email, Owner Account, Main Workspace, the number of Workspaces, the Role, and the date Created.
- In the Actions column you can use Log in as this member (see the app as they see it), View Job (eye icon), Edit (pencil) and Delete (bin).
- A free member slot is used, or the member price is taken from your balance.
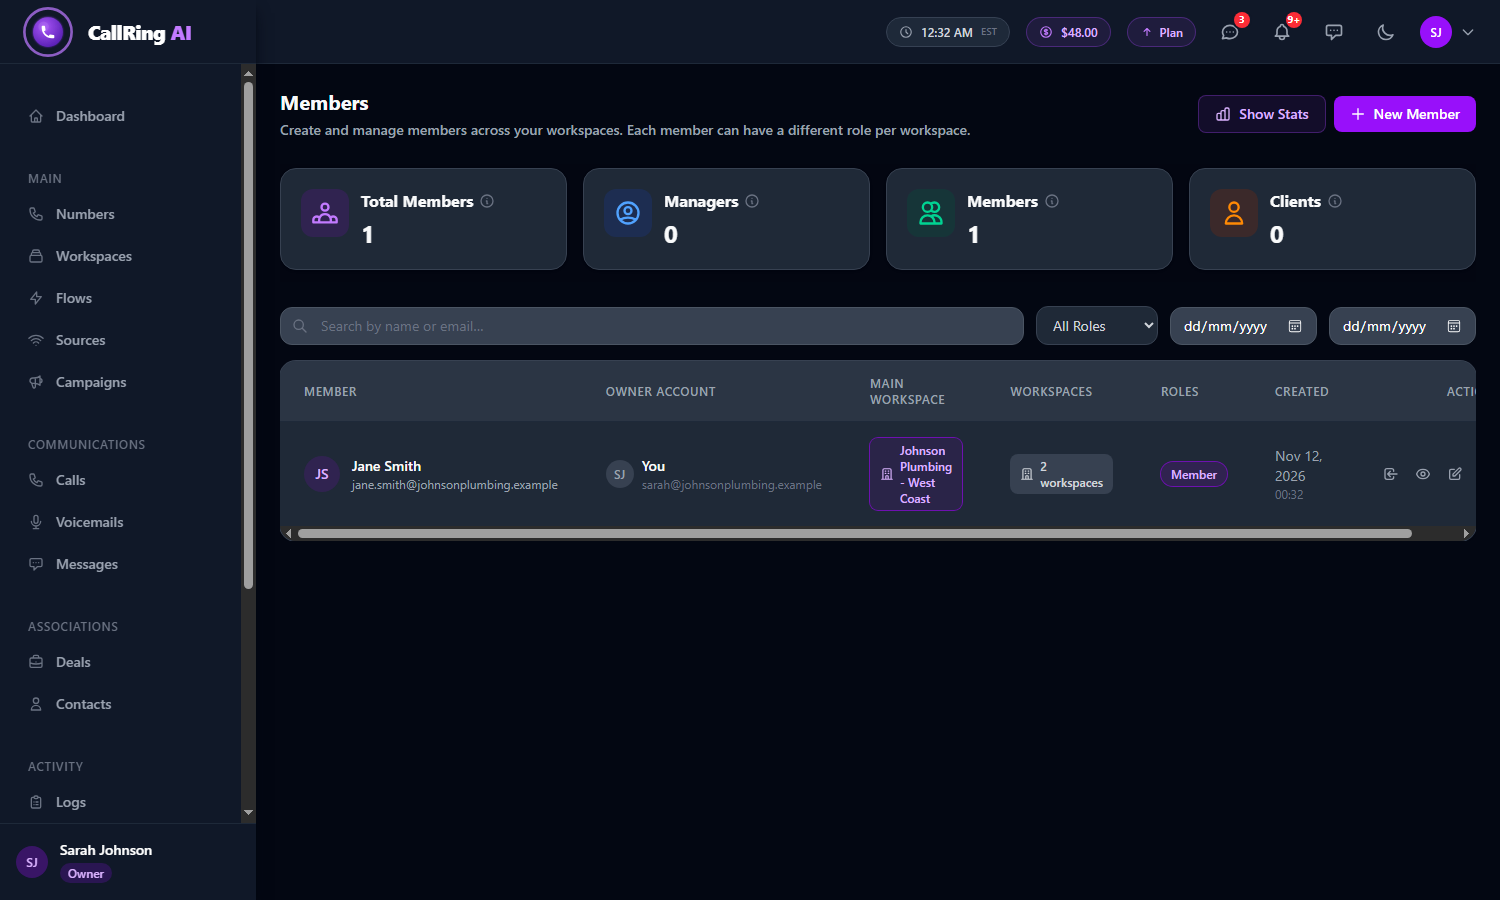
The new member appears in your Members list
Good to know
- Send the member the login page address, their email and the temporary password.
- After login they land in their Main Workspace and only see the sections and numbers you allowed.
- You can edit a member at any time to change their workspaces, numbers and permissions.
Need help? Open a support ticket from your account.