How to Set Up Dynamic Number Insertion
Dynamic Number Insertion (DNI) shows each website visitor their own CallRing tracking number instead of your usual phone number. When that visitor calls, you can see which visitor, page and source (for example Google Ads or Facebook) the call came from. It works with a pool of numbers: a group of CallRing numbers that are handed out to visitors one at a time. Only the main account owner can set this up. Your pool, numbers and price will look different from the sample data in the screenshots.
6 min read · 7 steps
How it works
- Each visitor gets one number from the pool and keeps it for 3 hours, even if they reload the page or visit other pages.
- When the 3 hours end, the number goes back into the pool for someone else.
- If all numbers in the pool are in use at the same moment, the next visitor simply sees your original website number (the Number to Swap). That call is still received, but it cannot be linked to a visitor.
- Tip: if you often get many visitors at once, add more numbers to the pool (Edit).
- New to DNI? Read the overview of dynamic number insertion first.
-
Step 1: Turn on the feature
In the left menu, under Services, click Extra Features. Find the card Dynamic Number Insertion and switch its toggle on. A window, Enable Feature, shows the cost (in the example, $15.00 / mo). Click Enable Feature to confirm.
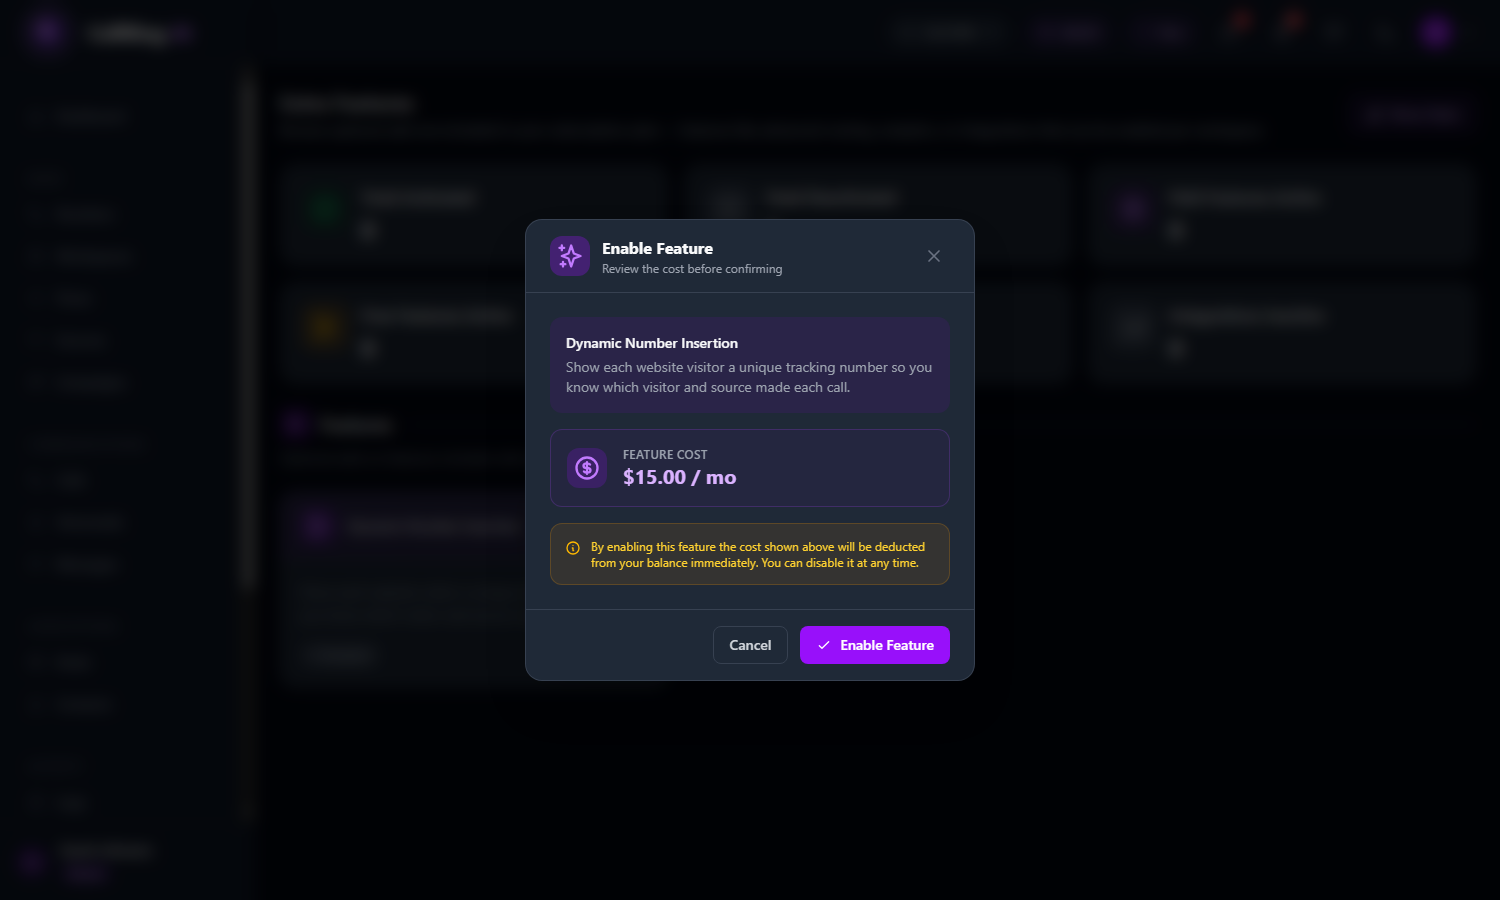
The Enable Feature window shows the cost before you confirm Warning: The cost is taken from your balance immediately. You can switch the feature off again at any time. Your price depends on your plan. -
Step 2: Open the feature
The card now shows Enabled and a button, Manage Dynamic Number Insertion. Click it. The first time, the page says “No number pools yet”. Click the purple Create Pool button.
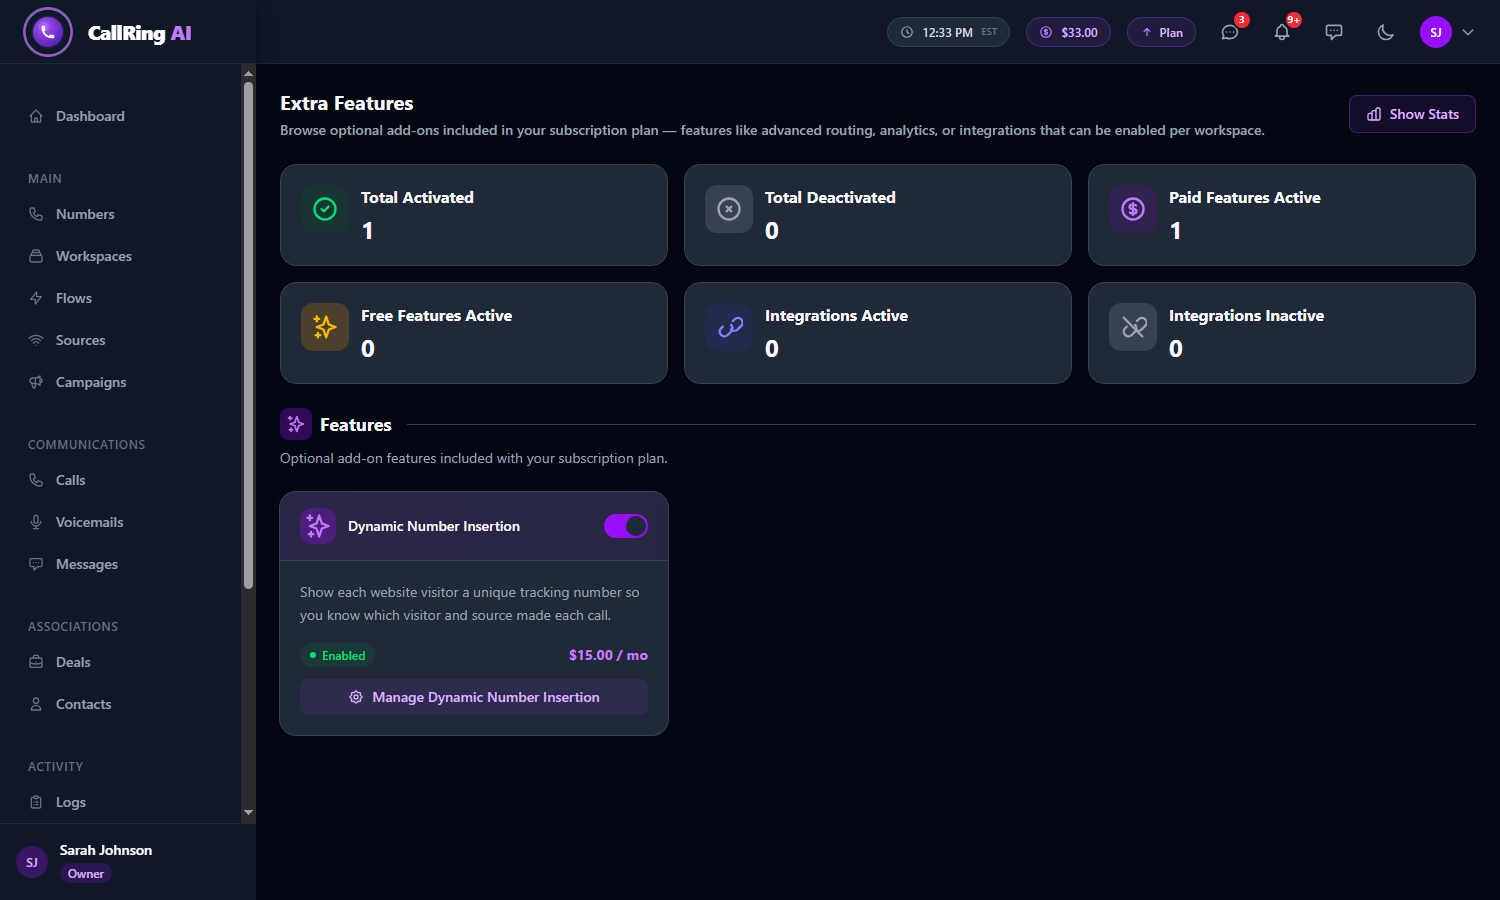
The card shows Enabled: click Manage Dynamic Number Insertion 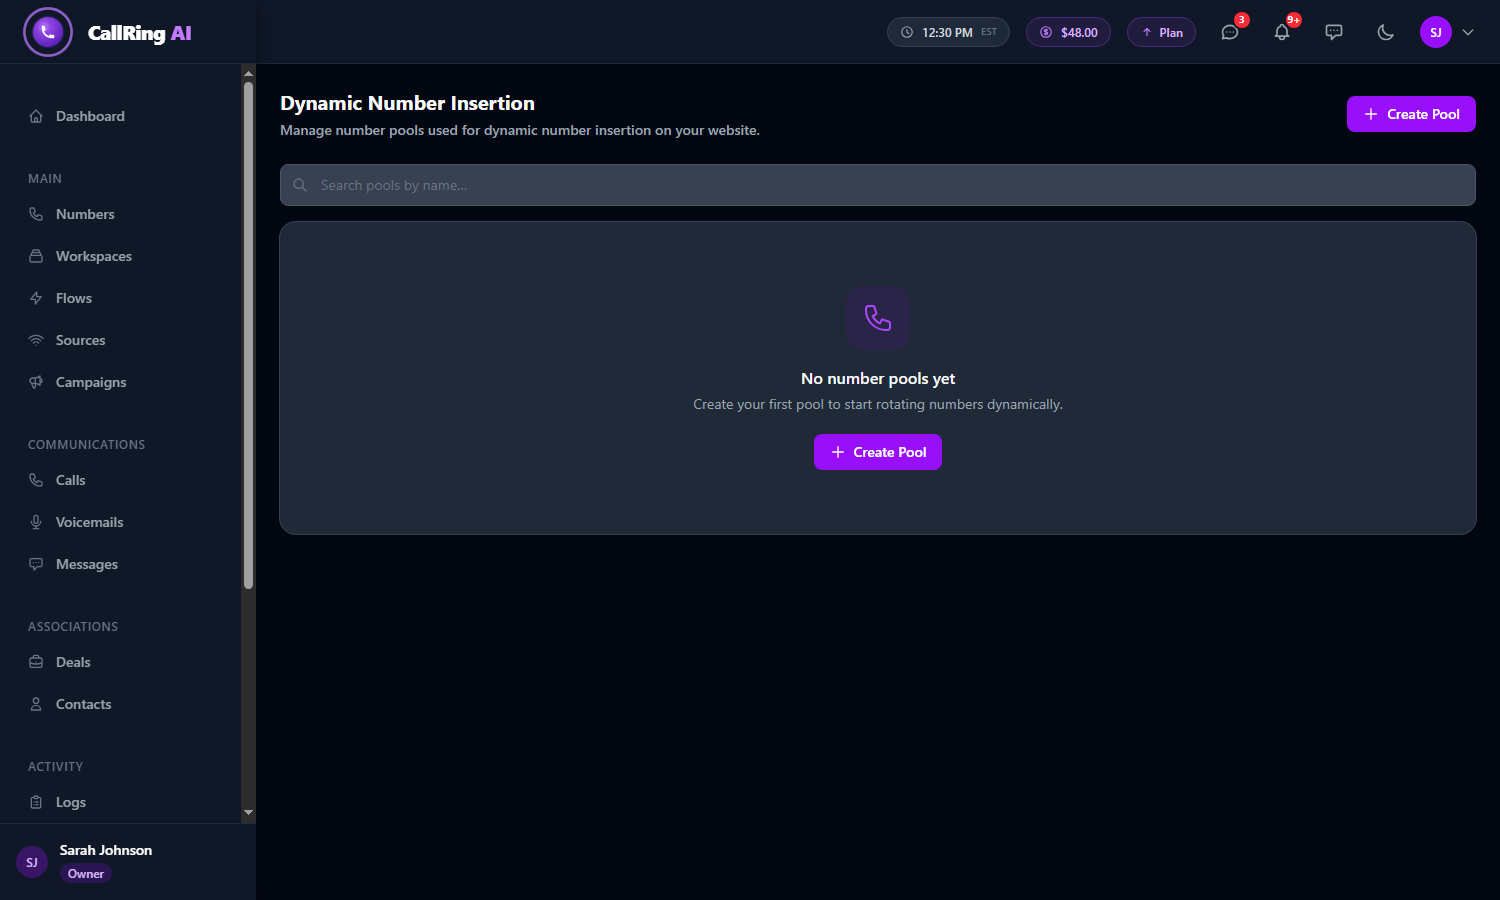
The first time, no pools exist yet: click Create Pool -
Step 3: Name the pool and enter your website number
Fill in two fields:
- Pool Name (required): any name you will recognize, for example “Website Homepage”.
- Number to Swap (required): the phone number that is currently printed on your website, in the format (555) 123-4567. CallRing finds this number on your pages and replaces it with a tracking number for each visitor.
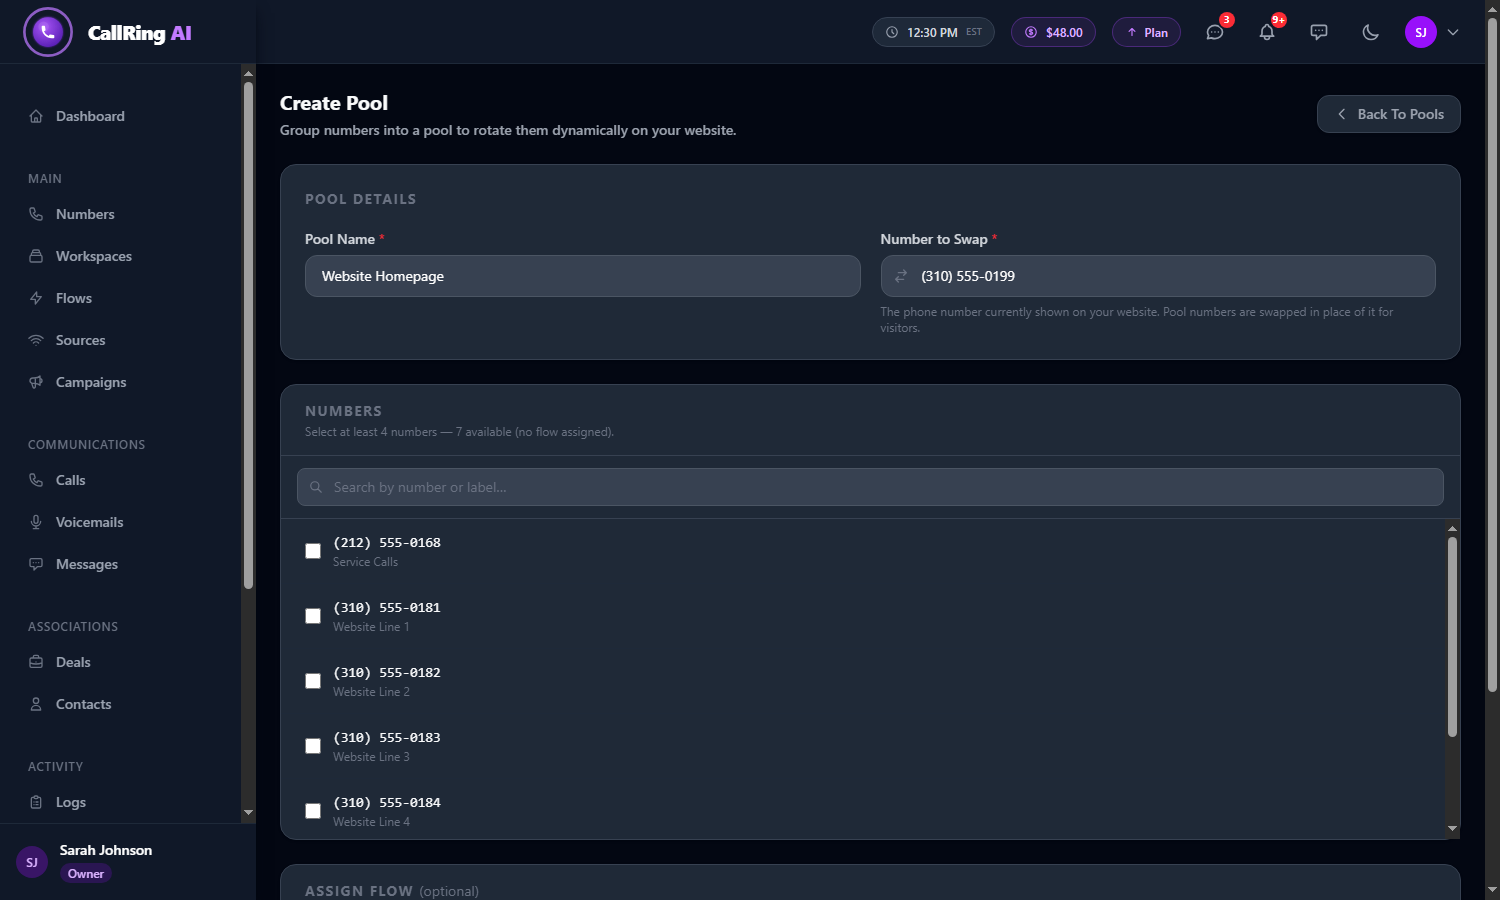
Give the pool a name and enter the number shown on your website Warning: Type the number exactly as it appears on your website. It must be a US number in the format (555) 123-4567. -
Step 4: Choose the numbers and the call flow
Scroll down and set up two sections:
- In Numbers, tick at least 4 numbers. These are the numbers that will be shown to visitors. The more numbers in the pool, the more visitors can see a different number at the same time.
- In Assign Flow (optional), click the call flow you want these numbers to use. A purple label shows your choice. Click the x to remove it.
- Click the purple Create Pool button. Click Cancel to leave without saving.
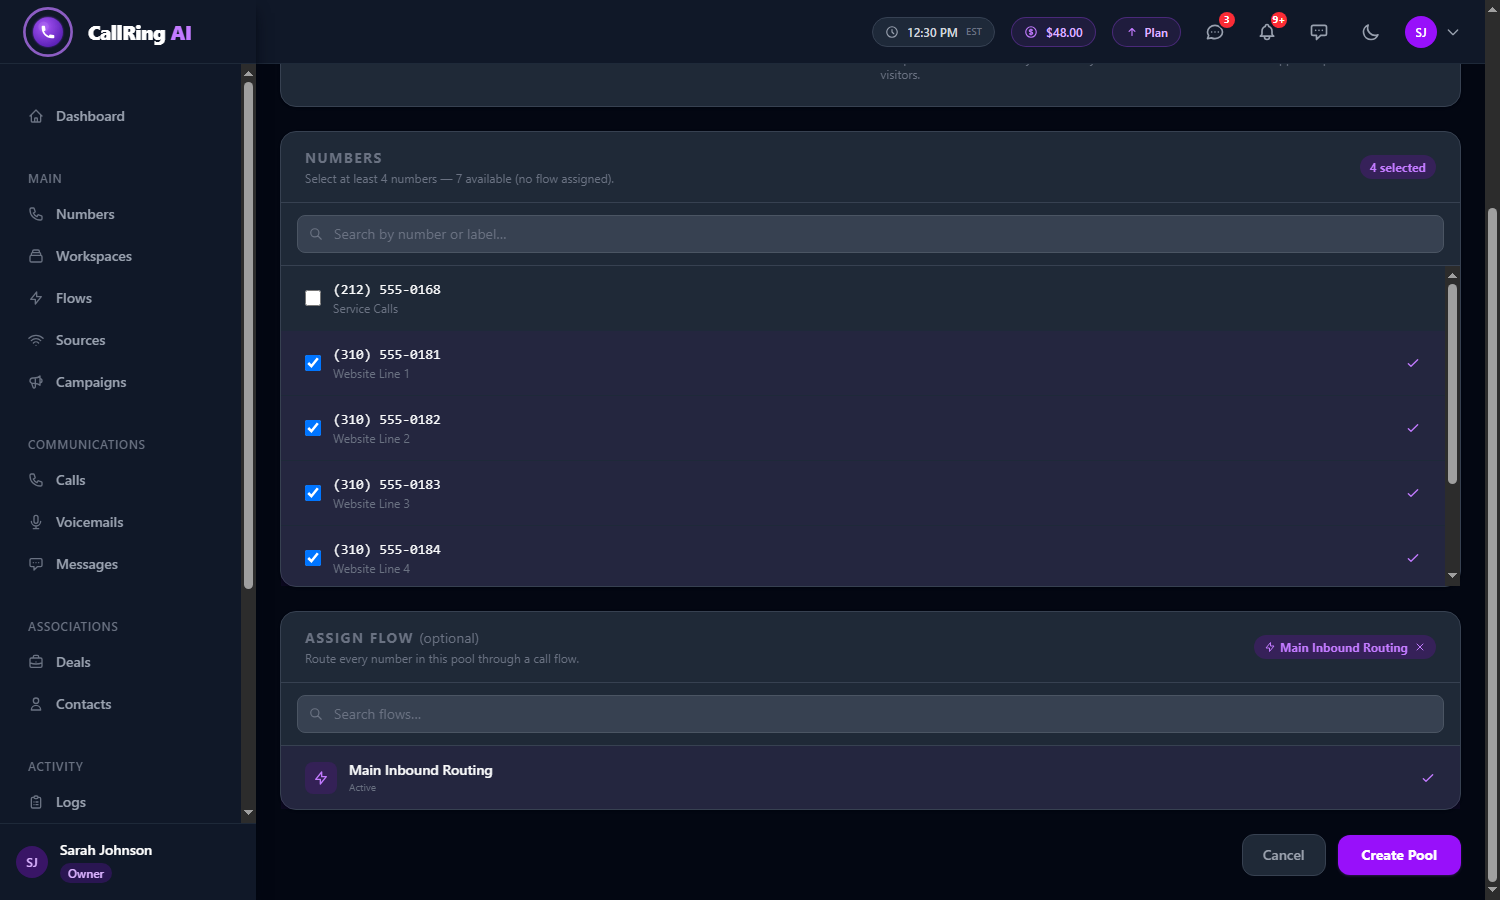
Tick at least 4 numbers and, if you like, choose a call flow Note: Only numbers that are not already in another pool and have no flow assigned are listed. The counter shows how many are available and how many you have selected. -
Step 5: Check your pool
You return to the list. Your pool shows Title, Total Numbers, Visitors, Swap Number, Status (Active) and Created At.
- The Actions column has Script (next step), Edit (pencil) and Delete (bin).
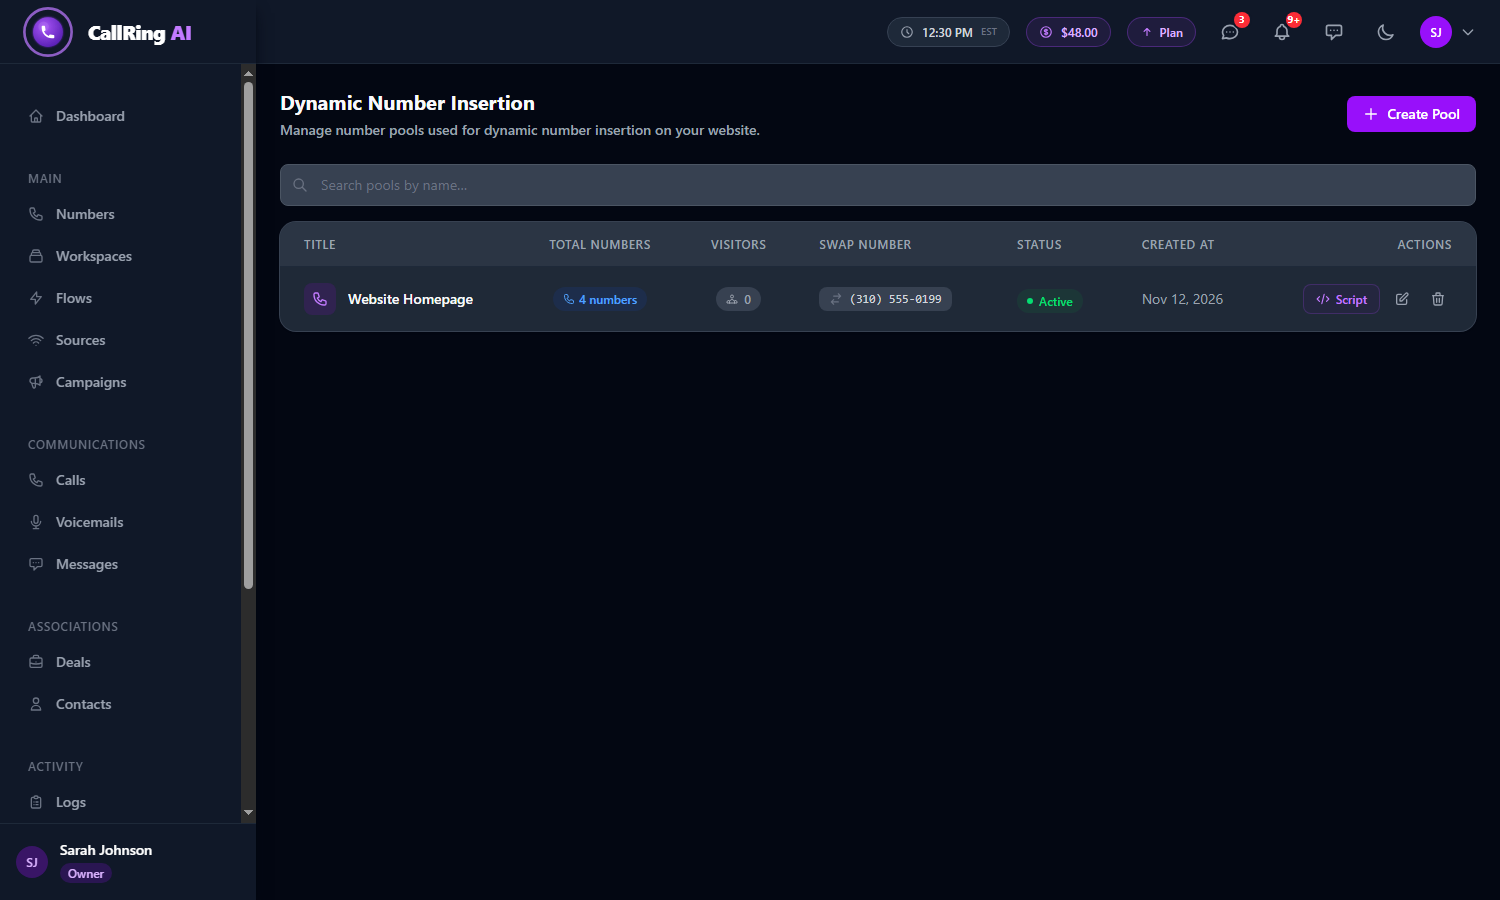
Your pool appears in the list, with Script, Edit and Delete -
Step 6: Copy the script to your website
Click Script. A window, Embed Script, opens. Click Copy next to the first box and paste the code just before the closing </body> tag of every page where your number appears.
- If you use a website builder, paste it in the “custom code” or “footer scripts” area, or send it to your web developer.
- The script automatically finds your Number to Swap on the page and replaces it. You do not need to edit anything.
- Optional: if your number is not printed on the page but you still want a tracking number shown there, copy the second box (a small “span” snippet) to where you want the number to appear.
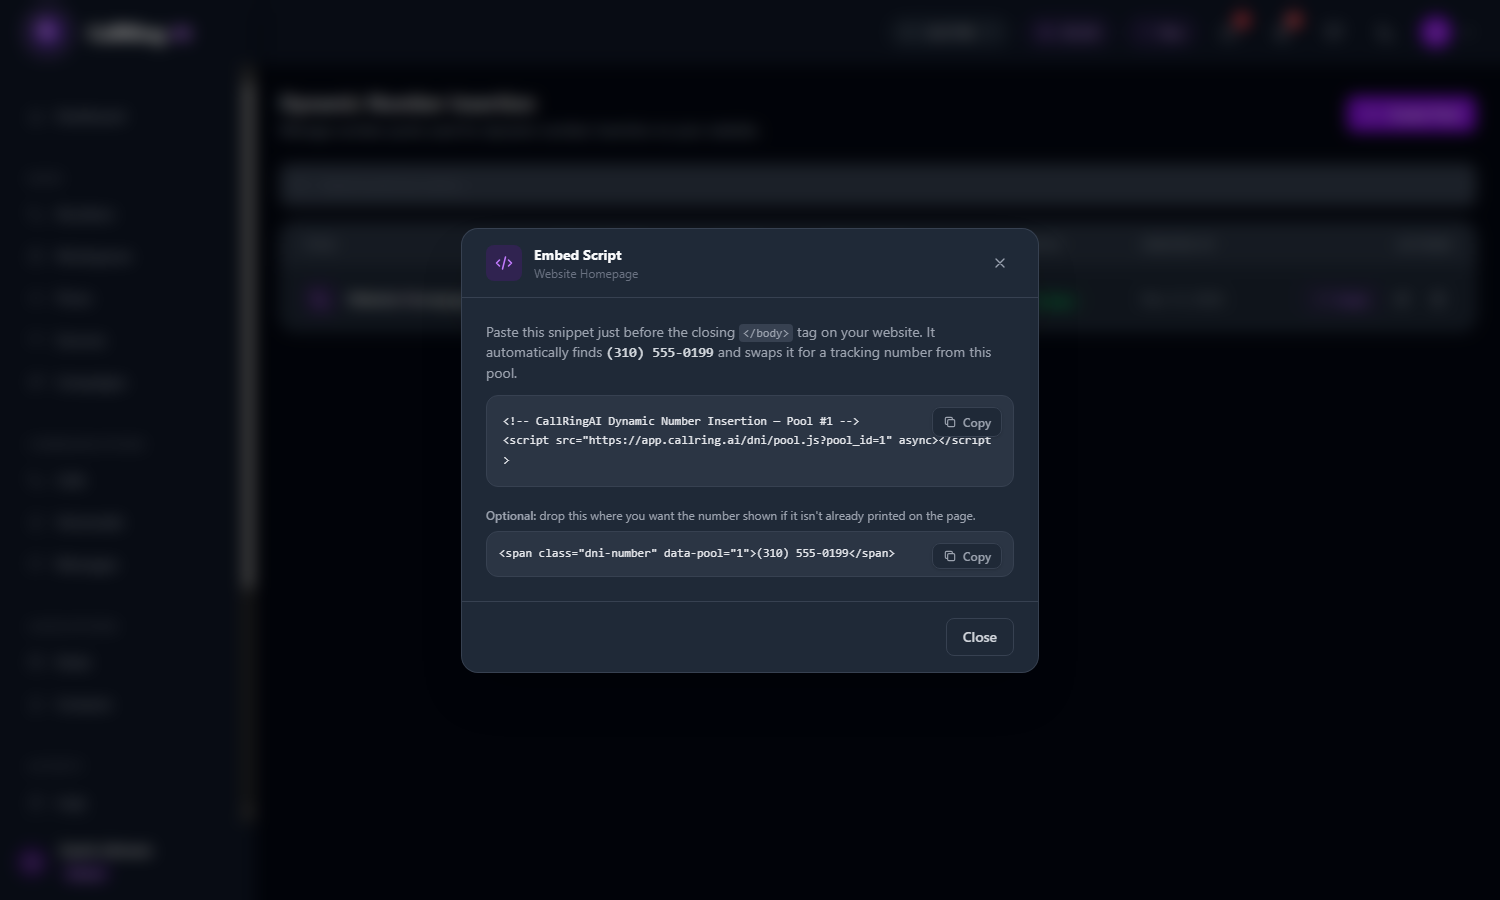
The Embed Script window: copy the script and paste it into your website Note: The web address inside the script is your CallRing address. Copy it exactly as shown in your account. -
Step 7: Watch it work
Back on the pool list, the Visitors column shows how many visitors currently hold a number from this pool. Click that number to open the visitors list.
- For each visitor you see the number assigned, the source (for example Google_ads or Facebook, or “Direct”), and the page they came from and landed on.
- You also see when the number was assigned and when it expires.
- Use the search box to find a number, source or referrer.
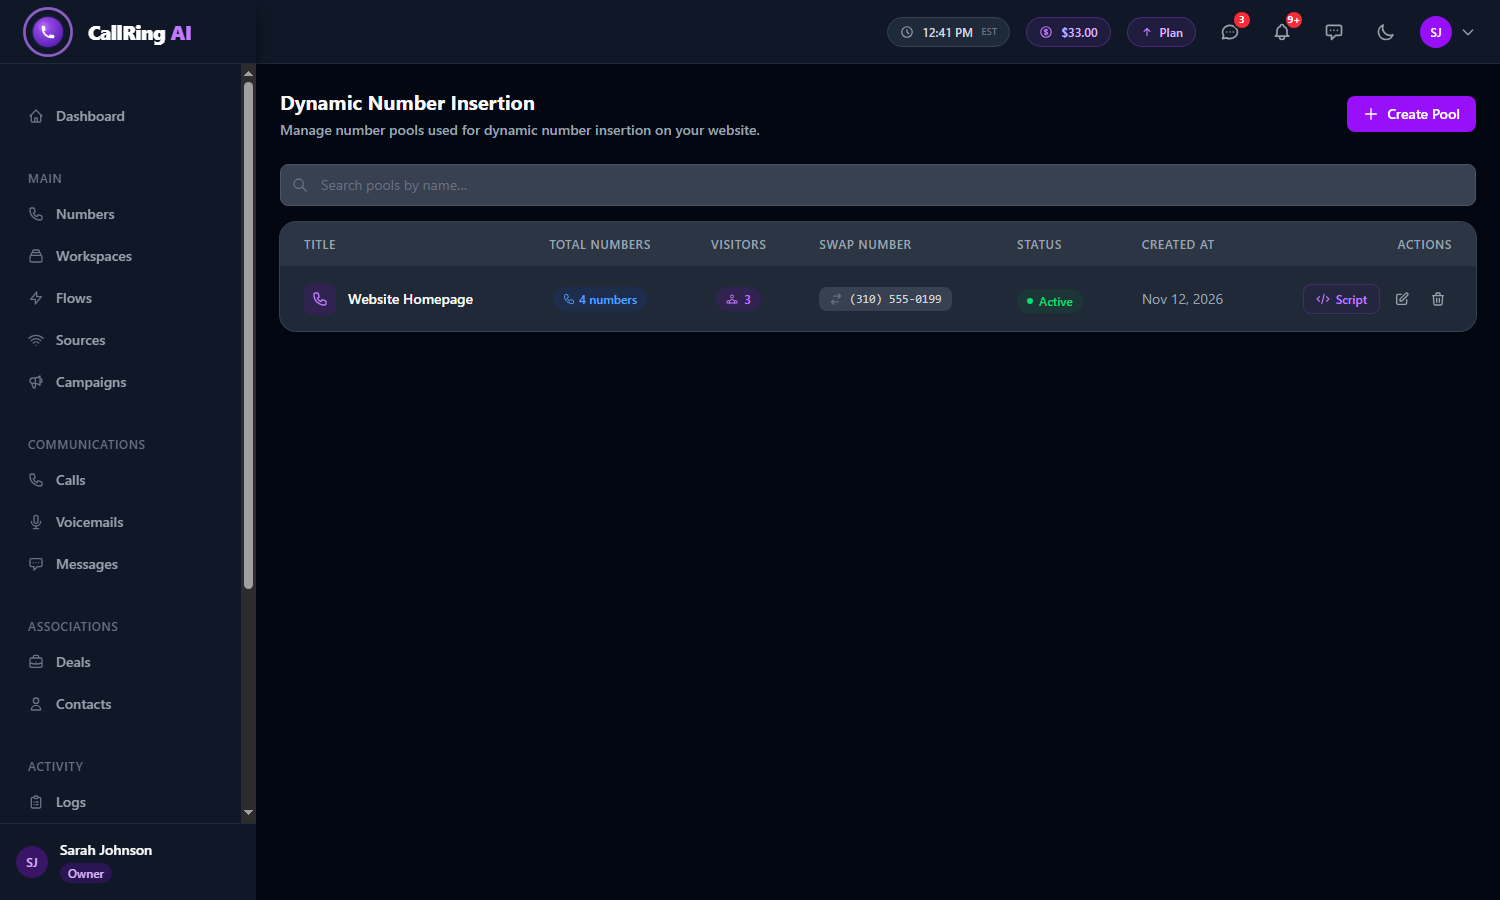
The Visitors column shows how many visitors hold a number from the pool 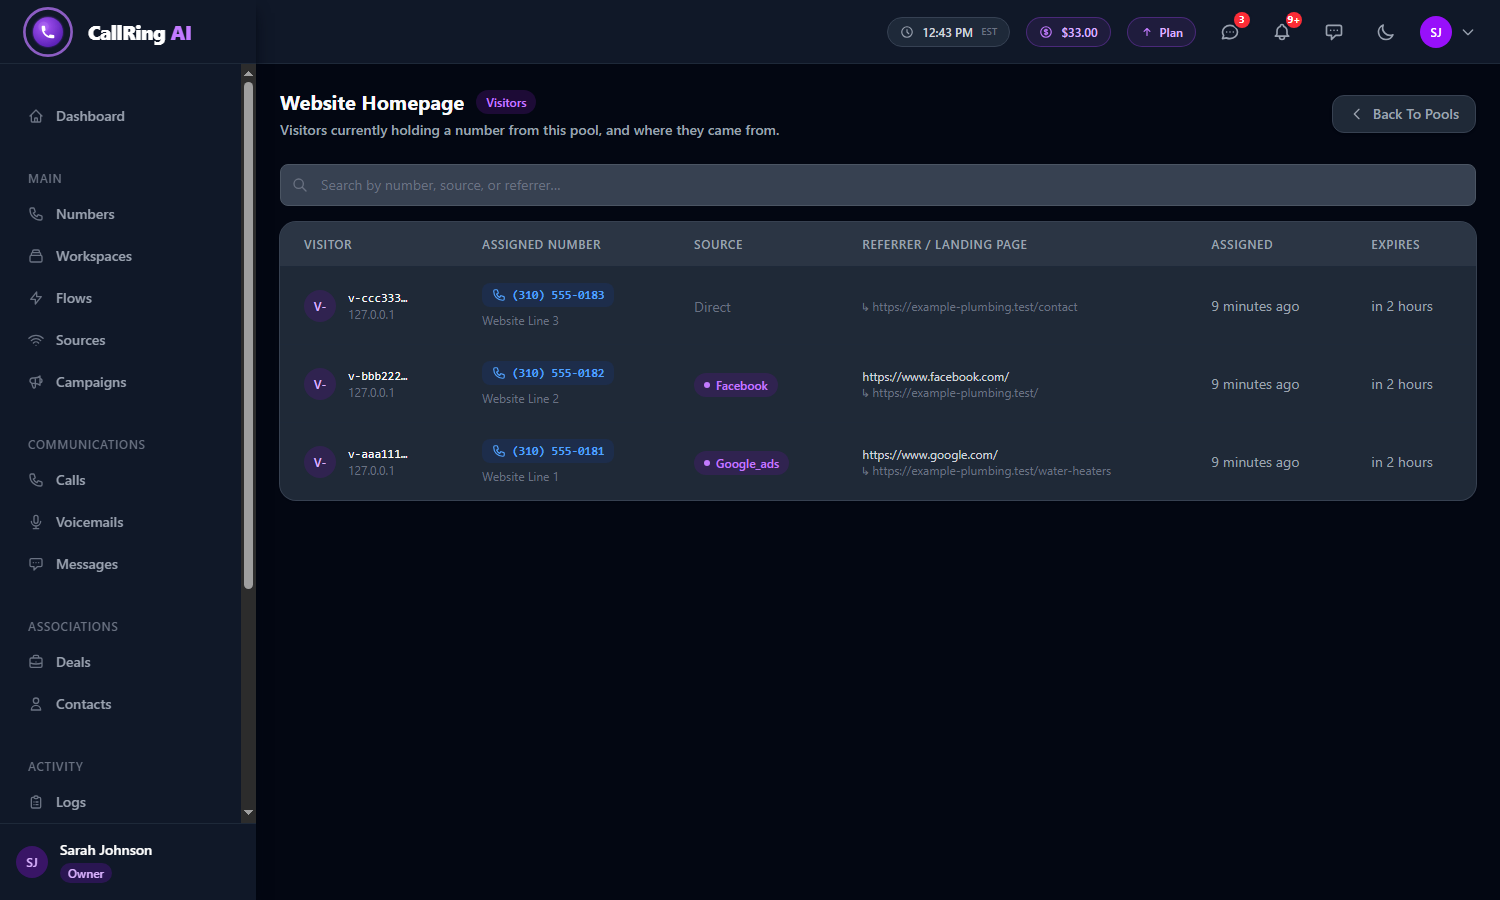
The visitors list shows each visitor’s number, source and page
Good to know
- Edit a pool (pencil icon) to rename it, change the numbers or the flow.
- Deleting a pool releases its numbers back to unassigned and removes their flow. This cannot be undone.
- The Numbers page shows which numbers belong to a pool.
Need help? Open a support ticket from your account.