How to Save a Contact
A saved contact puts a name on a phone number. Instead of only seeing (408) 555-0144 in your Calls, Voicemails and Messages, you see “Carlos Rivera” under the number. There are two ways to save a contact, and this guide covers both. Your contacts will look different from the sample data in the screenshots.
4 min read · 6 steps
Before you start
- Your Contacts page shows, for each contact, how many calls, messages and deals they have.
- Part A: save a contact straight from a call, voicemail or message.
- Part B: type a contact in on the Contacts page.
- The account owner can save contacts both ways.
- Team members can use the Contacts page, and they see the saved names on calls. The quick “add person” icon on call rows is for the owner.
-
Step 1: Part A: Find the caller
In the left menu, under Communications, click Calls. You can do the same on Voicemails and Messages. In the From column, next to the caller’s number, there is a small grey “add person” icon. This means the number is not saved yet. Move your mouse over it to see Save to contacts, then click it.
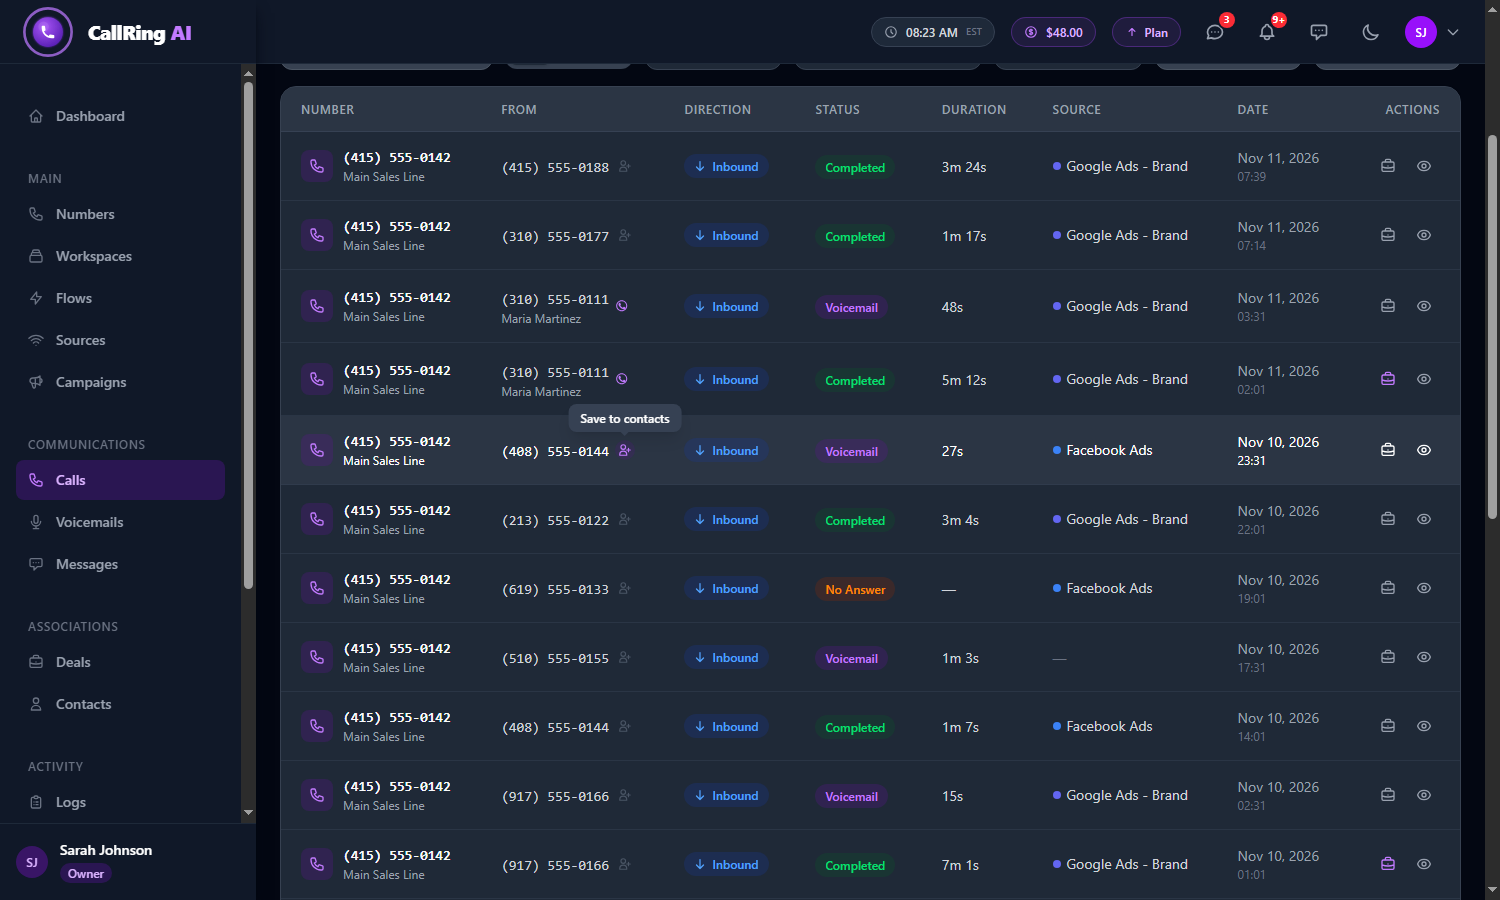
Hover over the add-person icon next to a caller to see Save to contacts, then click it -
Step 2: Fill in the contact details
The Save to Contacts window opens. The caller’s phone number is already filled in, so you do not have to type it. Fill in:
- Name (required), for example “Carlos Rivera”.
- Email (optional).
- Company (optional).
- Notes (optional): anything you want to remember, for example “Landlord with 6 rental units. Asked for a yearly maintenance quote.”
- Then click the purple Save Contact button. Click Cancel or the X to close without saving.

Fill in the name and any details you want to keep 
The empty form: Name is required, and the phone number is already filled in Note: If you click Save Contact with the name empty, a red message appears under the Name box. Type a name and try again. -
Step 3: See the name on your calls
The window closes. The caller’s name now shows under their number on every call from that number, old and new. The small icon next to the number changes to a purple contact icon.
- Hover over the icon to see “View contact:” and the name.
- Click it to open that contact on the Contacts page.
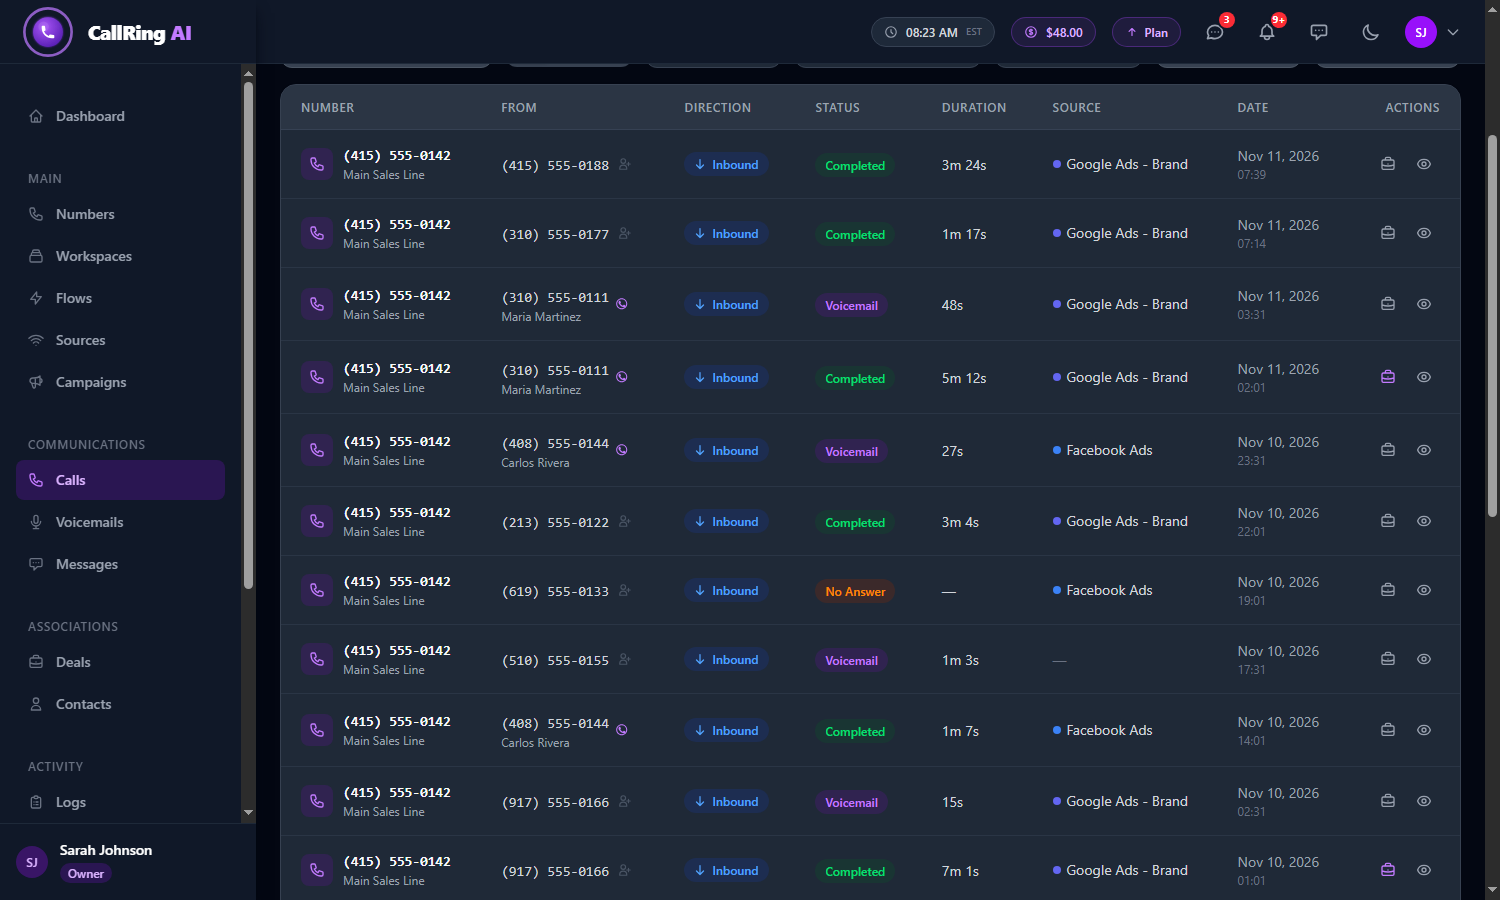
The contact’s name now shows under the number on every call Note: This way does not show a green confirmation message. The window simply closes and the name appears. -
Step 4: Part B: Open the Contacts page
In the left menu, under Associations, click Contacts. The table lists your contacts with:
- Name and Phone.
- Calls, Messages and Deals. Click a number to see those calls, messages or deals.
- Email, Company, Notes and the date Added.
- Actions: a pencil to edit and a bin to delete.
- Use the search box (“Search by name, phone, email or company...”) to find a contact quickly.
- Click the purple Add Contact button at the top right. A new account shows “No contacts yet. Save numbers from calls or add contacts manually.” with the same button.
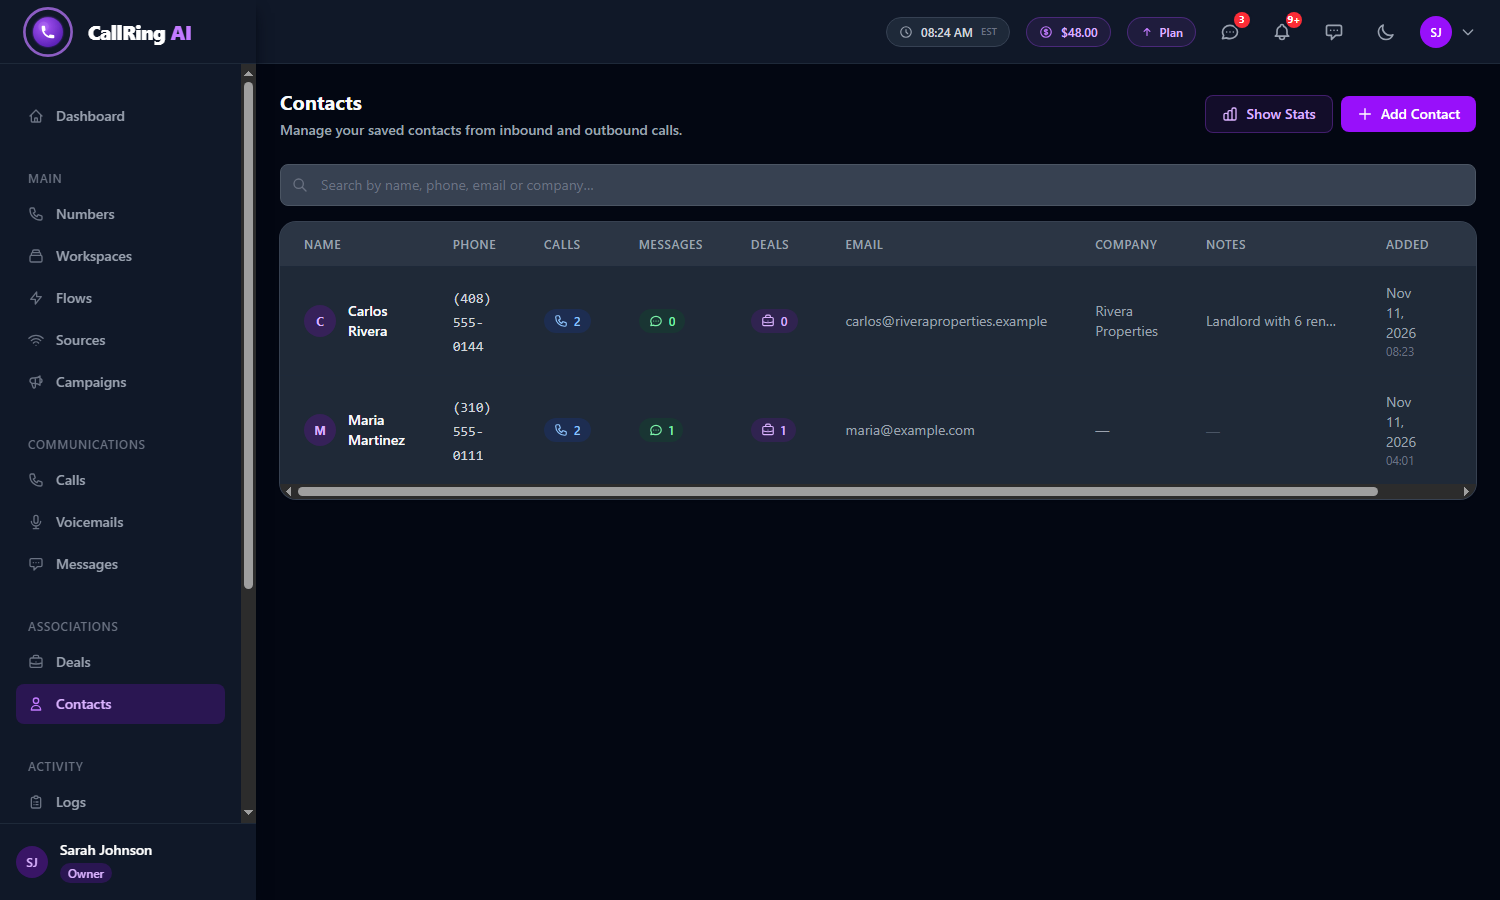
The Contacts page: click Add Contact at the top right -
Step 5: Type the contact in
The Add Contact window opens with Name (required), Phone (required), Email, Company and Notes. Fill them in, then click Save Contact.
- Type the phone as 10 digits, for example 4045550166. It formats itself as (404) 555-0166 and is saved as a US number.
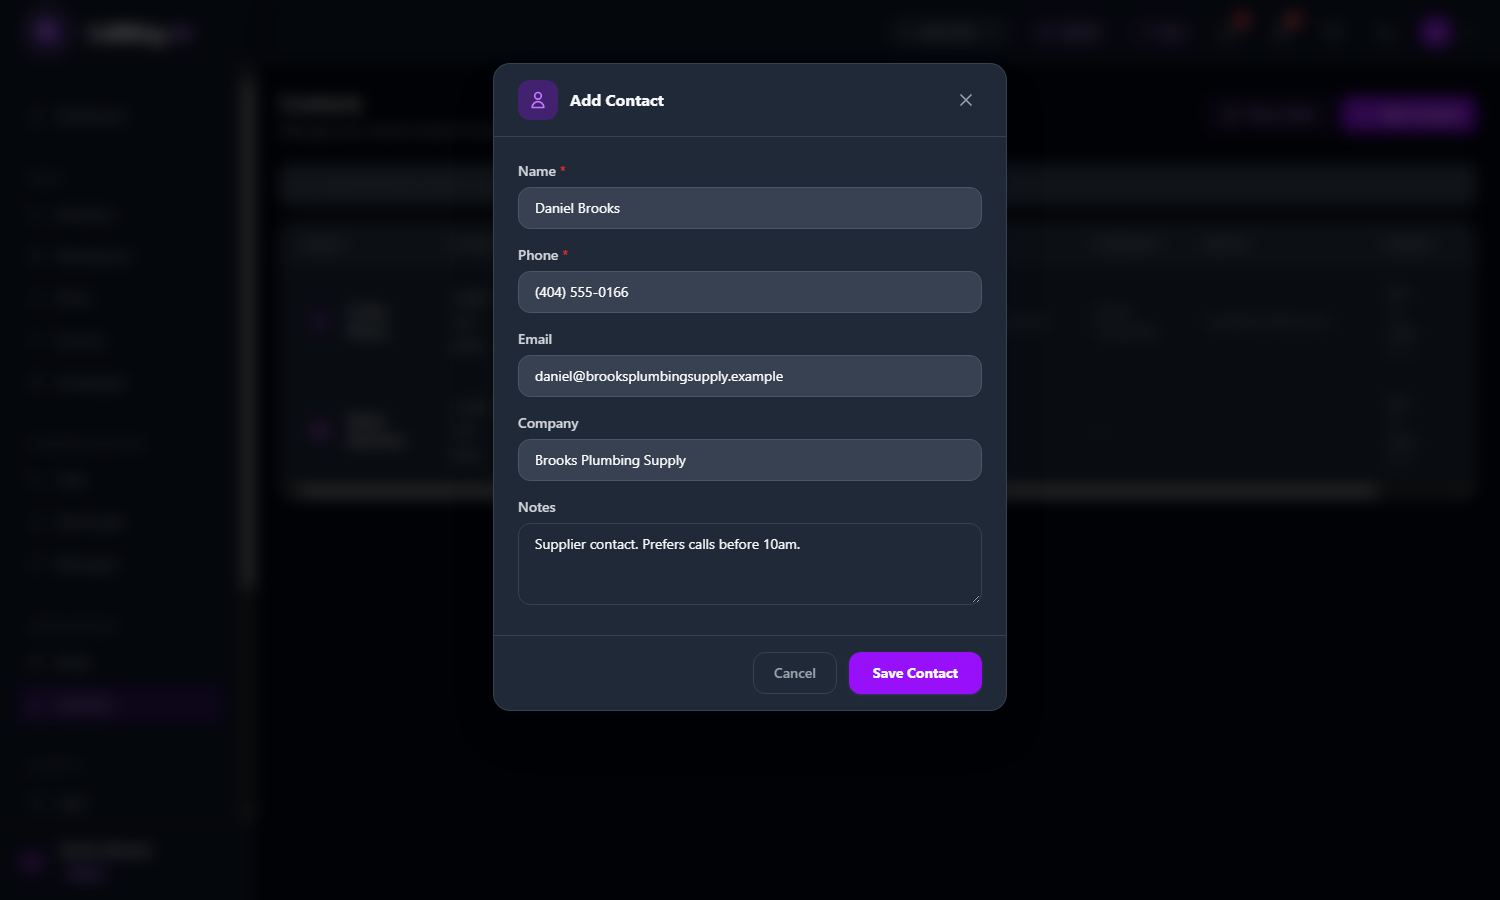
The Add Contact window with sample details filled in -
Step 6: Check the result
A green message “Contact saved.” appears at the bottom right, and the new contact shows in the list. It shows 0 calls, 0 messages and 0 deals until that person calls or texts your numbers.
- From then on, calls, voicemails and messages from that number show the contact’s name.
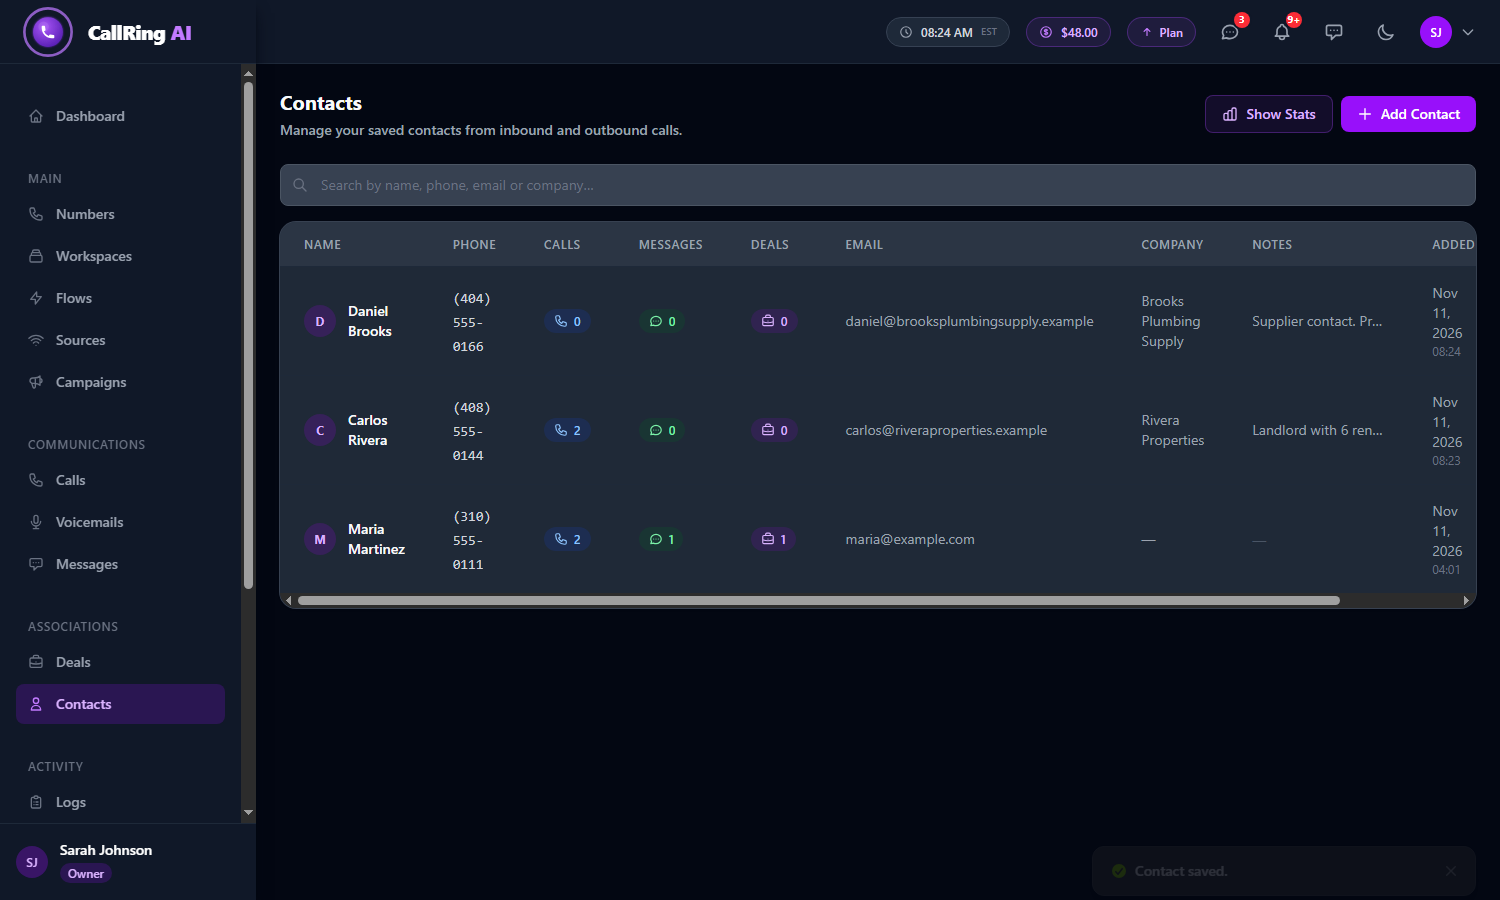
Your new contact appears in the list
Good to know
- Calls, messages and deals are matched by phone number, so make sure the number is exactly the one the person calls or texts from.
- To change a contact, click the pencil icon and then Update Contact. To remove one, click the bin icon and confirm. Calls and messages are kept.
Need help? Open a support ticket from your account.