How to Manage Google Sheets
The Google Sheets integration automatically adds a new row to a Google spreadsheet each time something happens on your phone numbers, for example when a call ends or a voicemail is left. You connect your Google account once. Then you create “records”: each record covers certain numbers and gets its own spreadsheet in your Google Drive. Only the main account owner can set it up. Your account and records will look different from the sample data in the screenshots.
7 min read · 8 steps
Before you start
- You must be the main account owner.
- You need a Google account. You will sign in to it in Step 2.
-
Step 1: Enable Google Sheets
In the left menu, under Services, click Extra Features. Scroll down to Integrations. Find the card Google Sheets and switch it on. A window, Enable Integration, shows the cost (in the example, $0.00 / mo). Click Enable Integration. When the card shows Enabled, click Manage Google Sheets.
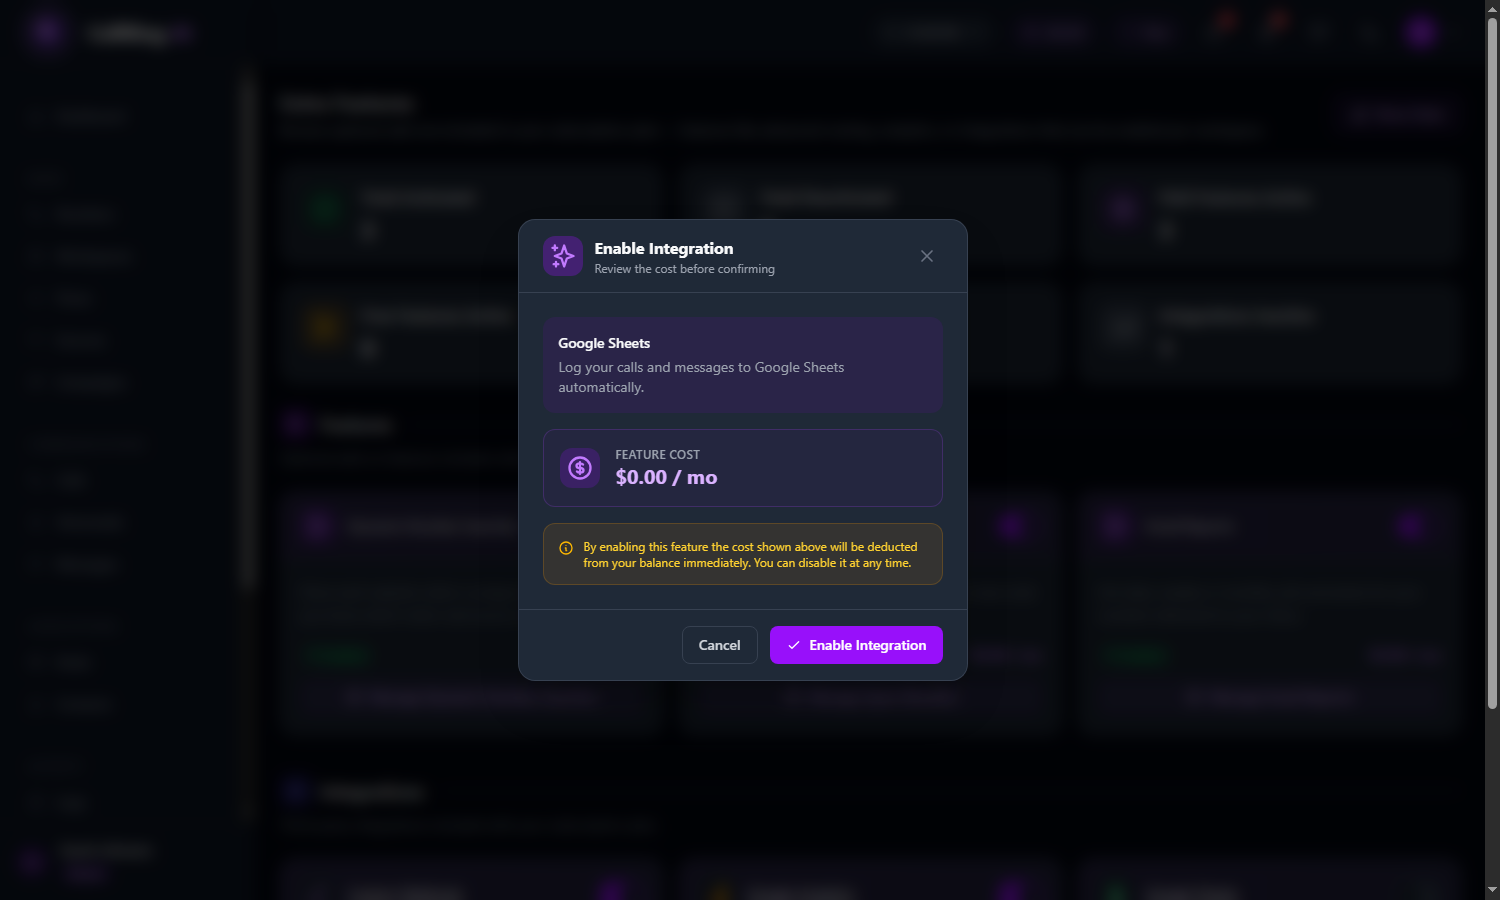
The Enable Integration window shows the cost before you confirm 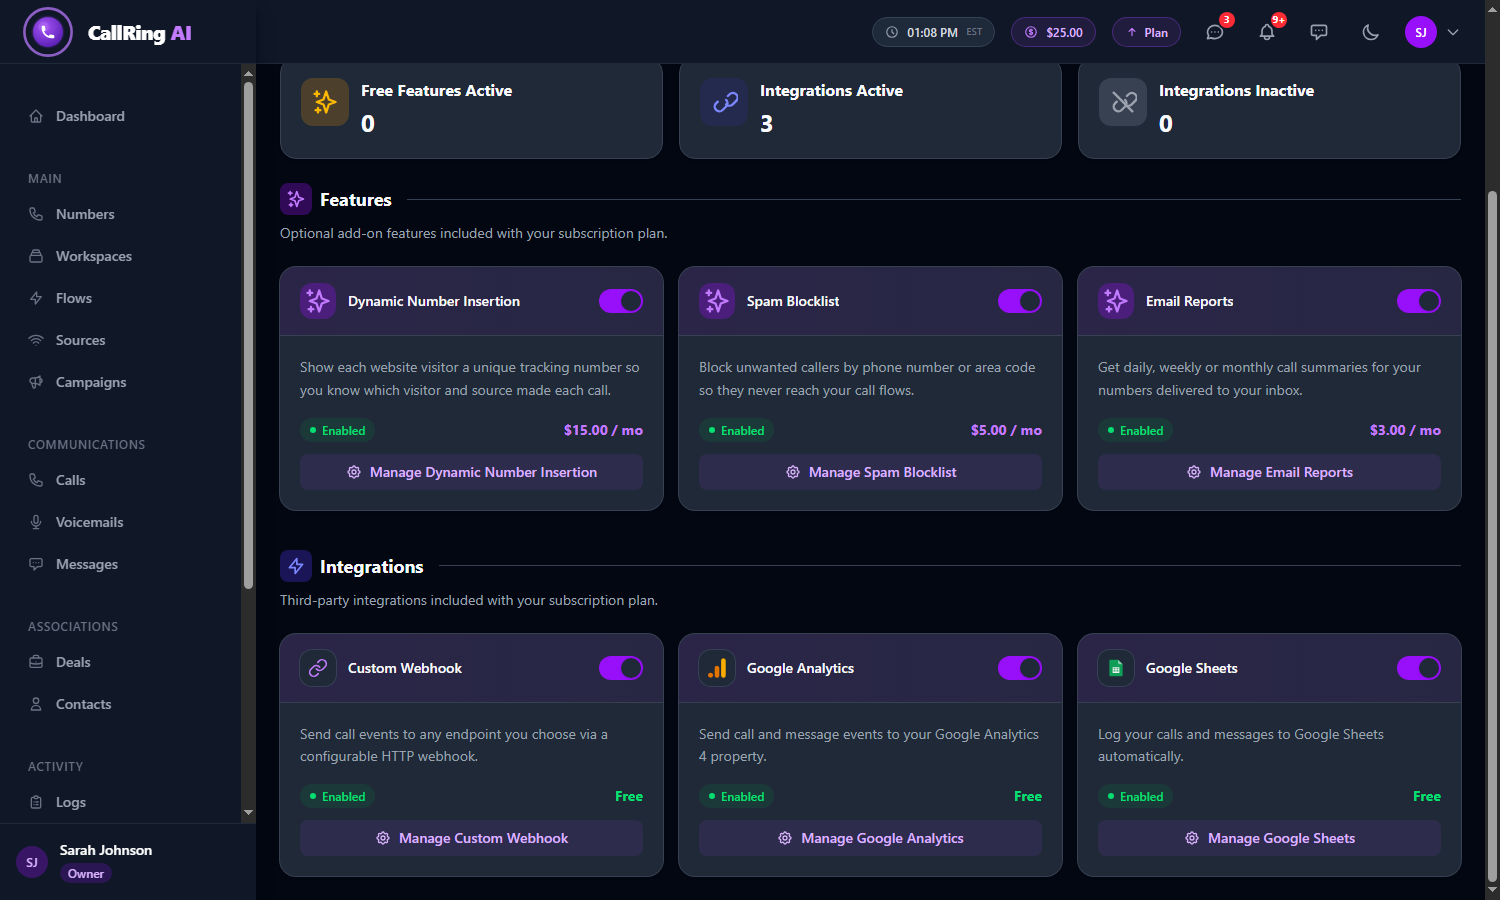
The Google Sheets card shows Enabled: click Manage Google Sheets -
Step 2: Connect your Google account
On the Google Sheets page, click the purple Connect Google button. Google’s own page opens. Choose your Google account and allow access. You then return to CallRing, and the card says Google account connected with your name and email.
- Note: If you cancel on Google’s page, or the connection fails, CallRing shows a red message. Click Connect Google and try again.
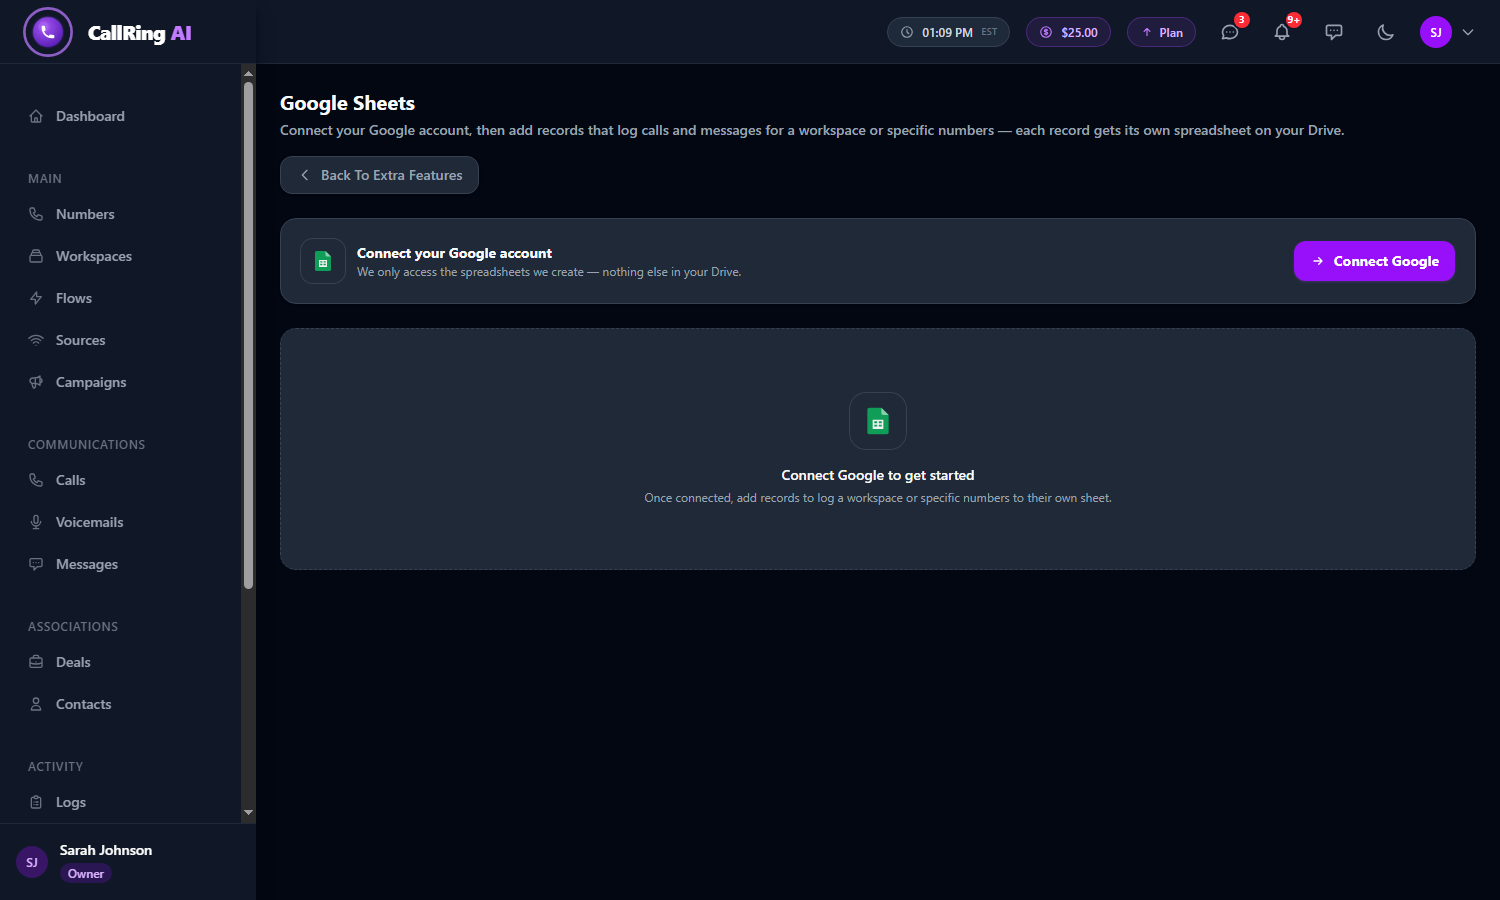
Click Connect Google 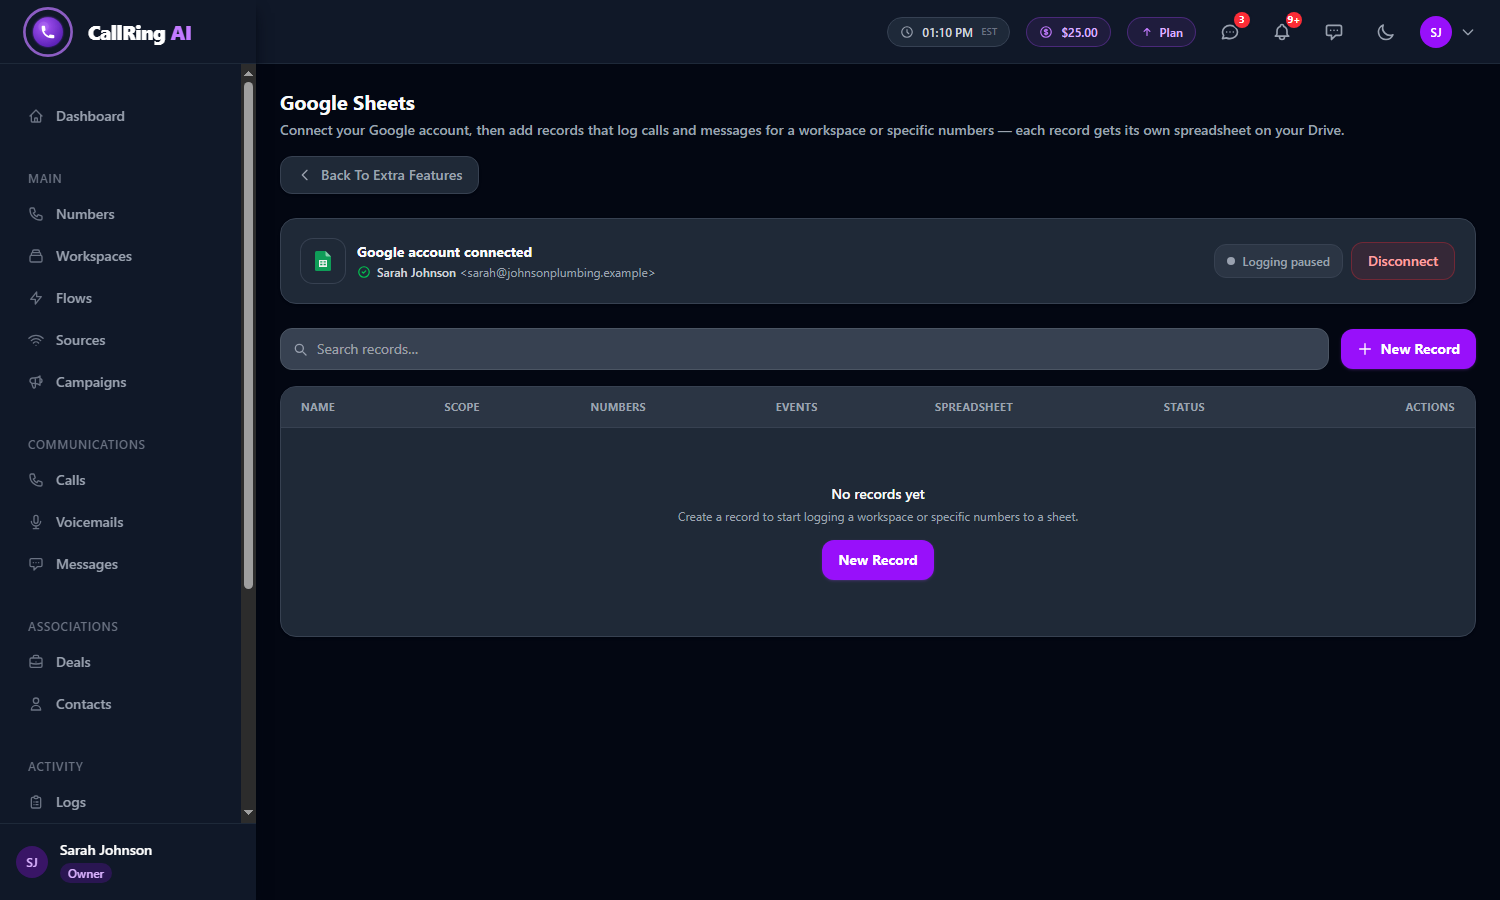
The card shows Google account connected, with your name and email Note: CallRing only gets access to the spreadsheets it creates. It cannot see anything else in your Google Drive. -
Step 3: Turn logging on
At the right of the card, the switch at first says Logging paused. Click it so it says Logging on.
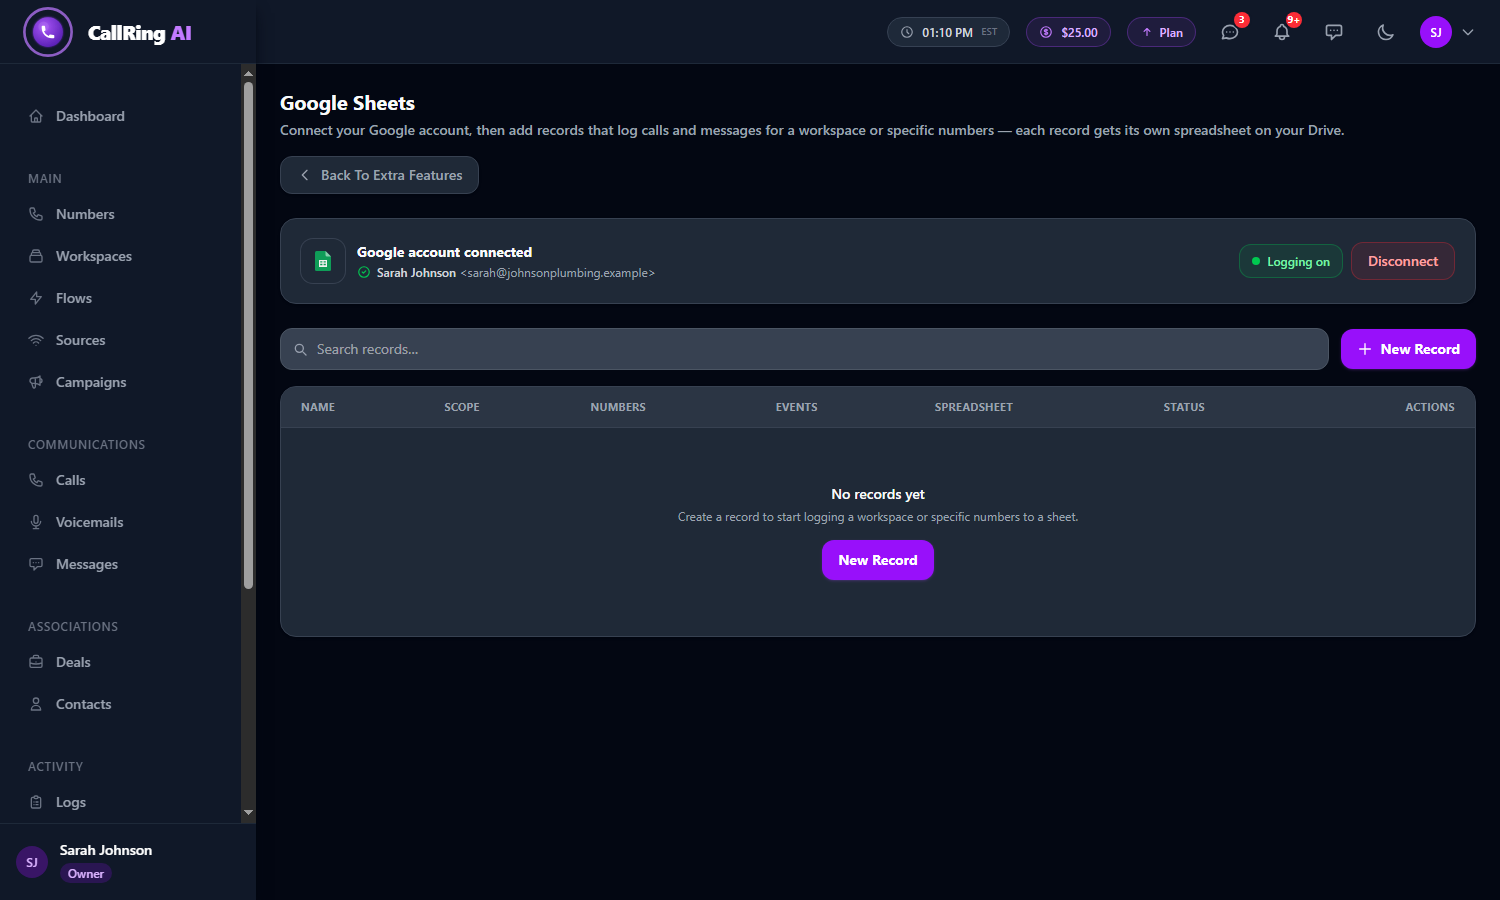
Click the switch so it says Logging on Warning: This is a master switch. While it says Logging paused, no rows are added, even if you have set up records. -
Step 4: Create a record
Click the purple New Record button. A “record” covers certain numbers and gets its own spreadsheet.
- Record name: a name you will recognize, for example “Sales Team - East Coast”. CallRing uses it to name your spreadsheet, “CallRingAI Records — <name>”.
- What should this record cover? Choose By workspace (pick a workspace; all its numbers are included, and you can untick some) or By specific numbers (tick any of your numbers from all workspaces).
- The line Numbers (2 of 2 selected) shows how many numbers are included. Use All or None and the search box to change the selection.
- Note: At least one number must be selected.
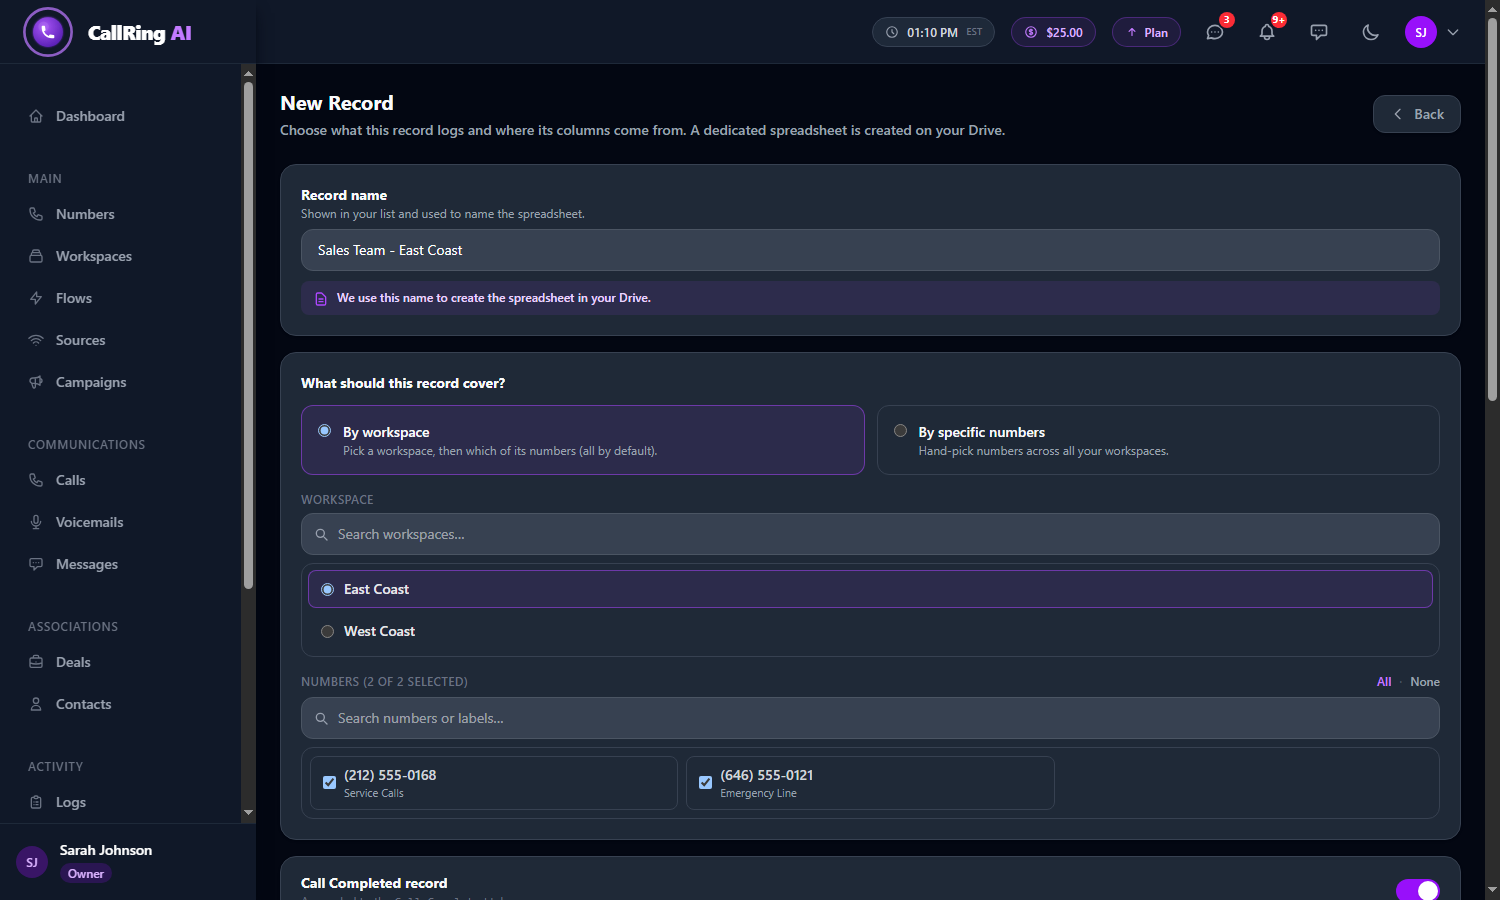
New Record: name it and choose what it covers Note: If you rename the record later, the spreadsheet keeps its first name. Only the label in your list changes. -
Step 5: Choose events and columns
Below, there is a card for each event: Call Completed, Voicemail and Missed Call. Each one writes to its own tab (page) inside the spreadsheet with the same name.
- Call Completed: a call has finished.
- Voicemail: a caller left a voicemail.
- Missed Call: a forwarded call was not answered.
- Switch an event on or off with its toggle.
- Under Columns to write, tick the details you want as columns: Date & Time, Business Number, Caller Number, Contact Name, Direction, Call Status, Duration, Source, Recording Link and Associated Deal.
- Click the purple Create Record button. CallRing creates the spreadsheet in your Google Drive and shows a green message, “Record saved.”
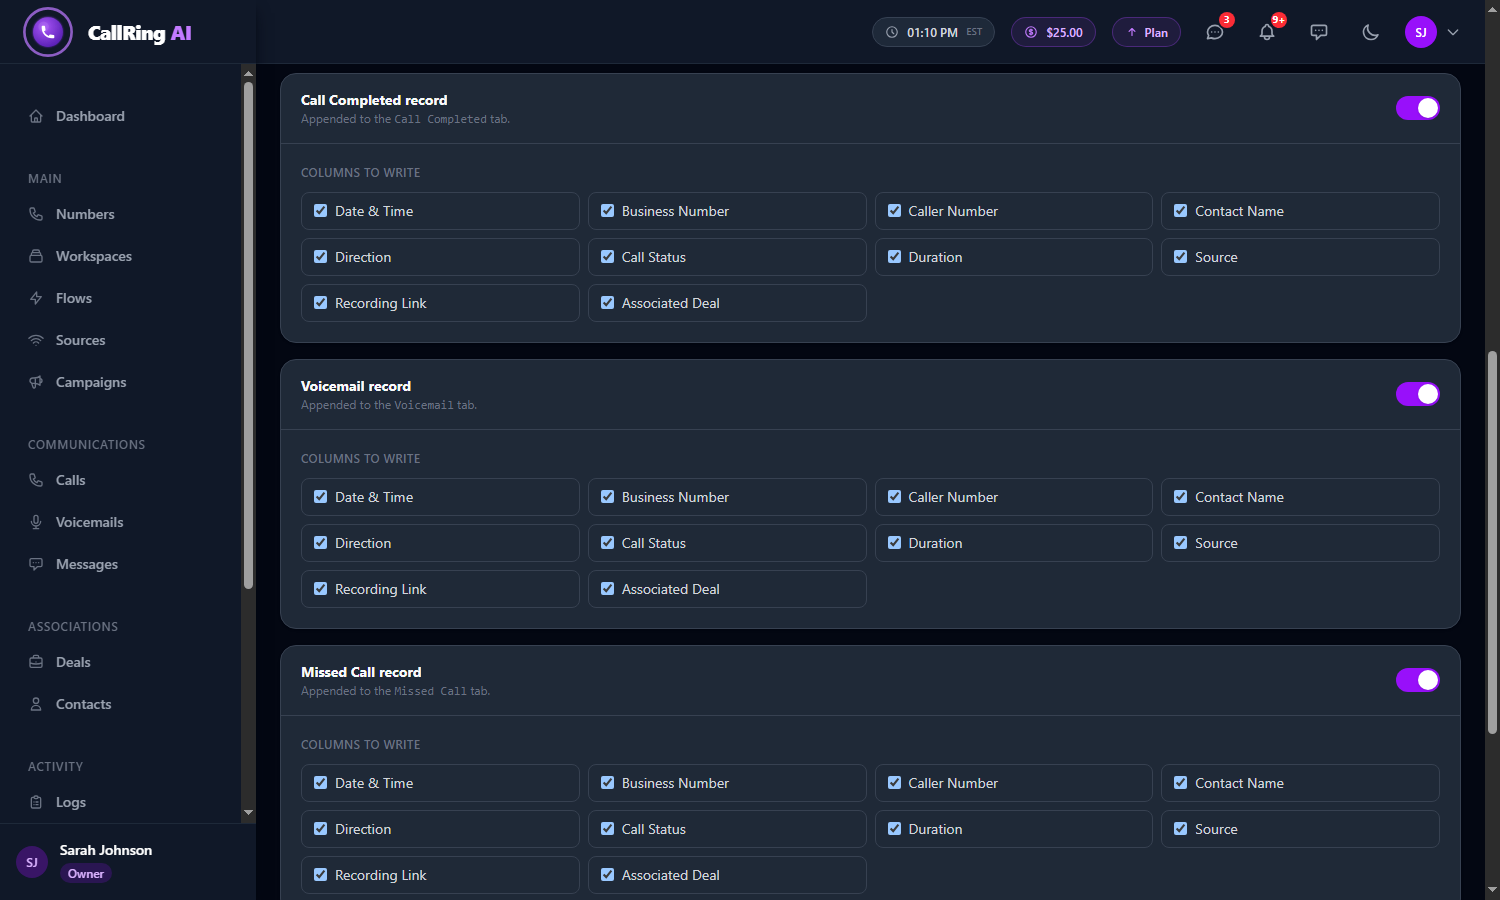
Each event has its own switch and its own columns to write -
Step 6: Open your spreadsheet
In the records list, each record shows its Name, Scope, how many Numbers, the Events that are on, the Spreadsheet and the Status (Active or Paused). Click Open in the Spreadsheet column to open the sheet in a new tab.
- The spreadsheet has one tab per event, each with a first row of column headings.
- New rows are added underneath as things happen.
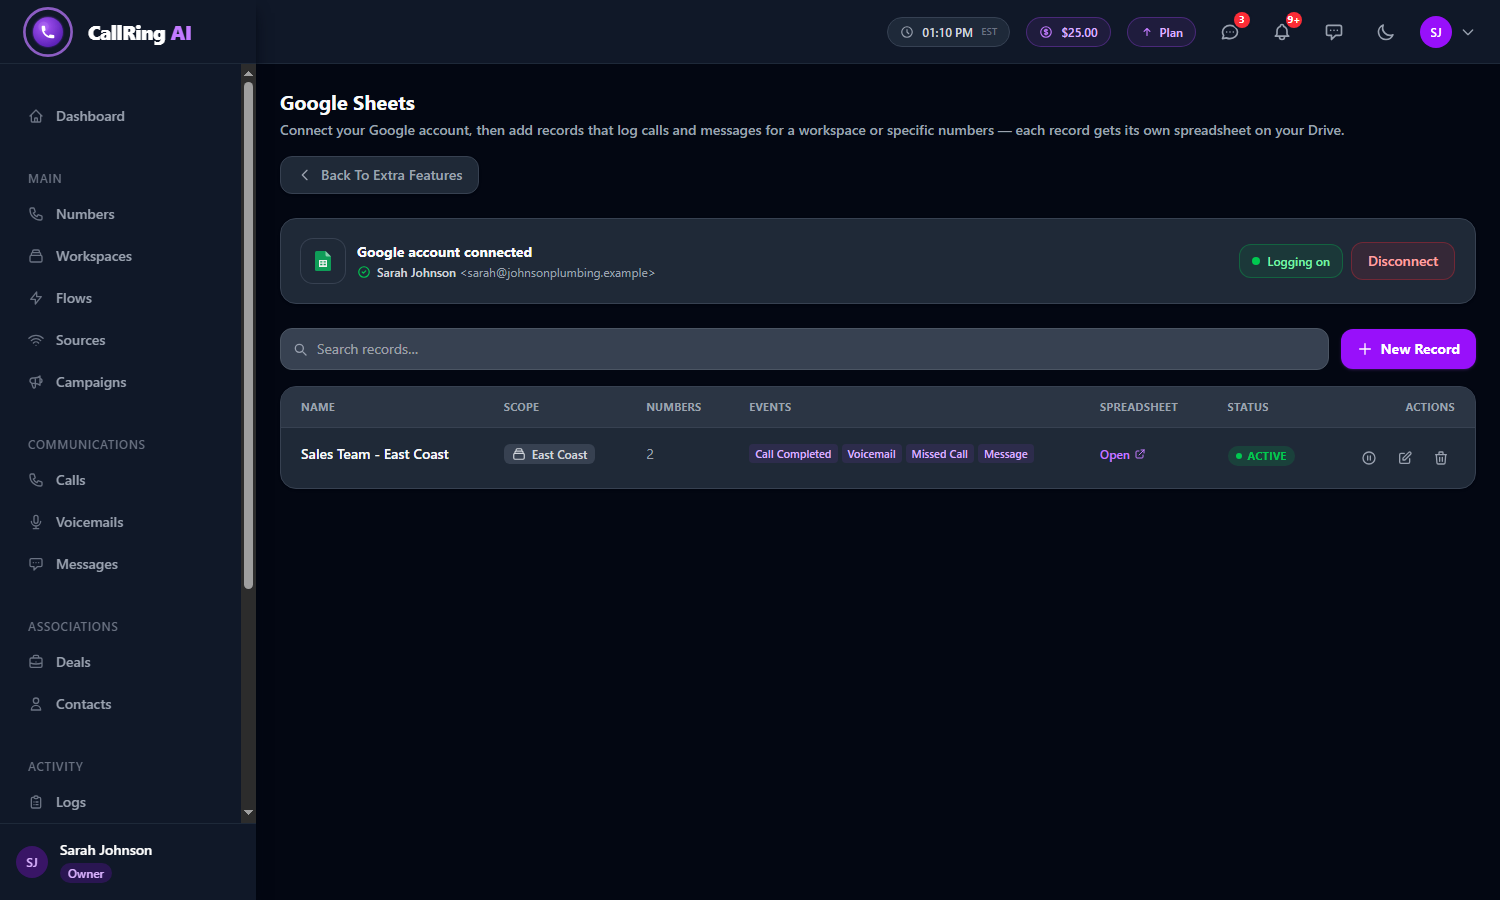
Your new record in the list: click Open to see its spreadsheet -
Step 7: Pause, edit, retry and remove
Use the icons at the right of each record, and the search box to find a record by name or workspace.
- Pause icon: pauses or resumes one record. A paused record shows Paused and adds no rows.
- Pencil icon: edit the record (name, numbers, events, columns).
- Bin icon: delete the record.
- Create sheet (amber button, instead of Open): appears when a record’s spreadsheet could not be created. Click it to try again. If it fails again, reconnect your Google account (see the next step).
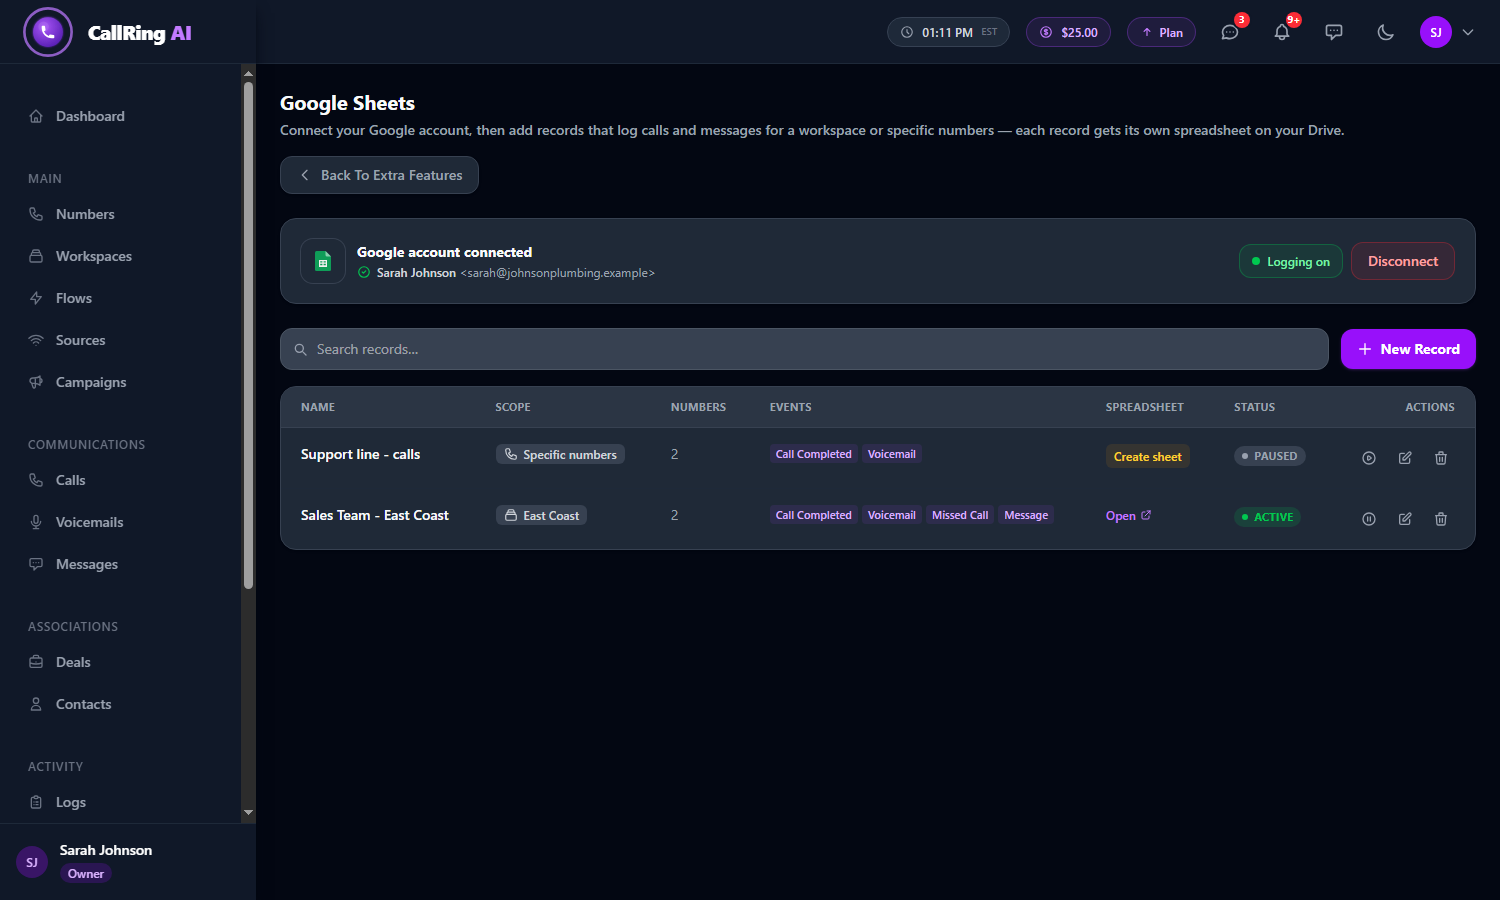
A paused record shows Create sheet, and an active one shows Open Warning: Deleting a record keeps the spreadsheet in your Google Drive. Only the connection to it is removed. -
Step 8: Disconnect your Google account
Click Disconnect at the top right of the card and confirm. This removes your Google connection and all your records from CallRing. Your spreadsheets stay in your Google Drive.
Warning: You will need to connect again and create new records to start logging again.
Good to know
- You can create several records, for example one per workspace, each with its own spreadsheet.
- To stop everything for a while, switch to Logging paused. To stop one record, pause it.
- Rows are added shortly after the event, not at the exact second.
- Do not delete or rename the tabs or the header row in a spreadsheet CallRing created, or rows may stop being added correctly.
- Do not share the spreadsheet link with people who should not see the caller details.
Need help? Open a support ticket from your account.